Trailered home a 1989 F350 dump truck that looks great on the outside, but the 7.3 IDI is something else

lotzagoodstuff

Supporting Member
Supporting Member
Joined
May 19, 2007
Posts
2,728
Reaction score
673
Location
Carmel, IN
@lotzagoodstuff I do have the Sterling 10.25, but it doesn't look like Eaton makes an elocker for that specific axle, at least not that I have been able to find. I like the idea of manually being able to lock the rear axle though.

The 10.5 elockers fit the 10.25 sterlings. I believe you have to pay attention to short or long pinion design.

xc_hide_links_from_guests_guests_error_hide_media
 

asmith

Full Access Member
Joined
Jan 28, 2012
Posts
672
Reaction score
217
Location
Atascadero, Ca
Ford also makes an E locker now for their newer trucks that will fit our rear ends. I believe you need to swap some of the newer parts with it.
 

46Gunz

Registered User
Joined
Nov 23, 2020
Posts
18
Reaction score
13
Location
VA
Or you can go for a manual activated locker
 

Old Goat

Full Access Member
Joined
Jan 14, 2021
Posts
1,658
Reaction score
1,645
Location
Northern Nevada
He wants $2,500 for that 94 7.3 and its still sitting in the truck. So I think I'll pass. I plan to go look at the 2 for $900 or $500 each next.

@Old Goat For sure I'll be going downhill spreading the gravel! Fortunately the house/main road is at the top of the hill, not at the bottom. I was wondering how to hook the chain to open the tail gate just a little at the bottom. It wasn't obvious how to hook the chain when I looked. With your description, I'll have a another look.

@lotzagoodstuff I do have the Sterling 10.25, but it doesn't look like Eaton makes an elocker for that specific axle, at least not that I have been able to find. I like the idea of manually being able to lock the rear axle though.
Did a Google search to find a picture of something close to what I was trying to describe.
Looking at the left side. Chain is connected to the top of the gate, drops through what looks like a piece of angle iron welded on. Then to the key Hole (hole with a slot) to hold the chain.
Between the hole and angle piece, is where you adjust the slack for how wide the Gate opens. Grab a link on left and right, to where they will touch, the links in between when you stretch it out will be how wide the gate opens. Say 3 or 4 links with how wide it opens. Adjust accordingly.

When you raise the bed, check your over head, power, Phone cables etc... Tree limbs.

Back in 82 we had a storm hitting the Santa Cruz, Ca., I worked for the State Hwy Dept. We had slides, trees down , most roads closed. I was running loader and loading trucks, we had crews from other yards helping us. This one truck a Ford LN 3 axle series from the 70`s with a cat engine/auto trans. We were stacking stuff every wide place along the Hwy. place he was dumping there were the Phone Cables looped between poles. He dumped, and as the bed was coming down he turned towards the road, caught the cable and flipped the truck on it`s side. Doesn`t take much.

You must be registered for see images attach


Goat
 

crazydane

Registered User
Joined
Jan 20, 2024
Posts
76
Reaction score
49
Location
Afton, VA
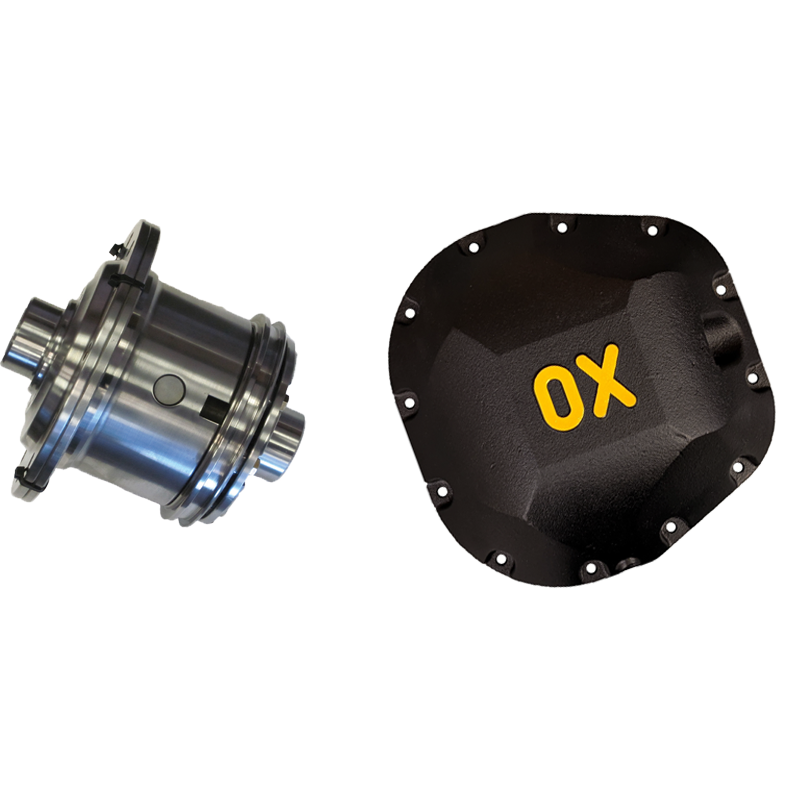
@46Gunz Thanks for the link to the OX locking Diff! I figured someone would make one.

@Old Goat Yep, that's how I configured mine. I guessed right!

You must be registered for see images attach


Chain is well worn in the position that opens the tail gate just a little for dumping gravel too:

You must be registered for see images attach


Here's the beginning of the dirt pile I'll be hauling up that hill once I get the truck running. You can just make out a shovel with a blue shaft for scale.

You must be registered for see images attach


There will be plenty of opportunities to get stuck hauling that dirt/muck up to higher ground!

I have been digging out the pond with this guy so far:

You must be registered for see images attach


That wet muck is incredibly heavy. I can lift about 3,500 lbs. with that bucket, and when pulling out a topped off bucket load, I can barely get the bucket 1' off the ground before the pressure relief kicks in. I figured that if I get the dump truck stuck somewhere on the land, I can use the tractor to pull it out.

Still surprised I haven't gotten stuck yet:

You must be registered for see images attach


The wall on the right side is about 7' tall/deep. I got plenty more dirt to dig up. When done, the pond will be about 60' x 40' and a good 7' deep.
 

crazydane

Registered User
Joined
Jan 20, 2024
Posts
76
Reaction score
49
Location
Afton, VA
Been busy with other projects, but have turned my attention back to this one now. Went and picked up a core from the junkyard for $500. It came out of a 89 F250 and supposedly had 220k on it.

Here she is:

You must be registered for see images attach


At least this one has the clamps on the fuel lines...

As I started tearing it down, the first thing I noticed was the thermostat:

You must be registered for see images attach


Sure has seen better days, but no big deal if that's all I'll find.

Got the valley cover off and noticed just a little bit of water (perhaps from condensation?):

You must be registered for see images attach


Certainly way better than the other engine that had many ounces of water in the valley.

Moving on, I pulled the valve train out and it look ok overall:

You must be registered for see images attach


But #8 was pretty rough:

You must be registered for see images attach


Again, maybe just condensation from sitting in the shed at the junkyard for 2+ years?
 

crazydane

Registered User
Joined
Jan 20, 2024
Posts
76
Reaction score
49
Location
Afton, VA
Pulled the heads and took a look at the bores/pistons:

You must be registered for see images attach


All 8 are already 030 over. :( So the 220k miles are definitely not original.

And I have no idea what happened to the #3 piston:

You must be registered for see images attach


When I took it apart, I noticed the valve cover bolts were only finger tight, ditto on the intake manifold bolts. The injector pump was also missing 2 of the 3 nuts that bolt it to the gear cover.

And the injection pump itself was apparently leaking and someone tried to "fix" it:

You must be registered for see images attach


And on the bank with the even cylinders bores #2 and 4 didn't look the greatest:

You must be registered for see images attach


You must be registered for see images attach


So do I proceed to tear this one down the rest of the way and see if I can lightly hone the bores and put it back together, ignoring the deep nicks in that one piston, or?

Kinda sucks I just dropped another $525 (with tax) for an engine that might only be marginally better than the one that came in the truck.
 

IDIBRONCO

IDIBRONCO
Joined
Feb 5, 2010
Posts
12,323
Reaction score
11,045
Location
edmond, ks
And I have no idea what happened to the #3 piston:
That looks like damage from a broken off glow plug tip to me.
And the injection pump itself was apparently leaking and someone tried to "fix" it:
" My mama always said, stupid is stupid does"-Forrest Gump. :frustrate :shoot:
So do I proceed to tear this one down the rest of the way and see if I can lightly hone the bores and put it back together, ignoring the deep nicks in that one piston, or?
Assuming that there's not any big ring ridges, I think that I would. You could use a ****** ball hone to knock off the rust and then put it back together. If nothing else looks bad, that would get your truck back on the road and give you time to work on getting another engine that's in better shape. The way I look at it is that you can't use the truck without an engine. This would let you use the truck or, if you decide to, even get your use out of it and then sell it. I do believe that I'd at least try to hand file the high spots off of that one piston of you go far enough to tear it all apart. That way you shouldn't have any pieces of aluminum sticking up high enough to hit the head.
 

The_Josh_Bear

Full Access Member
Joined
Jun 1, 2016
Posts
1,930
Reaction score
1,510
Location
Western WA
What's the story on that v-belt tensioner, boys? I've never seen that in all my years around OBN and FTE. The yard said it came out of an 89 F250 and my first thought was "shenanigans!" or something similar... :angel:
 

crazydane

Registered User
Joined
Jan 20, 2024
Posts
76
Reaction score
49
Location
Afton, VA
I'll defer to someone more qualified to answer that @The_Josh_Bear. This is my first time wrenching on a 7.3 IDI, although I got 2 under my belt now. :)

Got the engine transferred to the stand and drained the oil out of it. Not a hint of coolant, just very dark motor oil as expected with any diesel. I then cleaned off the heads and checked for any warpage. There was none at all.

You must be registered for see images attach


I then removed all the valves and found that the stem seal on all 8 exhaust valves had disintegrated:

You must be registered for see images attach


Everything otherwise seems to be in good shape with the stems being nice and snug in the heads. Some of the valves were pretty dirty:

You must be registered for see images attach


What's the best way to clean them? Ultrasonic cleaner?

Next I pulled all the pistons:

You must be registered for see images attach


2 of the top compression rings were stuck in #4 and #8. #2, #3, #5 and #7 had broken 2nd compression rings. #7 also also had a broken oil control ring.

The good news is the pistons themselves look ok (except that one with the dings in it from the glow plug. There's a hint of side play in the wrist pins, but I don't think its enough to worry about. They also popped out real easy, so no major ridge in any of the bores.

Crank journals all look good:

You must be registered for see images attach


I'll take a micrometer to the journals tomorrow and also take a closer look at the rod bearings to see if they are standard size or not.
 
Last edited:

KansasIDI

Hopelessly addicted to IDIs
Supporting Member
Joined
Jan 21, 2023
Posts
1,184
Reaction score
976
Location
Wilsey, KS
What's the story on that v-belt tensioner, boys? I've never seen that in all my years around OBN and FTE. The yard said it came out of an 89 F250 and my first thought was "shenanigans!" or something similar... :angel:
IDI engines with ‘dealer’ style A/C have them. 84-89. I could be wrong, but I’m pretty sure that’s what they’re for. My 86 has one.
 

crazydane

Registered User
Joined
Jan 20, 2024
Posts
76
Reaction score
49
Location
Afton, VA
With the pistons out, I took a closer look at the bores. No major scratches and the ridges are minimal as mentioned before as the pistons were easy to pull. I did pour some Evapo-Rust in the bores where the surface rust was showing, but it slowly drained over about 6 hours. Did get rid of most of it through:

You must be registered for see images attach


You must be registered for see images attach


You must be registered for see images attach


There were 2 bores that visually looked to have ridges and other surface issues:

You must be registered for see images attach


You must be registered for see images attach


But again, nothing that will catch a nail in any of the bores even though it looks like it from the pics.

I take it I need to remove the oil squirters before honing and I'll likely catch them with the stone otherwise. Looks like just a single bolt holds in each squirter.

Again, this engine won't be for any long road trips or anything, just haul dirt around my property and making the occasional trip to the quarry to pick up loads of gravel. I'd estimate I might put 500-1000 miles on it a year.
 

IDIBRONCO

IDIBRONCO
Joined
Feb 5, 2010
Posts
12,323
Reaction score
11,045
Location
edmond, ks
What's the story on that v-belt tensioner, boys? I've never seen that in all my years around OBN and FTE. The yard said it came out of an 89 F250 and my first thought was "shenanigans!" or something similar... :angel:
I thought it was just because someone didn't like their alternator belt at idle, but KansasIDI may be right.
What's the best way to clean them? Ultrasonic cleaner?
I've used a wire wheel on a bench grinder but that was before I had an ultrasonic cleaner. If you do go the ultrasonic route, I'd recommend taking some carb or brake cleaner and removing most of the crud from them first. From my experience, that extra crud builds up in your cleaner pretty quickly.
They also popped out real easy, so no major ridge in any of the bores.
That's good news. As for the ones that look like they have ridges, you could (should?) use a ridge reamer on them or take the block to someone who has one. That will lessen the likelihood of damaging a ring while installing the pistons. Again, that's only my recommendation.
I take it I need to remove the oil squirters before honing and I'll likely catch them with the stone otherwise. Looks like just a single bolt holds in each squirter.
Yes you do need to remove them. It is only one bolt that holds them in. I haven't seen anyone else mention it on here, but when I worked on these for a living, we'd use red Loc Tite on those bolts as an extra precaution. You sure don't want them falling out.
Again, this engine won't be for any long road trips or anything, just haul dirt around my property and making the occasional trip to the quarry to pick up loads of gravel. I'd estimate I might put 500-1000 miles on it a year.
Honestly, I think this one will last you for a long time like you're planning to use it.
 

crazydane

Registered User
Joined
Jan 20, 2024
Posts
76
Reaction score
49
Location
Afton, VA
Thanks for the feedback @IDIBRONCO

I worked a little more on it this evening. Pulled the balancer and found it had quite a groove in it:

You must be registered for see images attach


Same thing with crank, probably a bit worse actually:

You must be registered for see images attach


You must be registered for see images attach


Is there anything I can do about that, like maybe now press the new seals all the way in so that they won't ride the same groovers?

And it looks like the rod bearings are .010:

You must be registered for see images attach


What gasket kit would you guys recommend? This one?

You must be registered for see images attach


It includes new valve stem seals, which I need. The description states it does NOT include the following:

Intake gasket
Upper intake manifold plenum gasket

I'm not sure exactly what they are referring to. I do have that metal gasket thing the manifold rests on, so I don't think I need a new one of those.

Other than a new set of 030 rings, is there anything else I should replace while I have it apart?

I'm torn on getting a ridge reamer vs. taking it to someone. If I take it to someone, I was thinking of having the block (and heads) hot tanked as they are nasty. Of course of I have it hot tanked, I'll need to completely dismantle the block and pull the cam bearings and have them install new ones. That will probably make it a pretty expensive job.
 

Forum statistics

Threads
91,284
Posts
1,129,796
Members
24,099
Latest member
IDIBronco86

Members online

Top