Tin bashing

david85

Full Access Member
Joined
Feb 21, 2008
Posts
4,829
Reaction score
1,093
Location
Campbell River, B.C.
For pinhole filling, it would probably work fine. For some reason I was stuck thinking in terms of dent filling. Heat must be getting to me.
 

laserjock

Almost there...
Supporting Member
Joined
Nov 20, 2012
Posts
8,841
Reaction score
3,129
Location
Maryland
On pin holes, if the metal around it cleans up decent I'll hit it with some JB weld.
 

david85

Full Access Member
Joined
Feb 21, 2008
Posts
4,829
Reaction score
1,093
Location
Campbell River, B.C.
Well guys, I went with Raptor Liner but I opted for the underside since that's what will take the most beating.

Only hiccup was NAPA didn't have the proprietary gun that's supposed to be used with the kit. I had to buy a separate undercoating gun but it worked out well. I didn't realize until I opened the box that its the kind of gun intended for spraying inside cavities. This worked perfect for protecting the inside of the extended-cab walls even though it was not intended for spraying epoxy. I'll probably still spray rubberized undercoating in there eventually but that doesn't have to happen right now.

The Raptor Liner went on nice at first, but the gun kept clogging up on me. Chances are this wouldn't happen if the proprietary gun were used. Its also a bit pricey to use for the interior. 3 of the bottles were enough to comfortably cover the entire belly, but the 4th was used to add a bit more texture. Figured I'd use it up anyway because I really didn't want to have to clean the gun twice. In any case, I can see how one might come up short with an 8 foot bed. I can also see how using Linex would be a better choice for an actual bed liner since it goes on much thicker.

I'm tempted to try lizard skin for the interior floor and firewall but I have to read up on it a little more.

As a side note, the floor did quiet down a little. Not much, just a little.
 

Attachments

  • IMG_2587.JPG
    IMG_2587.JPG
    689 KB · Views: 18
  • IMG_2588.JPG
    IMG_2588.JPG
    738.9 KB · Views: 18
  • IMG_2589.JPG
    IMG_2589.JPG
    515.9 KB · Views: 17
  • IMG_2590.JPG
    IMG_2590.JPG
    392.1 KB · Views: 17
  • IMG_2591.JPG
    IMG_2591.JPG
    623.9 KB · Views: 17
  • IMG_2592.JPG
    IMG_2592.JPG
    574.5 KB · Views: 16

FORDF250HDXLT

The life of an Indian is like the wings of the air
Supporting Member
Joined
Dec 27, 2009
Posts
6,456
Reaction score
1,127
Location
Maine & Oklahoma
the raptor gun is just the top part.it screws right onto the raptor bottles.they have kits with and without the guns.the nozzle is pretty large so your right,it doesn't clog up.the raptor gun gives a bit more texture too i think,than the one you used did.still,that's fantastic just the same.she's gunna be well protected now.
 

laserjock

Almost there...
Supporting Member
Joined
Nov 20, 2012
Posts
8,841
Reaction score
3,129
Location
Maryland
The raptor guns can be had for less than $20 on Amazon I think. I wish I would have done the underside of my cab in the raptor liner. Looks great.
 

david85

Full Access Member
Joined
Feb 21, 2008
Posts
4,829
Reaction score
1,093
Location
Campbell River, B.C.
Time is getting tight, so I couldn't really wait for something in the mail. But anyone else thinking of doing this could save themselves some grief (and $$) by purchasing the correct gun. In my case, I can still use the one I bought for spraying coatings in the wall so it worked out fine.

Time will tell how it holds up but it seems to be curing nicely. In terms of appearance it does strongly resemble linex for the places that were laid down properly. One good coat gets put down first, then a second speckled pass gives the non-slip texture. I was able to figure that out once I got the hang of it. My understanding is that linex uses a similar technique when spraying in their bed liners. So in theory, you could make this look smoother to resemble rock guard and it can even be tinted with a 2k compatible pigment. Just don't mix it with water born paint product because this is solvent based (and you need to specify tintable when purchasing).

I'm actually getting on the fence for whether or not to use raptor liner instead of having a linex bed installed. Even if I had to buy two kits, it would still be about half the cost of a linex bed. And I figure it would probably take two raptor liner kits to get an equivalent thickness to linex on an 8' bed. Meh...I'll figure that out later.
 

79jasper

Chickenhawk
Joined
Oct 13, 2012
Posts
17,367
Reaction score
1,930
Location
Collinsville, Oklahoma
Only thing with line-x is you get a lifetime warranty.
So it's on their dime instead of yours.

Sent from my SAMSUNG-SM-G935A using Tapatalk
 

david85

Full Access Member
Joined
Feb 21, 2008
Posts
4,829
Reaction score
1,093
Location
Campbell River, B.C.
Only thing with line-x is you get a lifetime warranty.
So it's on their dime instead of yours.

Sent from my SAMSUNG-SM-G935A using Tapatalk

Very true. The local dealer is only 40 min away so it wouldn't be too bad to get anything repaired.
 

david85

Full Access Member
Joined
Feb 21, 2008
Posts
4,829
Reaction score
1,093
Location
Campbell River, B.C.
Well, I ordered the panel bond. Should be here tomorrow.

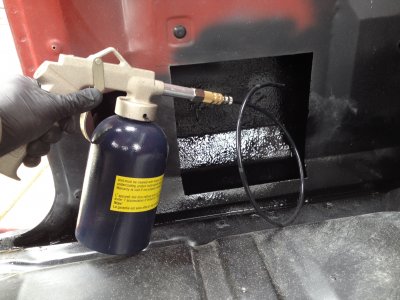
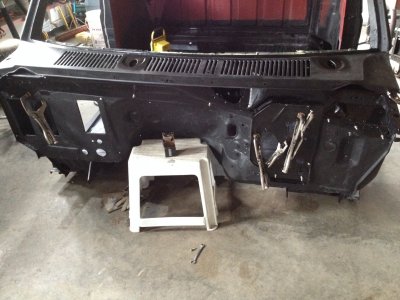
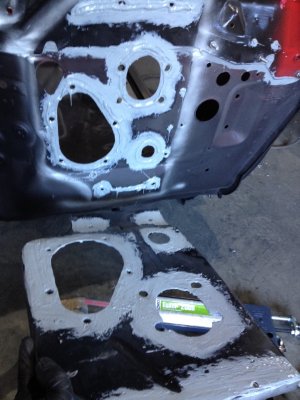
In the mean time I did a dry fit, and covered a few of the last spots that needed seam sealer.

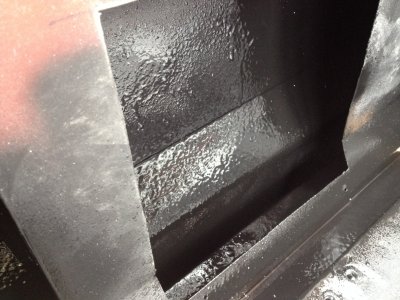
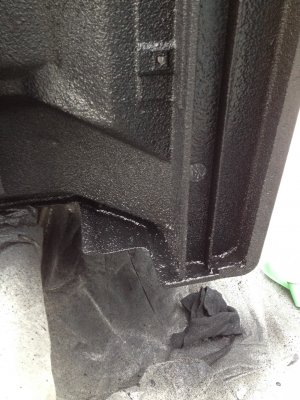
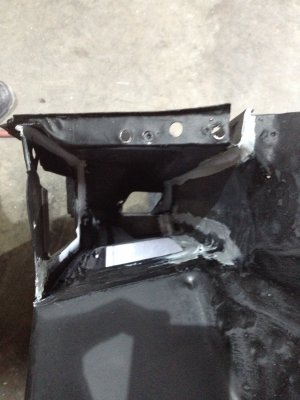
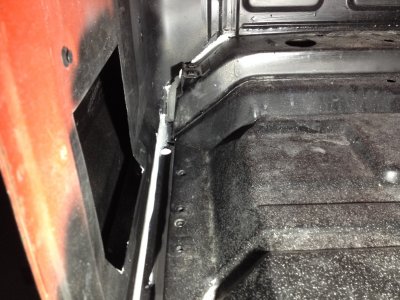
The way drainage normally works on these trucks, water drains off the front footwells, onto the rockers, flows under the aluminum door step and then slips sideways into the B-pillar root (next to the seat belt lower anchoring point). This isn't a major flaw, but I'd rather not have water get in there where it can then drain onto those joints in the bottom of the cab corner. There are drain holes down there, but sill, I'd rather keep the the water away from that area.

Now with everything sealed up water moves to the rear of the rocker, where it can drain out the 1" hole. This normally has a rubber body plug so road spray can't get inside, but any water that pools here will gradually weep out.

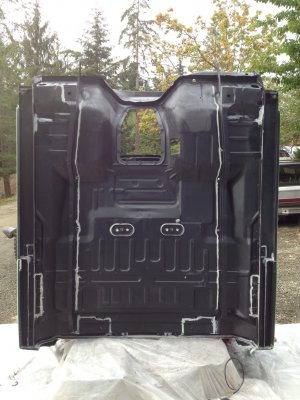
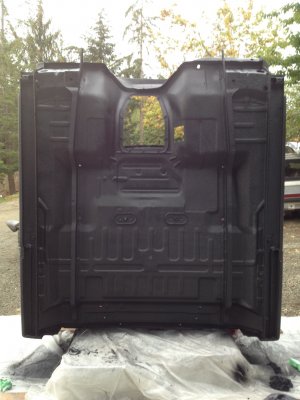
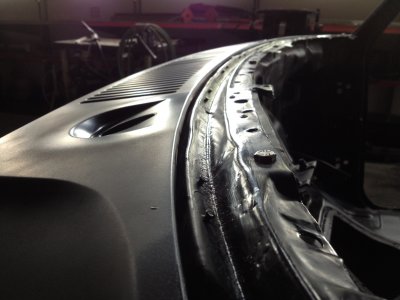
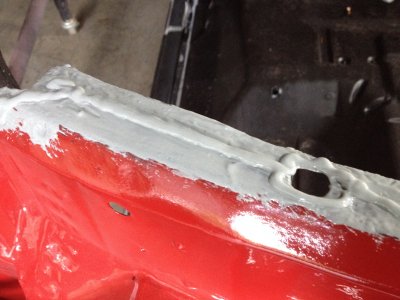
The last areas where the verticals on each end of the cowling. These areas showed no signs of rusting yet, but it didn't cost me anything but a few minutes.
 

Attachments

  • IMG_2593.JPG
    IMG_2593.JPG
    741.2 KB · Views: 13
  • IMG_2594.JPG
    IMG_2594.JPG
    480 KB · Views: 11
  • IMG_2595.JPG
    IMG_2595.JPG
    342.1 KB · Views: 14
  • IMG_2596.JPG
    IMG_2596.JPG
    706.7 KB · Views: 14

david85

Full Access Member
Joined
Feb 21, 2008
Posts
4,829
Reaction score
1,093
Location
Campbell River, B.C.
Cowling is on. Hopefully for good.

I didn't feel there was enough working time to assemble the firewall reinforcing plate but its clamped in there to help secure the cowling joint where it needs to be. I'll pull the plate off tomorrow and prep/install it.

I don't claim this is the correct procedure since its my first time using panel bond, but here's how I did it:

1: Clean approximately 1" of bare steel on the joint surfaces. Galvanizing must also to be removed. Use a wax/grease remover just before applying the glue.

2: Apply a bead to both joining surfaces and spread out to cover all bare metal. The stuff is supposed to be a sealer so the idea is to prevent rust. It also has some natural leveling properties.

3: Apply the bond seam to one side and assemble (doesn't really matter which side as long as it is centered on the joint area). Use clamps and screws as necessary to hold it together securely. Look for it to ooze out similar to a RTV gasket as this indicates good contact area inside the joint. I used stainless steel bolts in a few places, and they will be left in permanently.

4: Smooth over any excess and make sure everything is well covered. I actually added a bit more at this point to make sure there was a clean fillet inside the bottom of the gutter. Used some more to cover any drill holes from the original spot welds. A bit messy, but its sealed.

I also painted the insides before assembly since its not easy to aim a gun in there after everything is put together. This way there is no chance for UV light to attack the primer and seam sealer in there.
 

Attachments

  • IMG_2600.JPG
    IMG_2600.JPG
    609.8 KB · Views: 12
  • IMG_2601.JPG
    IMG_2601.JPG
    416.2 KB · Views: 13
  • IMG_2602.JPG
    IMG_2602.JPG
    675.4 KB · Views: 13
  • IMG_2603.JPG
    IMG_2603.JPG
    714.6 KB · Views: 13
  • IMG_2604.JPG
    IMG_2604.JPG
    723.1 KB · Views: 13
  • IMG_2605.JPG
    IMG_2605.JPG
    689.2 KB · Views: 13
  • IMG_2606.JPG
    IMG_2606.JPG
    640.4 KB · Views: 13

david85

Full Access Member
Joined
Feb 21, 2008
Posts
4,829
Reaction score
1,093
Location
Campbell River, B.C.
Reinforcing plate is set, and sealed all the way round.

Same basic procedure as before so not much else to add. I just barely had enough glue from one tube for the whole, so I guess I can refund the other unopened one. The supplier even let me borrow the dispenser without having to buy one.;Sweet

If the weather holds off for long enough this weekend, I might just be able to start laying down the urethane primer.
 

Attachments

  • IMG_2608.JPG
    IMG_2608.JPG
    493.9 KB · Views: 12
  • IMG_2609.JPG
    IMG_2609.JPG
    467.1 KB · Views: 10
  • IMG_2610.JPG
    IMG_2610.JPG
    713 KB · Views: 11
  • IMG_2611.JPG
    IMG_2611.JPG
    624.1 KB · Views: 12

david85

Full Access Member
Joined
Feb 21, 2008
Posts
4,829
Reaction score
1,093
Location
Campbell River, B.C.
If the weather holds off for long enough this weekend, I might just be able to start laying down the urethane primer.

Booyah! Got it coated. Still lots of scuff marks though, so I have some more block sanding before its ready for paint. The painter is booked for at least two weeks, and my schedule isn't looking much better. But for now, good progress.:rock:

You must be registered for see images attach


You must be registered for see images attach


You must be registered for see images attach
 

david85

Full Access Member
Joined
Feb 21, 2008
Posts
4,829
Reaction score
1,093
Location
Campbell River, B.C.
Took longer than I hoped but the cab is finally getting painted. We loaded it at home with a backhoe, but we muscled it off at the painter's shop. It felt a good 40% lighter than the box was.
You must be registered for see images attach
 

david85

Full Access Member
Joined
Feb 21, 2008
Posts
4,829
Reaction score
1,093
Location
Campbell River, B.C.
Its not quite concours material, but I'm happy. The sides turned out pretty much perfect, including that patch steel fiasco. The roof still has some flaws but its miles ahead of what it was. The cab is sitting on the mounts and the bolts are all hand tight for when I start assembling and adjusting clearances.

You must be registered for see images attach


You must be registered for see images attach


You must be registered for see images attach


You must be registered for see images attach


You must be registered for see images attach
 
Last edited:

david85

Full Access Member
Joined
Feb 21, 2008
Posts
4,829
Reaction score
1,093
Location
Campbell River, B.C.
Here's the cab side I had to rebuild. I know where the weld is, but not even my eye can find it on the outside. The only giveaway is the higher stiffness of the panel.

The weld on the rear wall is clearly visible, but I didn't feel like hiding it, since it lines up right where a factory crease should have been anyway.

You must be registered for see images attach


You must be registered for see images attach
 

Latest posts

Forum statistics

Threads
91,284
Posts
1,129,789
Members
24,099
Latest member
IDIBronco86

Staff online

Top