Tin bashing

david85

Full Access Member
Joined
Feb 21, 2008
Posts
4,820
Reaction score
1,083
Location
Campbell River, B.C.
Firewall repair is done. Upper cowling still fits but it will need its own restoration before going back on permanently.

Now for another dilemma....Should I use panel bond to put it back in???? Hmm... it would solve my problem about how to protect all the joints from moisture. Factory assembly practice appears to have used weld through sealer of some sort - impressive.

https://www.youtube.com/watch?v=fKu32jqP1fc
 

Attachments

  • IMG_2480.JPG
    IMG_2480.JPG
    589.3 KB · Views: 13
  • IMG_2481.JPG
    IMG_2481.JPG
    568.5 KB · Views: 13

david85

Full Access Member
Joined
Feb 21, 2008
Posts
4,820
Reaction score
1,083
Location
Campbell River, B.C.
Looks like this push is coming to an end guys. Work and apprenticeship training are coming in the fall and winter. Which means I'll need to start prepping in the next couple of weeks. And just like that... summer was over:puke:

So the sandblasting guy is booked to the end of next week...darn. Still have some stuff I can do in the meantime though.

The rear shock mounts are badly rusted and the driver's side frame rail rusted through at the mount itself. Not exactly tin bashing anymore but I'm happy with the result. I coated it with zinc cold galvanizing primer once it was all done. Undercoating will come later. Once that's on, no one will be able to find where my steel ends and the 1986 steel begins.;Sweet

Also lucked out with some new shock mounts. My local ford dealer can order them, so they should be here tomorrow. Other than replacing the rear bumper, that's pretty much all I planned to do with this frame. Even though the truck was rear ended a couple years back, it tracks straight as an arrow. The kingpin needle bearings seem to be working well too.;Sweet

I'm still tempted to look for a 4wd frame and restore that someday (Sandblasted, hot dipped galvanized), but for now, I won't have to worry about this one coming apart just yet. Even my Dad keeps telling me its a nice truck, but...it would be nice to have 4wd.
 

Attachments

  • IMG_2515.JPG
    IMG_2515.JPG
    946.2 KB · Views: 15
  • IMG_2516.JPG
    IMG_2516.JPG
    568.5 KB · Views: 13
  • IMG_2517.JPG
    IMG_2517.JPG
    892 KB · Views: 14
  • IMG_2518.JPG
    IMG_2518.JPG
    887.1 KB · Views: 13
  • IMG_2519.JPG
    IMG_2519.JPG
    767.9 KB · Views: 14

david85

Full Access Member
Joined
Feb 21, 2008
Posts
4,820
Reaction score
1,083
Location
Campbell River, B.C.
Cab came back from sandblasting yesterday. The floors look really good, but I still have a couple spots to deal with near the front mounts below the "A" pillar roots. This is a typical spot for rust to start because the tab that hangs out loose is hit by road debris, rust starts, and works its way along the tab and into the seam sealed joints....and there's lots of seam sealed joints in this area for rust to attack. I already had most of the floor epoxy sealed last night but ran out of primer. More should be here today. Hopefully the last of it (the stuff isn't cheap).

Also note how in one spot, oil is still leeching out of the joint. This is likely 80W 90 gear oil that I squirted in there a few years back. It works really well to slow, smother, or even prevent rust from happening in the first place. Its thick, gets everywhere and crawls up walls too.;Sweet Fluid Film is good too (doesn't stink as bad).
 

Attachments

  • IMG_2522.JPG
    IMG_2522.JPG
    893.8 KB · Views: 14
  • IMG_2523.JPG
    IMG_2523.JPG
    628.5 KB · Views: 13
  • IMG_2524.JPG
    IMG_2524.JPG
    580 KB · Views: 12
  • IMG_2525.JPG
    IMG_2525.JPG
    265.7 KB · Views: 12
  • IMG_2526.JPG
    IMG_2526.JPG
    318.2 KB · Views: 12
  • IMG_2527.JPG
    IMG_2527.JPG
    276.7 KB · Views: 13

david85

Full Access Member
Joined
Feb 21, 2008
Posts
4,820
Reaction score
1,083
Location
Campbell River, B.C.
Minor floor patch just behind the front driver's side cab mount. Hopefully this is the last of the cancer. First photo was taken right after sandblasting and shows how rust ate away the metal.

The remaining 4 photos show the repair underway after a protective coat of zinc phosphate epoxy primer was applied to the entire belly. Grey stuff is urethane seam sealer.

It didn't look too bad until I peeled it back to expose more rust in the lap joint. Lots of poorly thought out components and connections here that were vulnerable to road spray from the front tire. Typical stuff for a 30 year old truck but could have been much worse.
 

Attachments

  • IMG_2524.JPG
    IMG_2524.JPG
    580 KB · Views: 14
  • IMG_2529.JPG
    IMG_2529.JPG
    371.1 KB · Views: 14
  • IMG_2530.JPG
    IMG_2530.JPG
    339.3 KB · Views: 13
  • IMG_2531.JPG
    IMG_2531.JPG
    450.8 KB · Views: 15
  • IMG_2532.JPG
    IMG_2532.JPG
    501.8 KB · Views: 14

laserjock

Almost there...
Supporting Member
Joined
Nov 20, 2012
Posts
8,841
Reaction score
3,129
Location
Maryland
Looks pretty good actually. I should have sand blasted mine. It was way worse than yours though.
 

david85

Full Access Member
Joined
Feb 21, 2008
Posts
4,820
Reaction score
1,083
Location
Campbell River, B.C.
Well, its that special time of the week again, where I say something about 'doing it right' or some other BS. So yeah, I just made more work for myself...:rolleyes::frustrate

The cab roof had a bit more surface rust than I expected, so it will have to go back to the sandblaster. Can't grind the rust off, because the heat would warp the roof sheet (which is extremely thin!). Hopefully he won't have too much trouble getting it clean now that the paint and factory primer have already been removed. Both rain gutters were also gouged out with a wirewheel.

And then there's the inside of the floor...

As was standard for a 1986 diesel with lariat trim, my truck had butyl sheet applied to the foot wells, and the area under the bench seat (my F150 Lariat did not so it may not have been done to gassers). The idea is to block engine noise that reflects off the road and into the passenger compartment through the floor. I believe it's called 'mass loading' but might be wrong.

Originally I was going to leave well enough alone, even though it was cracked in a few places. Well, when I started removing the loose pieces, I noticed small rust specs in the factory paint. A great deal of blasting sand also got in through those cracks. The thing to keep in mind here, is that these sheets are not 100% attached to the floor pan. Several areas are floating over the complex shapes. This means that any water that gets in and under the carpet can easily find its way under the butyl too. Once in, it can't really evaporate, so the rust settles in and starts voting for change.

There's another problem. A ford problem. Paint adhesion on the interior of the floor can be hit & miss on these trucks. I noticed this on my F150 when I did a similar job 10 years ago. If you look at the closeups of the cleaned floor areas, you can see circular spots of bare metal. That wasn't sanded off, it simply flaked off. The black donor truck that I bought for the box also has the exact same problem, only much worse. The foot wells seem to be where it always happens, and I'm not really sure why.

So in the end, I decided to strip all the butyl sheet off, in order to properly inspect and correct the paint underneath. Lots of gouging with a blunt screw driver and just as much wiping with acetone to get the glue off. Yuck. As expected, there were a few problem areas but I caught them early. So, I'll be telling the sand blaster to hit the inside of the floor too. No need to strip it all, but chase anything that flakes or peels. He's been pretty good about finding stuff like that.
 

Attachments

  • IMG_2541.JPG
    IMG_2541.JPG
    132 KB · Views: 11
  • IMG_2542.JPG
    IMG_2542.JPG
    95.1 KB · Views: 11
  • IMG_2543.JPG
    IMG_2543.JPG
    44 KB · Views: 11
  • IMG_2544.JPG
    IMG_2544.JPG
    96.9 KB · Views: 11

laserjock

Almost there...
Supporting Member
Joined
Nov 20, 2012
Posts
8,841
Reaction score
3,129
Location
Maryland
I feel your pain on that stuff. It was HOURS of scraping and chiseling to get that stuff off the floor. I cleaned mine up as best I could then shot it all with acid etch primer and Raptor Lined it. Not sure what I will put back down over it if anything besides the carpet of course. It is all sealed up pretty well now though. The raptor liner is a catalyzed urethane not just a cheap roll on and dry product.
 

david85

Full Access Member
Joined
Feb 21, 2008
Posts
4,820
Reaction score
1,083
Location
Campbell River, B.C.
I feel your pain on that stuff. It was HOURS of scraping and chiseling to get that stuff off the floor. I cleaned mine up as best I could then shot it all with acid etch primer and Raptor Lined it. Not sure what I will put back down over it if anything besides the carpet of course. It is all sealed up pretty well now though. The raptor liner is a catalyzed urethane not just a cheap roll on and dry product.

Yup, took me about 3-4 hours to scrape it off, and another 2 hours of wiping to get rid of the glue underneath. I'm liking the idea of some kind of bed liner inside. Probably won't go all out for something like LineX (can't do that myself anyway), but a simple kit like raptor sounds nice.
 

laserjock

Almost there...
Supporting Member
Joined
Nov 20, 2012
Posts
8,841
Reaction score
3,129
Location
Maryland
The raptor is nice. It's the same chemistry as like the linex stuff I believe. I've shot some, I know junk has used it a good bit. I can't speak to longevity yet but it goes on pretty nice v
 

david85

Full Access Member
Joined
Feb 21, 2008
Posts
4,820
Reaction score
1,083
Location
Campbell River, B.C.
Just about on the summit...

Cab came back from blasting and I quickly sealed it up with epoxy. Right now I'm working on filler to get the roof and extended cab walls straight. Skin coat only.:backoff

The roof was walked on before I got the truck and there were a few minor dings around the edges too. Much of the general, wide dents were straightened using some custom made skin supports (no filler needed). These are glued against the skin with seam sealer, and then fastened to the support structure. The rear brace was stitch welded with Tig, while the front was bolted in. Both are arched under slight tension for even contact. The pieces were actually leftovers from a whole mess of shelving we bought when Zellers closed down (canadian retailer sort of like Target...which we also managed to kill up here LOL).

And in case I ever start feeling sorry for myself over how much extra work this project turned out to be, I had a nice reminder of how well things actually went. The sand blaster had a chevy 8' bed from some 1980s truck (What is it with people restoring chevys up here???). He did a really good job at digging all the rust out and epoxy coating it. Unfortunately its pretty far gone and the customer has yet to pick it up even after several months. As you can see, its starting to rust again. Maybe he's taking offers. Up here in Canada this qualifies as good solid rust free steel. Anyone interested?:rotflmao
 

Attachments

  • IMG_2567.jpg
    IMG_2567.jpg
    356.3 KB · Views: 15
  • IMG_2568.JPG
    IMG_2568.JPG
    434 KB · Views: 17
  • IMG_2581.JPG
    IMG_2581.JPG
    452.5 KB · Views: 18
  • IMG_2582.JPG
    IMG_2582.JPG
    542.2 KB · Views: 17
  • IMG_2583.JPG
    IMG_2583.JPG
    594.5 KB · Views: 19
  • IMG_2585.JPG
    IMG_2585.JPG
    654.5 KB · Views: 19
  • IMG_2563.JPG
    IMG_2563.JPG
    594.2 KB · Views: 18
  • IMG_2564.JPG
    IMG_2564.JPG
    566.8 KB · Views: 18
  • IMG_2565.JPG
    IMG_2565.JPG
    672.4 KB · Views: 17
Last edited:

david85

Full Access Member
Joined
Feb 21, 2008
Posts
4,820
Reaction score
1,083
Location
Campbell River, B.C.
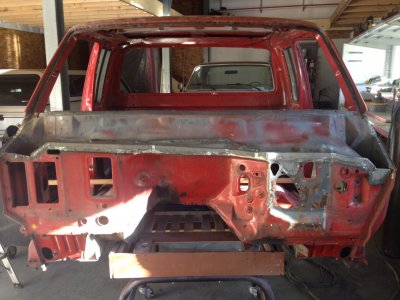
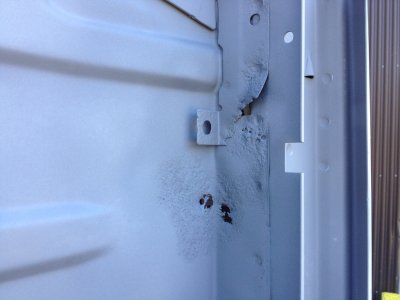
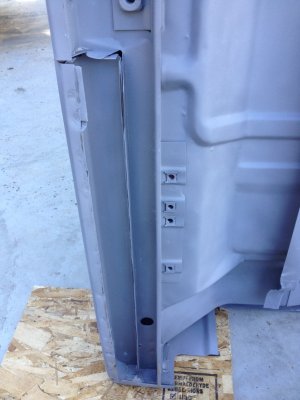
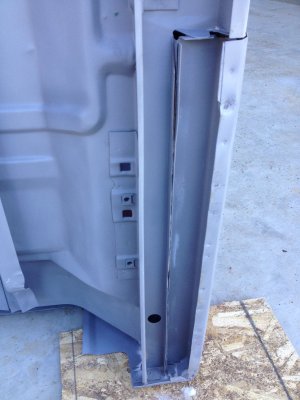
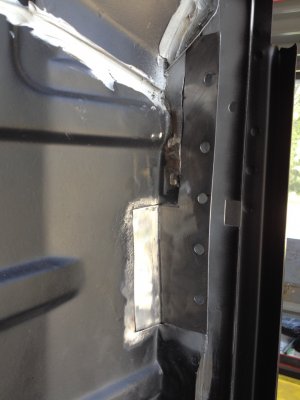
Here's a quick write up on fixing a pinhole that went through the extended cab panel. This was actually there for a few years but phosphoric acid, followed by zinc rich primer and a dab of seam sealer prevented it from spreading.
You must be registered for see images attach


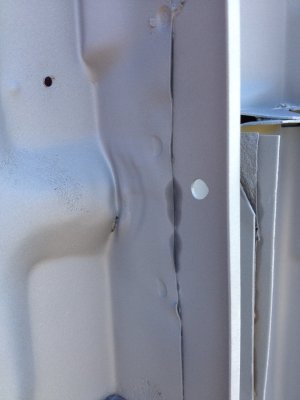
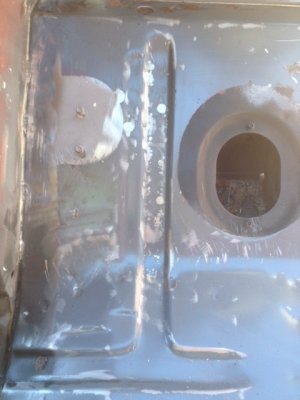
Here's the view from inside with the light shining through:
You must be registered for see images attach


You could try welding this as is, but since the metal is so thin, it would result in chasing a blob around the edge until it finally built up enough to close it off. This usually results in a lot of heat, filler material, and of course distortion. Once the weld is ground flat, there is more usually distortion. And, since you would be welding over pockets of rust, contaminants could result in porosity (more pinholes!). This YouTuber shows the conventional way of trying to Tig weld holes in a car body. Even if it wasn't for the lack of surface prep, its painful to watch:

https://www.youtube.com/watch?v=ug6qnJhIngs

Keep in mind I'm not a ticketed welder and probably never will be (My old man would lynch me if I went that route with my career LOL). So here's the method I came up with.

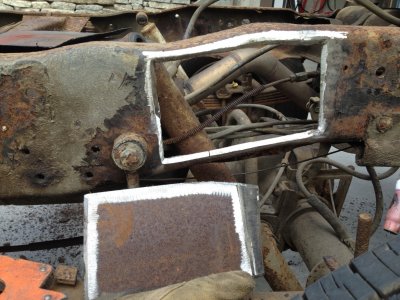
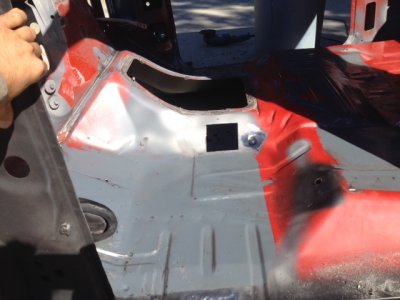
First, drill the pinhole out in order to get thicker steel around the edges. Step drills area always nice. Allow a slight champfer or use a de-burring tool if you don't have a step drill.
You must be registered for see images attach


Next, take a 1/4" punched steel sheet pill and test the size. The drilled hole was 6mm, so it was pretty close fit.
You must be registered for see images attach


Now for the tricky part. Pound the pill lightly against a steel backing. This will flatten the bur, and expand the pill slightly to get flange that rests on the champfer.
You must be registered for see images attach

The result is a very tight and flush fit.

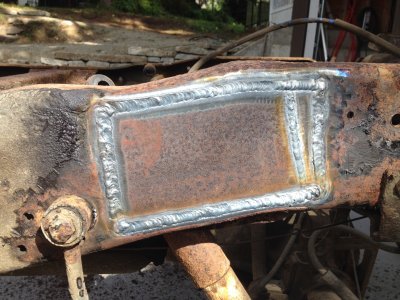
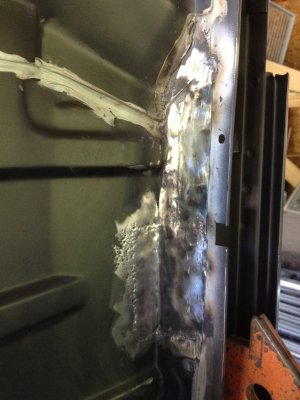
For welding, start with a small tack. Don't use filler rod, just add heat until the edges flow together. Start on the parent material, establish a puddle and gently coax it over the joint. The tack will pull a little when it cools but no matter, just tap it flat again. Do not weld it all in one shot.
You must be registered for see images attach


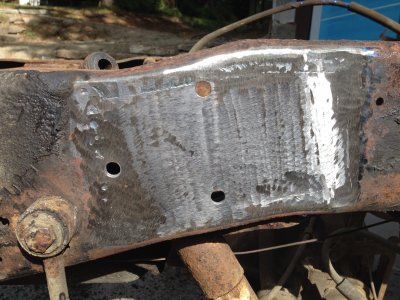
Then start from the opposite side and fill in the rest of the weld using the same autogenous welding method. Again, don't try doing it all in one go. Spread it out to three or four stitches.
You must be registered for see images attach


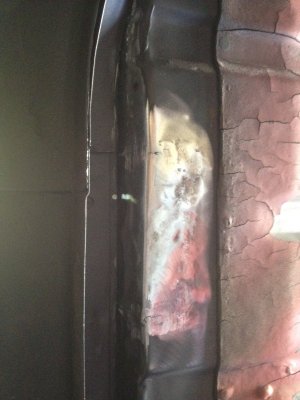
Almost no grinding required, other than to clean up some of the burned surrounding paint. No distortion either.
You must be registered for see images attach
 

david85

Full Access Member
Joined
Feb 21, 2008
Posts
4,820
Reaction score
1,083
Location
Campbell River, B.C.
That's a good fix on the pinhole.
What do you think of using lead as a filler?

Sent from my SAMSUNG-SM-G935A using Tapatalk

Never used lead and probably never will, so take my opinion with a grain of salt.

Aside from health reasons, the use of a flame on thin steel with double wall construction doesn't appeal to me. Burning off wide swaths of factory coating inside the walls is something I like to avoid. Most of the filling I've done so far was kept to 1/16" or less and I only use water resistant, fiberglass reinforced fillers. Its much harder to sand and feather cleanly, but any good quality high build urethane primer can fill the scuff marks just fine. Which is something you'll have to do anyway.

For older cars that used thicker steel and less double wall construction, I could see using lead. But even then, I've been able to bring the metal so close that I don't think the advantages of lead over 'bondo' are enough to warrant using it. Simply put, if you're worried about the filler cracking off from normal use, you probably have more straightening to do before adding any kind of filler, lead or putty. I learned that lesson.

But for sealing pinholes like this? Yeah, it would probably work fine.
 

DaveBen

Supporting Member
Supporting Member
Joined
Sep 29, 2010
Posts
1,927
Reaction score
645
Location
Ukiah, Ca
Lead was used by all of the old timer body men. It is easy to work with (other than the heat) and only moderately deadly. Plastic is what is used today.
 
Top