Tin bashing

david85

Full Access Member
Joined
Feb 21, 2008
Posts
4,823
Reaction score
1,088
Location
Campbell River, B.C.
I might just do that. ;Sweet

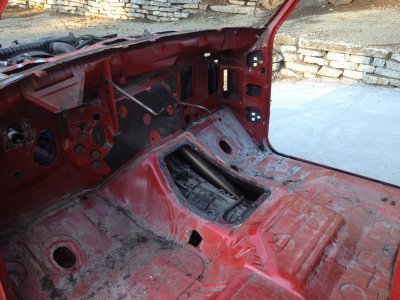
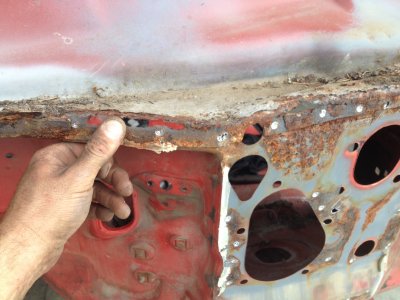
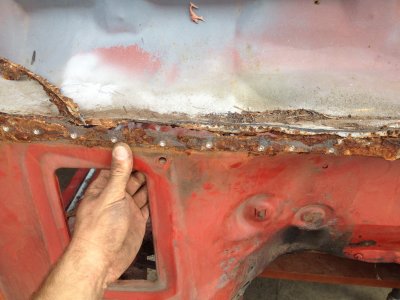
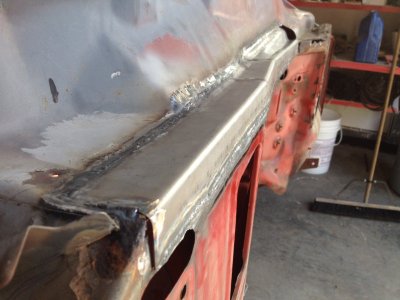
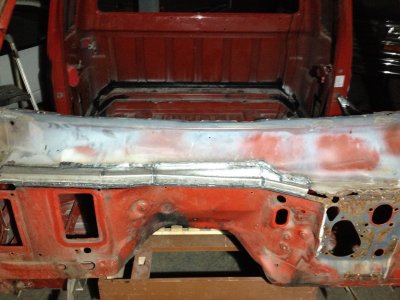
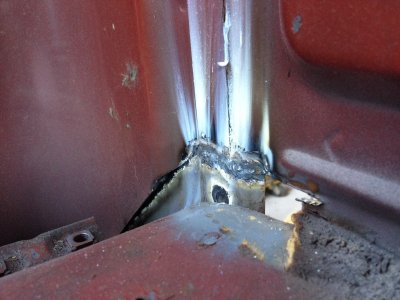
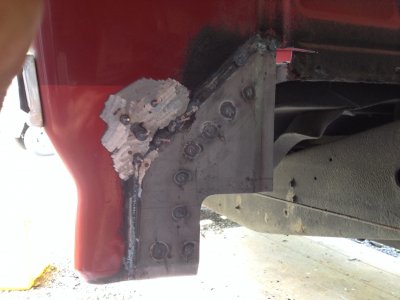
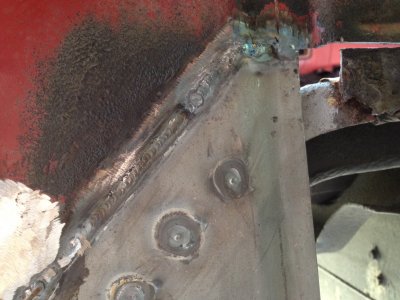
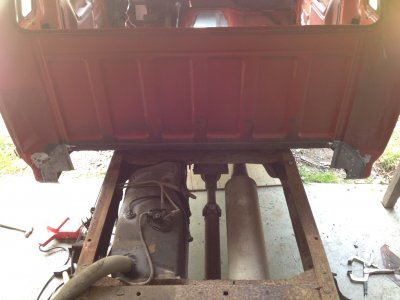
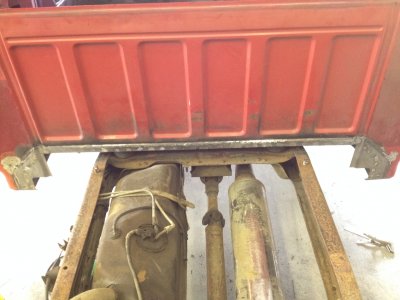
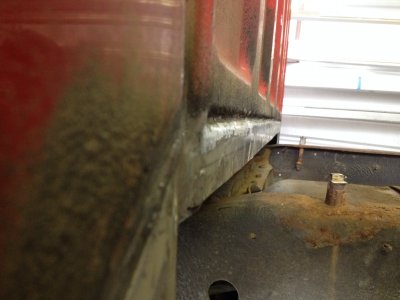
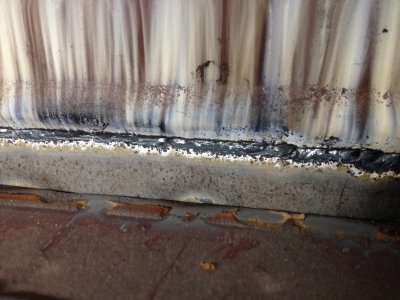
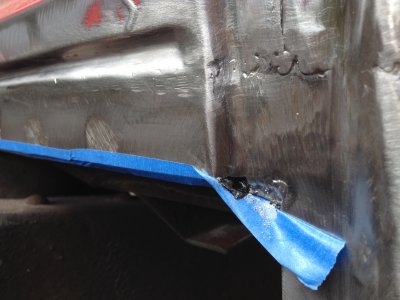
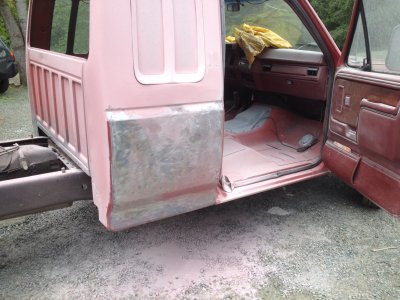
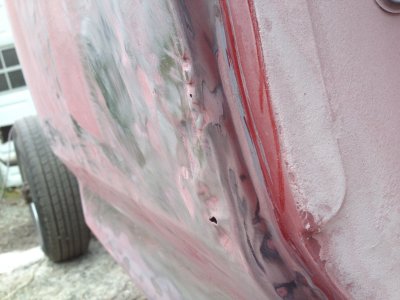
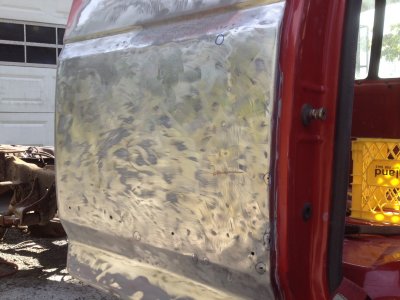
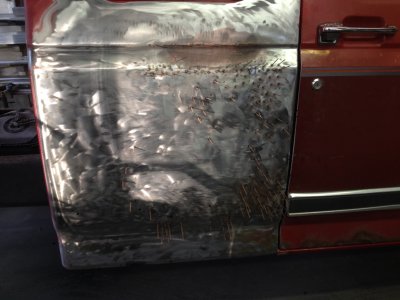
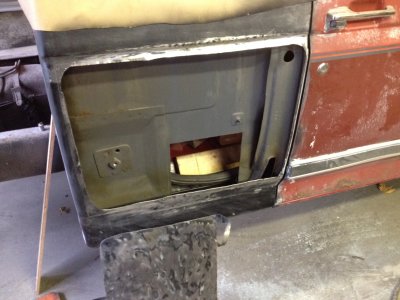
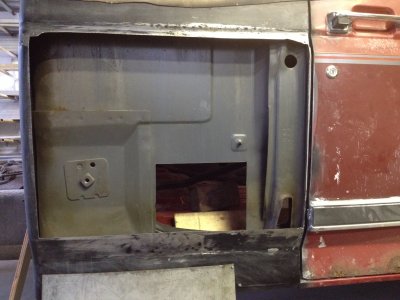
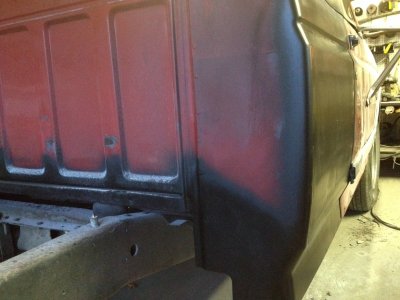
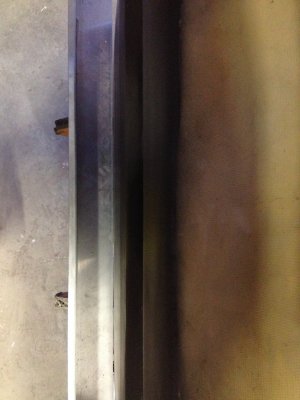
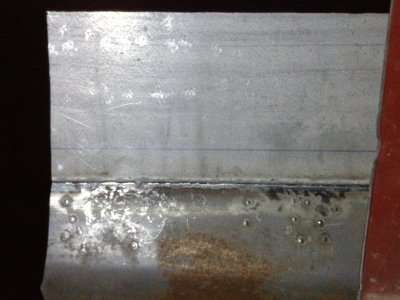
Well, both cab corner repair patches are welded in. That clears me to cut out the bottom of the rear wall.

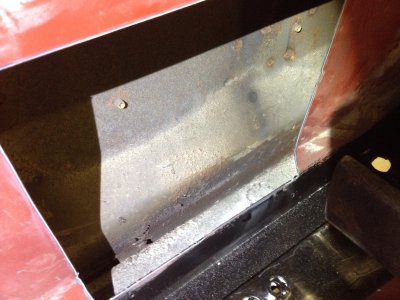
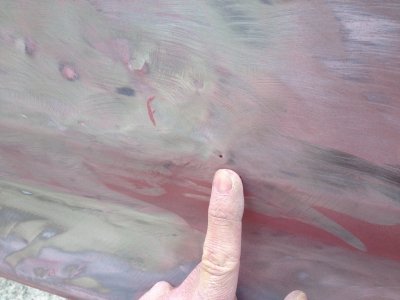
I used my dent spotter to correct some of the warping but it wasn't too bad. From what I can tell, warping is no worse than factory fit right now since a lot of loose ends get tied up at the rear cab corners during assembly. No doubt this contributes to many of the rust problems these trucks are legendary for, but I digress. Right now I'm totally stoked to be making this kind of headway.-Flame Thr

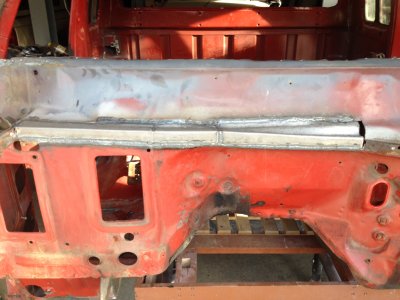
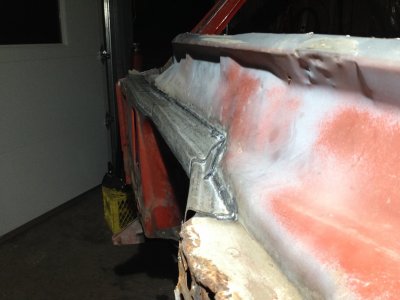
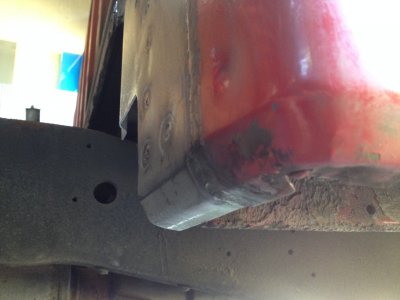
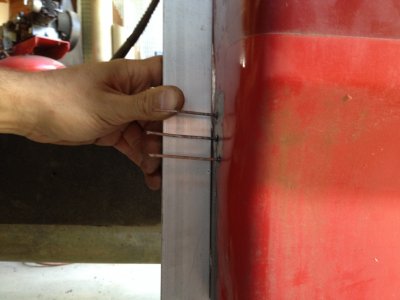
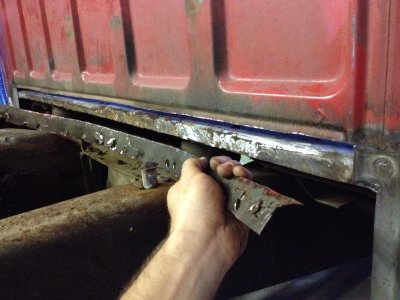
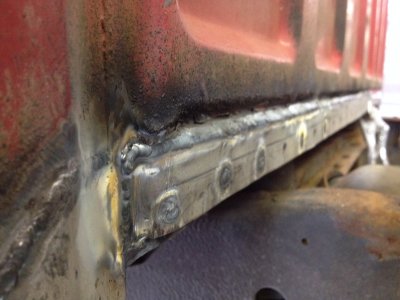
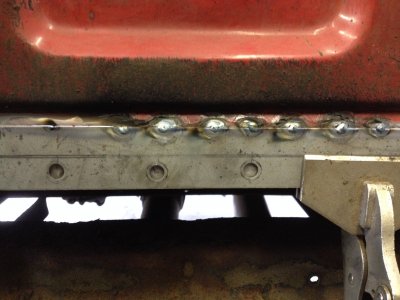
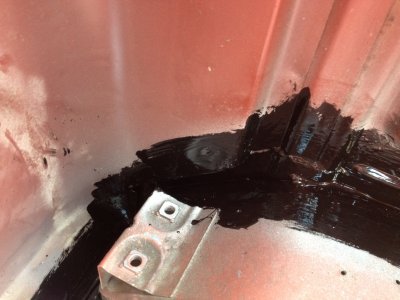
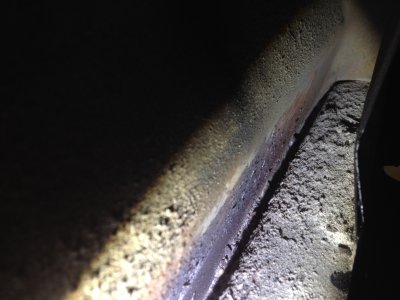
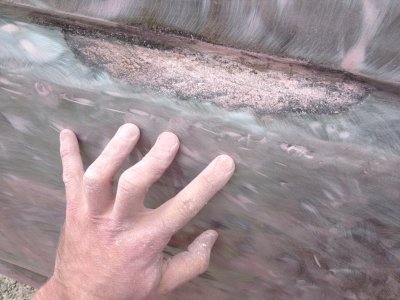
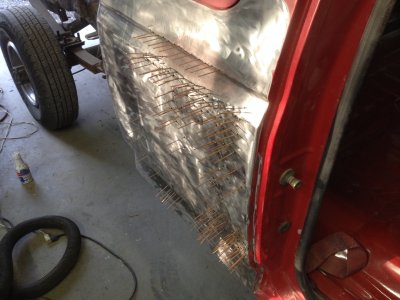
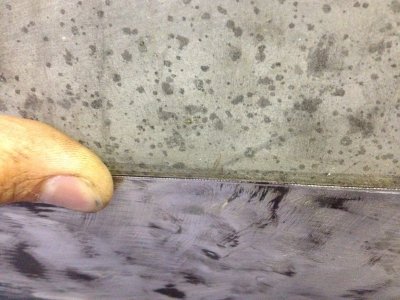
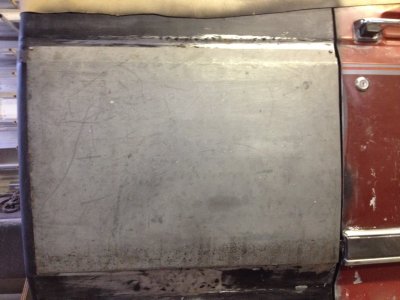
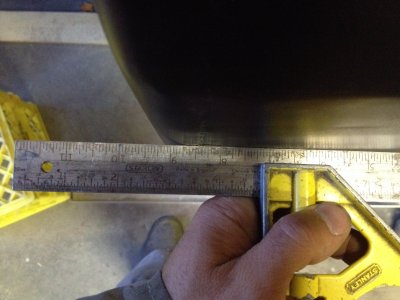
I hope to get the ribbon patch welded in tomorrow unless something comes up. A straight piece like that should be faster and easier to finish
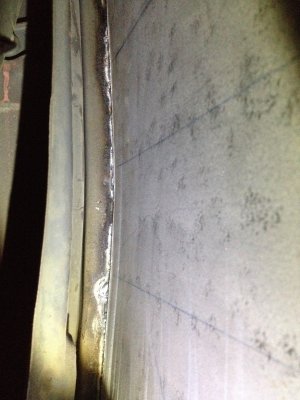
;Sweet
 

Attachments

  • IMG_2383.JPG
    IMG_2383.JPG
    585.8 KB · Views: 19
  • IMG_2382.JPG
    IMG_2382.JPG
    491.7 KB · Views: 18
  • IMG_2384.JPG
    IMG_2384.JPG
    708.2 KB · Views: 20
  • IMG_2386.JPG
    IMG_2386.JPG
    452.7 KB · Views: 22
  • IMG_2387.JPG
    IMG_2387.JPG
    463 KB · Views: 23
  • IMG_2389.JPG
    IMG_2389.JPG
    698.9 KB · Views: 22
  • IMG_2390.JPG
    IMG_2390.JPG
    504.5 KB · Views: 21

david85

Full Access Member
Joined
Feb 21, 2008
Posts
4,823
Reaction score
1,088
Location
Campbell River, B.C.
Welding on the back wall is done. Just needs a bit of cleanup and then I can pour the primer into the joint.
 

Attachments

  • IMG_2391.JPG
    IMG_2391.JPG
    706.5 KB · Views: 17
  • IMG_2392.JPG
    IMG_2392.JPG
    645.2 KB · Views: 17
  • IMG_2393.JPG
    IMG_2393.JPG
    619.4 KB · Views: 18
  • IMG_2395.JPG
    IMG_2395.JPG
    618.7 KB · Views: 19
  • IMG_2396.JPG
    IMG_2396.JPG
    558.1 KB · Views: 19
  • IMG_2398.JPG
    IMG_2398.JPG
    664.8 KB · Views: 18

david85

Full Access Member
Joined
Feb 21, 2008
Posts
4,823
Reaction score
1,088
Location
Campbell River, B.C.
Blecch!!! Sandblasting really sucks when you're the one inside the cab lol. That stuff gets everywhere.

I ended up using that to clean up the surface rust inside on the floor and near the seat mounts. Took a good hour to clean it up afterwards.

Shot a quick coat of zinc primer, then brushed on the epoxy coat. Unfortunately, it didn't all flow into the joint uniformly like I had hoped...should have used more reducer.

The good news: I'm done with the rear wall surgery. The bad news: I used a bore scope to look inside the walls for the extended cab and saw rust...

Wrestled with this for a while but decided on cutting open the inside walls to gain access, assess, and repair as required. Wasn't as bad as I feared, but it should still be dealt with now, not later in a couple years when it rots through. I figured that even if did have to replace the lower body outside, having access inside would be needed to rustproof the inside of the weld.
 

Attachments

  • IMG_2400.JPG
    IMG_2400.JPG
    581.5 KB · Views: 13
  • IMG_2401.JPG
    IMG_2401.JPG
    616.9 KB · Views: 14
  • IMG_2403.JPG
    IMG_2403.JPG
    573.6 KB · Views: 15
  • IMG_2404.JPG
    IMG_2404.JPG
    739.7 KB · Views: 15
  • IMG_2405.JPG
    IMG_2405.JPG
    478.1 KB · Views: 13
Last edited:

david85

Full Access Member
Joined
Feb 21, 2008
Posts
4,823
Reaction score
1,088
Location
Campbell River, B.C.
And now for that cracked bondo I've been dreading. Looks like I lucked out. Rust was pitted pretty bad, but didn't go through. I sand blasted it the best I could, then dosed it with phosphoric acid to kill what was left.

As for the straightening that was done on it...yeah. Butcher job.

Evidently the body shop I decided to trust (my bad!) didn't have a proper spot puller. So instead they simply used a Mig welder to tack tabs on and then yank it the best they could. At least they didn't use screws. The tacks resulted in more warping, and some were cracked or ripped when they pulled on it (see photos). So far, there are 9 holes or cracks that need to be welded shut (circled in the photos).

Filler thickness averaged 1/4". Way too much but I've seen worse on the box.

Once it was stripped bare, I pulled out my dent spotter and pretty much riddled it. As of right now, the worst requires 1/16" of filler to match factory lines. Might be able to do better after a good night's sleep.
 

Attachments

  • IMG_2406.JPG
    IMG_2406.JPG
    572.2 KB · Views: 17
  • IMG_2407.JPG
    IMG_2407.JPG
    773.2 KB · Views: 17
  • IMG_2409.JPG
    IMG_2409.JPG
    614.2 KB · Views: 17
  • IMG_2411.JPG
    IMG_2411.JPG
    716.7 KB · Views: 18
  • IMG_2410.JPG
    IMG_2410.JPG
    646.4 KB · Views: 19
  • IMG_2412.JPG
    IMG_2412.JPG
    613.4 KB · Views: 19
  • IMG_2413.JPG
    IMG_2413.JPG
    494.5 KB · Views: 18
  • IMG_2414.JPG
    IMG_2414.JPG
    553.3 KB · Views: 19

david85

Full Access Member
Joined
Feb 21, 2008
Posts
4,823
Reaction score
1,088
Location
Campbell River, B.C.
Once it was stripped bare, I pulled out my dent spotter and pretty much riddled it. As of right now, the worst requires 1/16" of filler to match factory lines. Might be able to do better after a good night's sleep.

Ok....so...short answer to that was NO!!! In the end the filler required exceeded 1/8". The shape was perfect but one push on the panel and yup...cracked.-cuss

Things got a little hectic trying to figure out what to do. Photo ops got overlooked. So here's what the breakdown was:

Plan B: slit the panel to relieve the tension and weld the gap. Nope. Only added more distortion and trying to weld a big gap with tin us just an all round bad idea. I knew this but decided to try anyway.

Plan C: Completely cut out the warped area and replace it with fresh steel. There is a slight convex shape though, so I wasn't sure if I could duplicate that. Cutting that much out also made me leery. My painter suggested trying to find a junkyard truck and cut the whole extended cab corner off, but 1996 is the newest year that could fit. That's already 20 years old and anything that old is unlikely to be without rust issues up here.

Plan D: Cut a section of metal out of the old box and try using panel-bond adhesive. But as I mentioned earlier, I have no prior experience with it (even though all reviews appear to be good, provided a quality OEM epoxy is used). I was almost ready to try this one first.

.....but it looks like plan C is going to work.

I made a complete panel from scratch using 16 gauge steel. To get the convex shape, I traced several horizontal lines on the inside, then followed them with a small sledge hammer against the concrete floor. Its no english wheel, but it actually worked really well. Another bonus is the thicker steel won'y be so easily warped from the welding.

Once I was satisfied with the shape, I drilled two holes at the top corners and screwed it into the side of the cab.

Then I traced a scribe mark all around the edges. Made an approximate cut, then used snips to ride against the scribe mark. Final trimming was done as needed with a file, or angle grinder. The top corners were not cut out right away, to keep the screw holes for accurate locating of the panel. Once a few tacks were in place at the bottom and rear, I removed the screws and finished the cut at the top two corners.

The panel is now fully tacked in at all four sides with extremely minimal distortion. This is the first time I even attempted to weld in a panel this large, with all 4 sides requiring a complete seam weld. Everything else always had a loose edge. So far, so good. I'll seal up the welds tomorrow.
 

Attachments

  • IMG_2419.JPG
    IMG_2419.JPG
    582.1 KB · Views: 16
  • IMG_2421.JPG
    IMG_2421.JPG
    675.5 KB · Views: 16
  • IMG_2422.JPG
    IMG_2422.JPG
    860.4 KB · Views: 16
  • IMG_2423.JPG
    IMG_2423.JPG
    644.1 KB · Views: 16
  • IMG_2426.JPG
    IMG_2426.JPG
    679.2 KB · Views: 17
  • IMG_2427.JPG
    IMG_2427.JPG
    667.1 KB · Views: 18

david85

Full Access Member
Joined
Feb 21, 2008
Posts
4,823
Reaction score
1,088
Location
Campbell River, B.C.
Looks like I won on the third round;Sweet. All welds are done, sealed (no pinholes), and primed. After curing overnight, its ready for a skin coat of filler. I have some major shop cleanup to do first though.

The most noticeable weld is at the rear vertical. The rest are pretty hard to spot. Photos on the inside show good weld penetration. The sharpie guide lines along with hammer marks are clearly visible. Straight edge on the outside shows how much curve was put in the panel lengthwise.

Next up will be fixing the dent in the roof, and likely having to pull the dash assembly - I want to know what's happening at the firewall gutter. After that??? Probably lift the cab and see what other surprises I find. I know there was some surface rust in the splash zone behind the front tires. Area around the windshield needs a good cleanup too (pine needles...).
 

Attachments

  • IMG_2437.JPG
    IMG_2437.JPG
    677.1 KB · Views: 15
  • IMG_2439.JPG
    IMG_2439.JPG
    615 KB · Views: 13
  • IMG_2440.JPG
    IMG_2440.JPG
    705.9 KB · Views: 15
  • IMG_2443.JPG
    IMG_2443.JPG
    300.9 KB · Views: 13
  • IMG_2444.JPG
    IMG_2444.JPG
    742.7 KB · Views: 15
  • IMG_2445.JPG
    IMG_2445.JPG
    531.6 KB · Views: 14

laserjock

Almost there...
Supporting Member
Joined
Nov 20, 2012
Posts
8,841
Reaction score
3,129
Location
Maryland
Damn man. You are an animal. Not that you care now, you can actually get that as a replacement panel like half way up the window I believe. Not sure it would have fit any better than what you did but just letting you know after the fact there are other options. Great timing right?
 

david85

Full Access Member
Joined
Feb 21, 2008
Posts
4,823
Reaction score
1,088
Location
Campbell River, B.C.
Damn man. You are an animal. Not that you care now, you can actually get that as a replacement panel like half way up the window I believe. Not sure it would have fit any better than what you did but just letting you know after the fact there are other options. Great timing right?

Hey I'm curious to see it anyway. Might help the next guy;Sweet

Years ago I did see a panel that appeared to be the full extended cab panel. Not a patch panel, but the full panel that would have been put on in the assembly of the body shell. Bottom seam right up to the rain gutter, and B-pillar wrapped around to the rear wall. I looked this time too but couldn't find it again.

Although considering this patch cost me nothing but consumables, I don't regret doing it.

Dash is out now and I'm working on a new roof brace. For the longest time this truck would go "BONG" whenever I closed the window at speed LOL
 

david85

Full Access Member
Joined
Feb 21, 2008
Posts
4,823
Reaction score
1,088
Location
Campbell River, B.C.
I'm just about over the last summit guys! Today I got back into it full speed.

98% of the wiring is now completely removed from the cab. Doors and fenders are in storage until all usable parts get stripped from them. Cab bolts all came out and only a bare shell remains. Tomorrow it comes off the frame and I can attack the firewall.

I may still take it to sandblasting just to get a fresh look at the underside of the floor. There are a few spots where the undercoating is showing orange colored cracks and now would be a good time to kill it. Now would also be a good time to clean up that hole for the transfer case shifter (yes...that crappy hack job was yours truly...:angel:)
 

Attachments

  • IMG_2467.JPG
    IMG_2467.JPG
    825 KB · Views: 10
  • IMG_2468.JPG
    IMG_2468.JPG
    758.4 KB · Views: 13

david85

Full Access Member
Joined
Feb 21, 2008
Posts
4,823
Reaction score
1,088
Location
Campbell River, B.C.
OK, not over the last summit...but it is in sight.

After mentally going in circles on what was the best way to attack the firewall, I went with the only real solution: Remove the upper cowl as one piece. The reinforcing for the steering column and brake booster had to be removed first.

With the cowling removed, we can see the full extent of the damage. Basically the entire upper firewall seam is toast. But like everything else, it can be fixed...one piece at a time ;Sweet
 

Attachments

  • IMG_2469.JPG
    IMG_2469.JPG
    806.7 KB · Views: 13
  • IMG_2470.JPG
    IMG_2470.JPG
    689 KB · Views: 13
  • IMG_2471.JPG
    IMG_2471.JPG
    919.5 KB · Views: 14
  • IMG_2472.JPG
    IMG_2472.JPG
    685.2 KB · Views: 15
  • IMG_2473.JPG
    IMG_2473.JPG
    620.1 KB · Views: 15
  • IMG_2474.JPG
    IMG_2474.JPG
    760 KB · Views: 16

david85

Full Access Member
Joined
Feb 21, 2008
Posts
4,823
Reaction score
1,088
Location
Campbell River, B.C.
wow surprising to see that seam rust out like that.

Very common, unfortunately. The seam is right in the bottom of the gutter, and the seam sealer doesn't really last much more than 20 years before getting crusty at the edges. Another problem is very little paint gets into the gutter from factory, so only primer is there to protect an area that stays pretty damp most of the time. The hot engine bay also takes its toll.

I already repaired it quick & dirty years ago by pecking out the crust with a screw driver and covering it up with urethane sealer (there were holes even back then!). It stopped the leaks but rust was still there. Not much was visible from outside but once it gets into the seams, it spreads quickly before bubbling to the surface.

By the way, I like your new avatar image;Sweet
 

david85

Full Access Member
Joined
Feb 21, 2008
Posts
4,823
Reaction score
1,088
Location
Campbell River, B.C.
You must be registered for see images attach

Oh hell yeah!^^ That's why I'm obsessing over undercoating, sealer and penetrating wax/oils...even if it will still rust away eventually.:puke:

Well here is the result after the first full day of reconstruction on the front. Rather than rebuild the 3 layer lap joint (rust trap!), I installed a form fit angle piece that butt joins the firewall directly to the inner cowl. That makes for a water tight welded joint. The outer cowl will need some restoration before it goes back on, but my plan is to make a Tee joint into the new steel.

You can see that my patch isn't a perfect match but this rearrangement helps eliminate a bottleneck where pine needles used to collect. The main thing is to make sure the runoff is in tact toward the driver's side. Water from the windshield needs to drain that way, because the ventilation inlet is on the passenger side (just forward of the A pillar support).
 

Attachments

  • IMG_2475.JPG
    IMG_2475.JPG
    570.1 KB · Views: 13
  • IMG_2476.JPG
    IMG_2476.JPG
    601 KB · Views: 13

david85

Full Access Member
Joined
Feb 21, 2008
Posts
4,823
Reaction score
1,088
Location
Campbell River, B.C.
Managed to get past that corner. Not much length welded in, but that was a tricky piece to fit.
 

Attachments

  • IMG_2477.JPG
    IMG_2477.JPG
    495.6 KB · Views: 10
  • IMG_2478.JPG
    IMG_2478.JPG
    363.7 KB · Views: 11
Top