With all the people having freeze plugs problems lately due to improper installation at machine shops ( myself included ) I decided to document putting these things in the correct way. with some pictures Hopefully this will help some people out in the future. After seeing how the factory tool works I can't possibly see how anyone could expect to see the plugs on the sides and rear of these engines to seal properly without it.
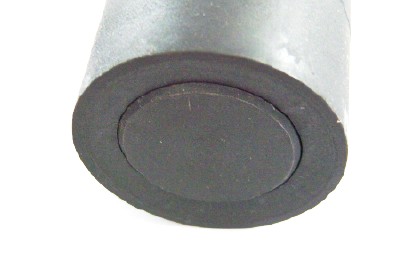
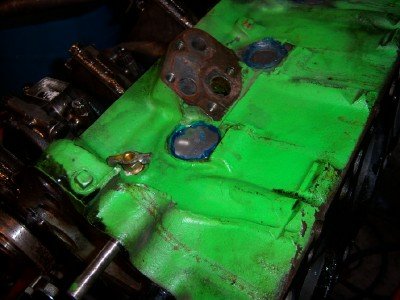
This is for the 7 concave freeze plugs ( core plugs that go around the exterior of the block, 3 on the driver's side, 2 on the passenger side ( block heater is normally installed in the third hole on passenger side ) and 2 on the rear of the block behind the flywheel.
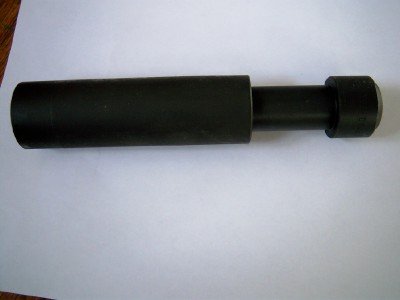
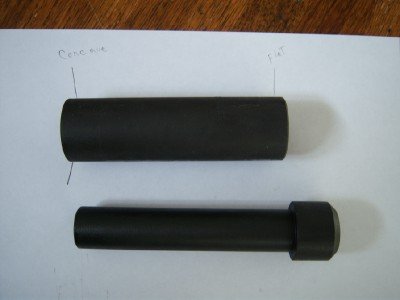
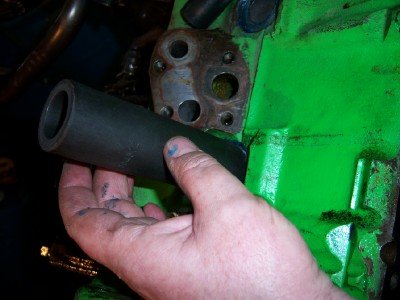
You will need ford Rotunda tool # 303-D045 Expansion Plug Replacer
Call 1-800-ROTUNDA ( the number rings through to OTC/SPX tools and is administered by Snap On these days, so you may be able to order the tool from a Snap On Truck, I've purchased other Rotunda OTC tools off the snap on truck before so... ) and do expect to get a runaround. They get about $135 for the thing. It's expensive but that turkey holds the outer shape of the plug perfectly keeping it pointed the right direction, while compressing the center the exact amount needed to seat the things in place where they won't walk out and leak. If you've had one come loose after someone installed one incorrectly , It's a miserable, expensive, time consuming thing to have to go back after them to get it right, Buy the tool.
The freeze plugs are ford part #E3TZ6026A and list price is $0.97 ea on them ( I got them from www.directfordparts.com for $0.68 each ). Get the ones from Ford or International. I got one from Napa to compare and the shape is different and edges were rough and will likely not seal properly.The ones from Ford were very high quality, smooth finish all around, uniform production ( I bought a bunch extra thinking I might need to cull some, not so)
Removing the old ones is easy, drill out the center and stick something in and pry them out, they pop out pretty easy, especially if they haven't been put in correctly.Do not drill too far and punch a hole through a cylinder .
Clean the holes with brass wire wheel down to clean metal remove all rust and corrosion, expect to spend some time on them, there will be some crud there to work off. The outer circle is what has to be perfect, chances are there will be some irregularity on the part facing out. You just want to make sure that the new plug will lay down in the hole with the edges flush with the edges of the hole. If there is any debris holding it up, your plug will not seal.
Run some kind of magnet that you know is not going to break off inside the engine down in the holes to get all the shavings out. I've always found that Radio Shack has these nice little round magnets with holes in the middle, and one of those and a nice stout piece of fishing line make for a great shaving retrieval tool.
clean the holes and new plugs with acetone or anaerobic sealer activator ( same thing , use safety precautions)
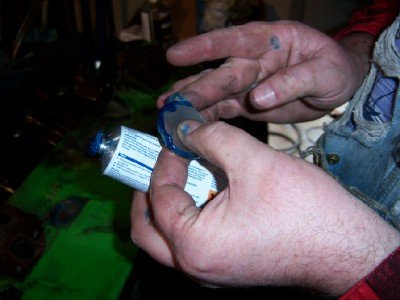
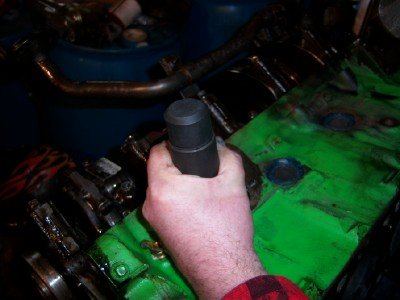
Pic 1-3 : Fill groove with gasket sealer and put sealer around edge of new plug ( The manual calls for a ford sealer no longer in existence with no other part number to cross reference it to. I use Hylomar Racing formula, seriously good stuff ,You'd have a hard time finding a better sealer)
Pic 4: Set the new plug in place.
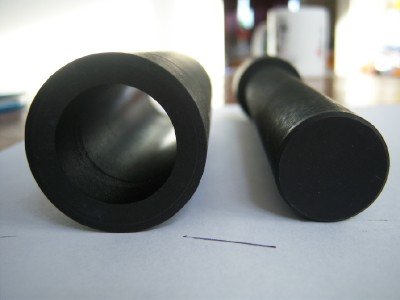
Pic 5-6: Separate the two pieces of the expansion plug installer tool and with just the outer section of the tool, gently tap the plug to seat down in the hole.
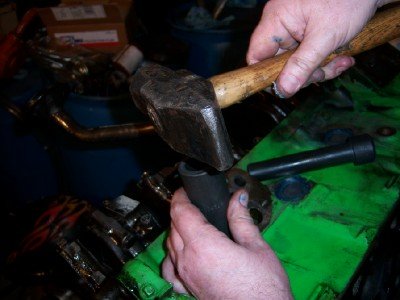
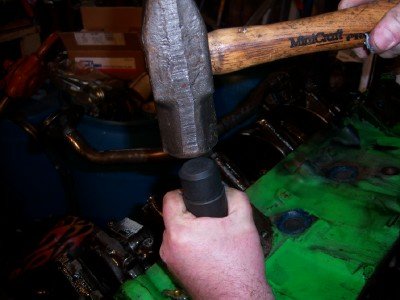
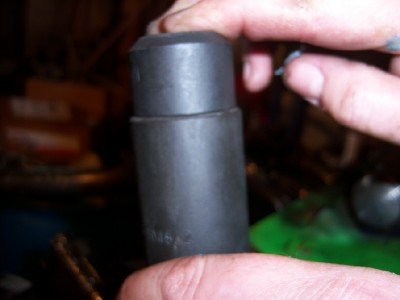
Pic 7-10: Next, insert the other part of the tool in the middle, and whack it down ( you gorillas with wrists bigger than my legs take it easy, you don't want to crack the block ) . Keep whacking it down , you will see it steadily going further down, as you see the clearance getting close between the top of the outer part of the tool and the bottom of the head of the inner part of the tool, stop , and while holding the inner part down, see if the outer part has any room to lift up` ( see pic 9) if so, give a few more whacks until there is no clearance between the inner and outer parts of the tool, and that point, the new freeze plug is seated perfectly.
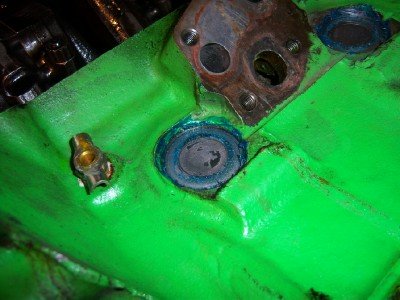
Pat yourself on the back and enjoy a long leak free future.
-----Robert
This is for the 7 concave freeze plugs ( core plugs that go around the exterior of the block, 3 on the driver's side, 2 on the passenger side ( block heater is normally installed in the third hole on passenger side ) and 2 on the rear of the block behind the flywheel.
You will need ford Rotunda tool # 303-D045 Expansion Plug Replacer
Call 1-800-ROTUNDA ( the number rings through to OTC/SPX tools and is administered by Snap On these days, so you may be able to order the tool from a Snap On Truck, I've purchased other Rotunda OTC tools off the snap on truck before so... ) and do expect to get a runaround. They get about $135 for the thing. It's expensive but that turkey holds the outer shape of the plug perfectly keeping it pointed the right direction, while compressing the center the exact amount needed to seat the things in place where they won't walk out and leak. If you've had one come loose after someone installed one incorrectly , It's a miserable, expensive, time consuming thing to have to go back after them to get it right, Buy the tool.
The freeze plugs are ford part #E3TZ6026A and list price is $0.97 ea on them ( I got them from www.directfordparts.com for $0.68 each ). Get the ones from Ford or International. I got one from Napa to compare and the shape is different and edges were rough and will likely not seal properly.The ones from Ford were very high quality, smooth finish all around, uniform production ( I bought a bunch extra thinking I might need to cull some, not so)
Removing the old ones is easy, drill out the center and stick something in and pry them out, they pop out pretty easy, especially if they haven't been put in correctly.Do not drill too far and punch a hole through a cylinder .
Clean the holes with brass wire wheel down to clean metal remove all rust and corrosion, expect to spend some time on them, there will be some crud there to work off. The outer circle is what has to be perfect, chances are there will be some irregularity on the part facing out. You just want to make sure that the new plug will lay down in the hole with the edges flush with the edges of the hole. If there is any debris holding it up, your plug will not seal.
Run some kind of magnet that you know is not going to break off inside the engine down in the holes to get all the shavings out. I've always found that Radio Shack has these nice little round magnets with holes in the middle, and one of those and a nice stout piece of fishing line make for a great shaving retrieval tool.
clean the holes and new plugs with acetone or anaerobic sealer activator ( same thing , use safety precautions)
Pic 1-3 : Fill groove with gasket sealer and put sealer around edge of new plug ( The manual calls for a ford sealer no longer in existence with no other part number to cross reference it to. I use Hylomar Racing formula, seriously good stuff ,You'd have a hard time finding a better sealer)
Pic 4: Set the new plug in place.
Pic 5-6: Separate the two pieces of the expansion plug installer tool and with just the outer section of the tool, gently tap the plug to seat down in the hole.
Pic 7-10: Next, insert the other part of the tool in the middle, and whack it down ( you gorillas with wrists bigger than my legs take it easy, you don't want to crack the block ) . Keep whacking it down , you will see it steadily going further down, as you see the clearance getting close between the top of the outer part of the tool and the bottom of the head of the inner part of the tool, stop , and while holding the inner part down, see if the outer part has any room to lift up` ( see pic 9) if so, give a few more whacks until there is no clearance between the inner and outer parts of the tool, and that point, the new freeze plug is seated perfectly.
Pat yourself on the back and enjoy a long leak free future.
-----Robert
Attachments
-
 FPI1.jpg197.2 KB · Views: 28
 -
 FPI2.jpg178.7 KB · Views: 19
 -
 FPI3.jpg201.3 KB · Views: 22
 -
 FPI4.jpg191.1 KB · Views: 36
 -
 FPI5.jpg194.9 KB · Views: 26
 -
 FPI6.jpg204.3 KB · Views: 20
 -
 FPI7.jpg199.3 KB · Views: 20
 -
 FPI8.jpg201.7 KB · Views: 19
 -
 FPI10.jpg184.6 KB · Views: 22
 -
 FPI11.jpg175.2 KB · Views: 59


 Now my son wants to paint the truck black with flames or stripes that colour. I told him if he wants to mess with all that taping off and extra work, we'll do it. He did most of the prep and paint work on one of our cars when he was 9 and did a nice job, HE's 11 now so I figure he's up for it.