david85
Full Access Member
Okay, story time.
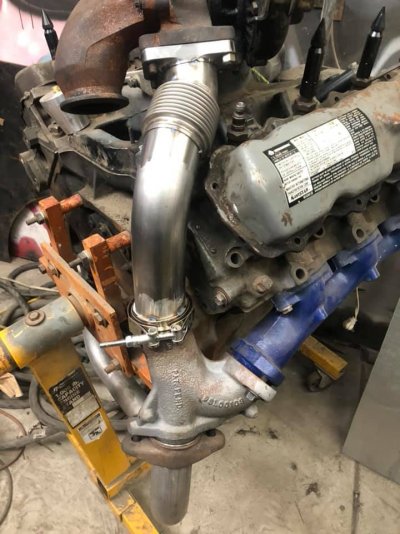
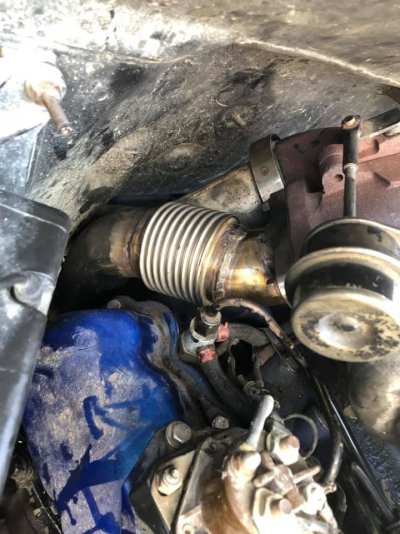
There's been some discussion on this for a while. Basically, the ATS 093 turbo kit is designed to be installed relatively easy around the engine and you can tell the designer put some though into this. Aftermarket installs would have been in frame, while appropriately optioned assembly line trucks for 1993 and 1994 would have been factory installed. There are slight differences between the aftermarket 093 kit and factory turbo IDI kit, but the parts in this discussion are identical.
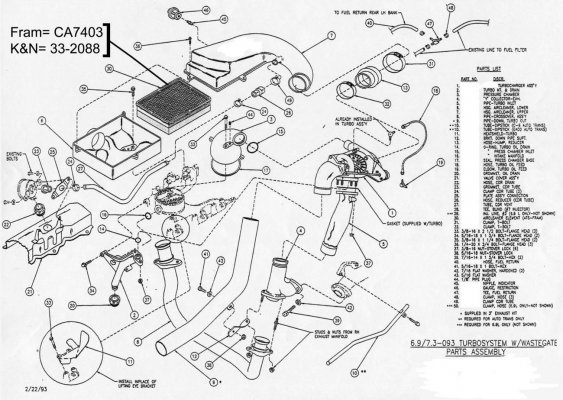
Specifically, Items 4 and 5 in the attached diagram. The connection between the Y-pipe and the up pipe is a ball joint interference fit. This allows 6 degrees of motion to allow ideal alignment between the pipes and also for thermal cycling. Overall, the 093 kit is well designed and also lends itself to relatively easy upgrades with custom turbos.
The problem is this interference fit tends to wear out over time. Probably due to some combination of vibration, corrosion and thermal cycling. The older 088 use a nearly identical slip coupling and it seems to be holding up just fine on my truck, which still has the 088 kit. I'm not sure if it affects all such kits produced by ATS, or if there's something unique to the smaller Y-pipe on the 093 that makes it more vulnerable. I don't know what specific alloy the cast iron is, but I presume its weldable since some have been able to weld other castings in the kit (downpipe upgrades, for example). I'm counting on the weldable part.
The easy solutions to this have been tried by a few others:
1. Exhaust pipe cement
2. Hi Temp Silicone sealant
3. Steam pipe sealant (deacon)
4. Insert a thin metal shim to take up the clearance
As far as I can tell, they all work for a little while. I had high hopes on option 3. High enough that I actually ordered can of the Deacon product that ocnorb used on his thread: https://www.oilburners.net/threads/...-leak-has-killed-my-boost-2022-edition.91627/
But as some of you already know, it still ended up failing.
The solution I'm going to attempt is probably the most expensive but I also feel is most likely to work. Basically, this will be similar to a knee or hip replacement surgery:
1. Cut off the worn out parts
2. Install a replacement connection that is machined to original tolerance.
Here's what I've done so far.
1. Take careful measurements of the original parts.
2. Design a 3D model in AutoCAD of what the parts should be (to the best of my ability).
3. Take that model to the local machine shop and have them make new ones out of 304 stainless steel.
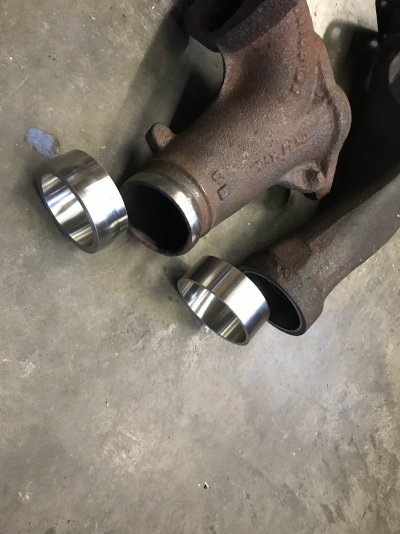
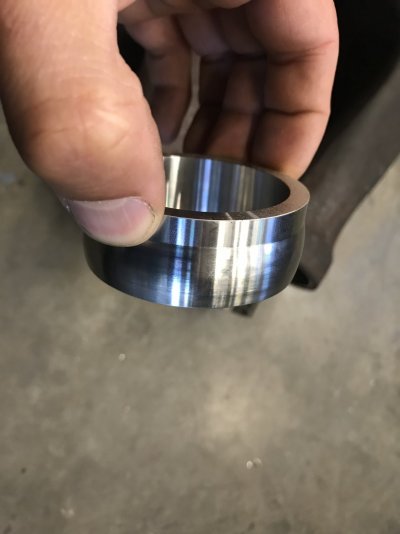
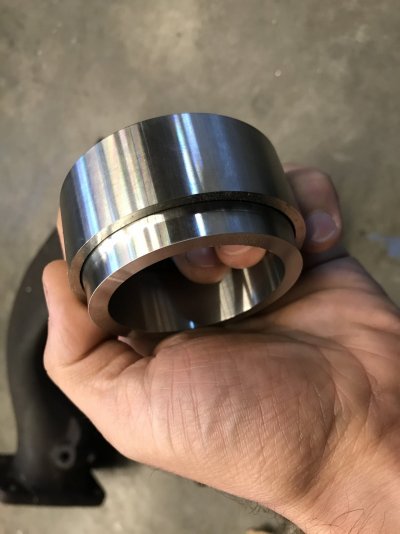
See attached for what I have right now. I asked for 0.001" - 0.002" interference fit. Some quick measurements look good but there seems to be a slight taper in the inside bore of the cylinder side. I could probably use this to my advantage though.
There's been some discussion on this for a while. Basically, the ATS 093 turbo kit is designed to be installed relatively easy around the engine and you can tell the designer put some though into this. Aftermarket installs would have been in frame, while appropriately optioned assembly line trucks for 1993 and 1994 would have been factory installed. There are slight differences between the aftermarket 093 kit and factory turbo IDI kit, but the parts in this discussion are identical.
Specifically, Items 4 and 5 in the attached diagram. The connection between the Y-pipe and the up pipe is a ball joint interference fit. This allows 6 degrees of motion to allow ideal alignment between the pipes and also for thermal cycling. Overall, the 093 kit is well designed and also lends itself to relatively easy upgrades with custom turbos.
The problem is this interference fit tends to wear out over time. Probably due to some combination of vibration, corrosion and thermal cycling. The older 088 use a nearly identical slip coupling and it seems to be holding up just fine on my truck, which still has the 088 kit. I'm not sure if it affects all such kits produced by ATS, or if there's something unique to the smaller Y-pipe on the 093 that makes it more vulnerable. I don't know what specific alloy the cast iron is, but I presume its weldable since some have been able to weld other castings in the kit (downpipe upgrades, for example). I'm counting on the weldable part.
The easy solutions to this have been tried by a few others:
1. Exhaust pipe cement
2. Hi Temp Silicone sealant
3. Steam pipe sealant (deacon)
4. Insert a thin metal shim to take up the clearance
As far as I can tell, they all work for a little while. I had high hopes on option 3. High enough that I actually ordered can of the Deacon product that ocnorb used on his thread: https://www.oilburners.net/threads/...-leak-has-killed-my-boost-2022-edition.91627/
But as some of you already know, it still ended up failing.
The solution I'm going to attempt is probably the most expensive but I also feel is most likely to work. Basically, this will be similar to a knee or hip replacement surgery:
1. Cut off the worn out parts
2. Install a replacement connection that is machined to original tolerance.
Here's what I've done so far.
1. Take careful measurements of the original parts.
2. Design a 3D model in AutoCAD of what the parts should be (to the best of my ability).
3. Take that model to the local machine shop and have them make new ones out of 304 stainless steel.
See attached for what I have right now. I asked for 0.001" - 0.002" interference fit. Some quick measurements look good but there seems to be a slight taper in the inside bore of the cylinder side. I could probably use this to my advantage though.