School me on obs dash

Clb

Another old truck
Supporting Member
Joined
Mar 1, 2013
Posts
6,952
Reaction score
3,350
Location
nannyfornia
I don't see a direct tutorial for 93 dash removal to access the wiring to fix a no light issue, but I'm still searching for it.
How badly do I not want to touch this antique plastic?:oops:
 

Nero

HD Diesel nut
Joined
Jan 3, 2022
Posts
4,209
Reaction score
4,793
Location
OR
Biggest pita in my opinion is removing the two horizontal pieces near the cluster, theres screws under it. Past that I wouldn't be afraid to pull one. I'll be pulling the one in my dads truck soon
 
  • Like
Reactions: Clb

Clb

Another old truck
Supporting Member
Joined
Mar 1, 2013
Posts
6,952
Reaction score
3,350
Location
nannyfornia
I don't have the body section of the fsm. So I'm headed to you tube university to see how it might come out, so I can get it right and not break an almost perfect one...
 

Clb

Another old truck
Supporting Member
Joined
Mar 1, 2013
Posts
6,952
Reaction score
3,350
Location
nannyfornia
While this is out, I am going to mod the oil pressure gage, anything else I should look at?
 

Clb

Another old truck
Supporting Member
Joined
Mar 1, 2013
Posts
6,952
Reaction score
3,350
Location
nannyfornia
Ok I swear I saw it here....
Anyone recall seeing the mod for oil pressure sender and gage mod on here?
It's making the factory idiot lamp into a mechanical needle...
 

offroad-anarchy

Registered User
Joined
Feb 6, 2026
Posts
36
Reaction score
48
Location
somewhere in UT, MT, ID or WY
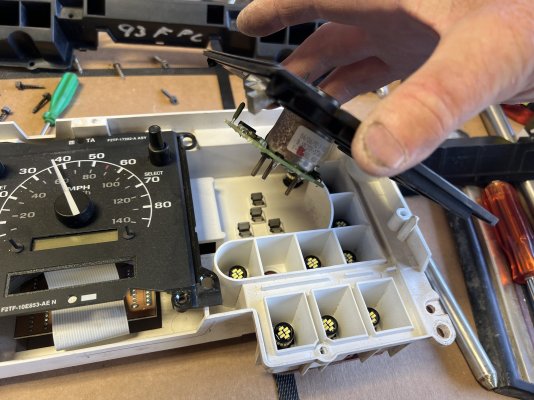
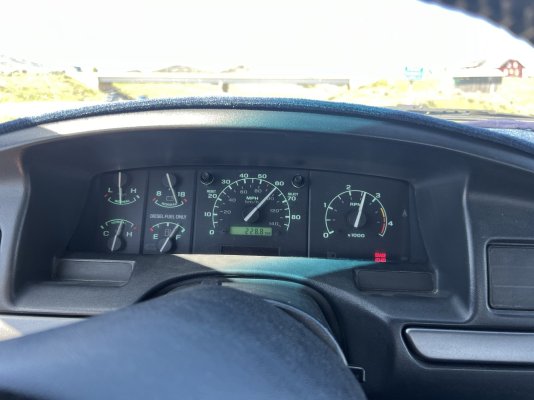
I've replaced my cluster, lights, tach and psom into a new cluster. Had the thing apart about 3 or 4 times.

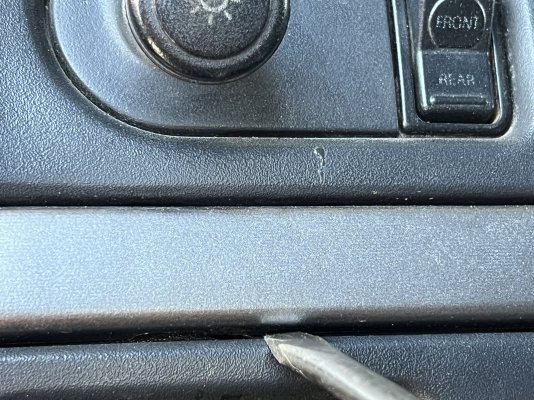
I thought the plastic pieces that hid the screws were super simple to get off. Slot on the under side of each that you use a flat screw driver to gently pry them out from the bottom.

I then used some Rust-Oleum Black Stainless steel spray paint to make them look super sharp again. You have to do super thin coats though. My 93 XLT ones have some sort of wrap on them from the factory to get the look they had. If you do a thick coat the solvent in the lacquer paint bubbles up the wrap. Go slow when you repaint and they will look great.

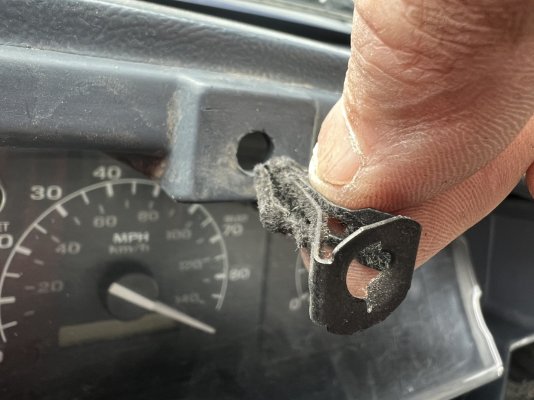
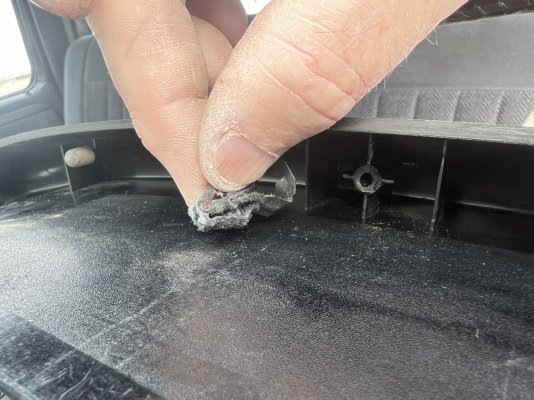
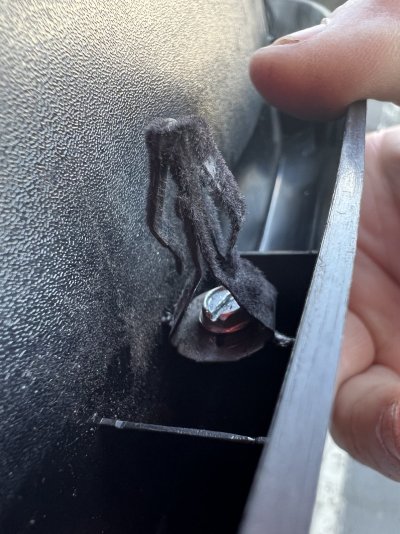
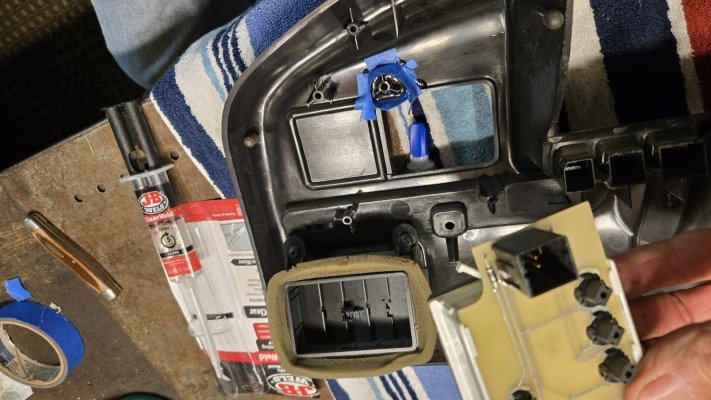
From there you have to gently pull the bezel straight out toward you. It uses some felt covered 'barb' to hold it in around the top edge above the instrument cluster. They are heat staked to the back of the bezel and will most likely break off when pulling it apart the first time. I found a screw that I used to screw them back into the boss where the heat stake broke off. I had to find some extra barbs from a junk yard to get mine all back together.
 

Attachments

  • IMG_1568.JPG
    IMG_1568.JPG
    529.7 KB · Views: 8
  • IMG_9474.JPG
    IMG_9474.JPG
    249.2 KB · Views: 8
  • IMG_9475.JPG
    IMG_9475.JPG
    420.6 KB · Views: 8
  • IMG_9476.JPG
    IMG_9476.JPG
    378.3 KB · Views: 8

offroad-anarchy

Registered User
Joined
Feb 6, 2026
Posts
36
Reaction score
48
Location
somewhere in UT, MT, ID or WY
My original cluster had gotten wet and the electronics in it were corroded and lots of stuff didn't seem to be working. I bought a used one off car-part.com and it turned out to be pretty decent. I swapped my clear front and psom into it and added a set of AUXITO LED bulbs for all the gauges.

If you ever have to take the cluster apart, you start by pulling the right tach piece out first, then the center speedo then the left side gauges. They kind of go over each other from left to right.

If you need any other ideas, let me know. Might not be remembering all that I did in there, but it seemed to be pretty straight forward once you get the lights knob off and the wires unhooked off the back of it :)

Cheers, Pete
 

Attachments

  • IMG_1331.JPG
    IMG_1331.JPG
    308.3 KB · Views: 8
  • IMG_1405.JPG
    IMG_1405.JPG
    205.2 KB · Views: 7
  • Like
Reactions: Clb

Greenie

Registered User
Supporting Member
Joined
Jan 17, 2004
Posts
402
Reaction score
334
Ok I swear I saw it here....
Anyone recall seeing the mod for oil pressure sender and gage mod on here?
It's making the factory idiot lamp into a mechanical needle...
xc_hide_links_from_guests_guests_error_hide_media
 

Clb

Another old truck
Supporting Member
Joined
Mar 1, 2013
Posts
6,952
Reaction score
3,350
Location
nannyfornia
Sweeeeeet
 

Attachments

  • 20260601_145145.jpg
    20260601_145145.jpg
    297.7 KB · Views: 10
  • 20260601_145151.jpg
    20260601_145151.jpg
    270 KB · Views: 10

Clb

Another old truck
Supporting Member
Joined
Mar 1, 2013
Posts
6,952
Reaction score
3,350
Location
nannyfornia
Ok
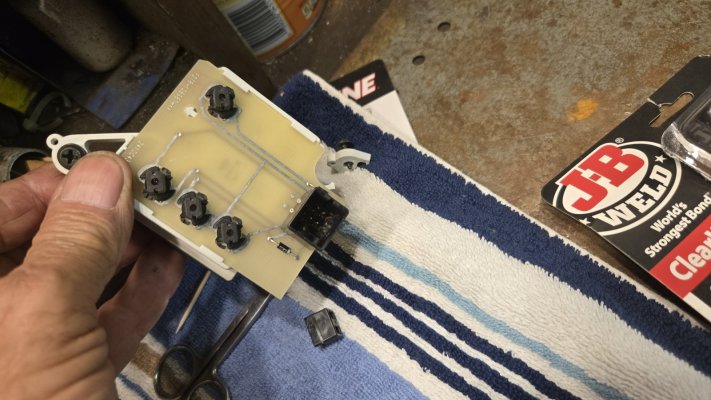
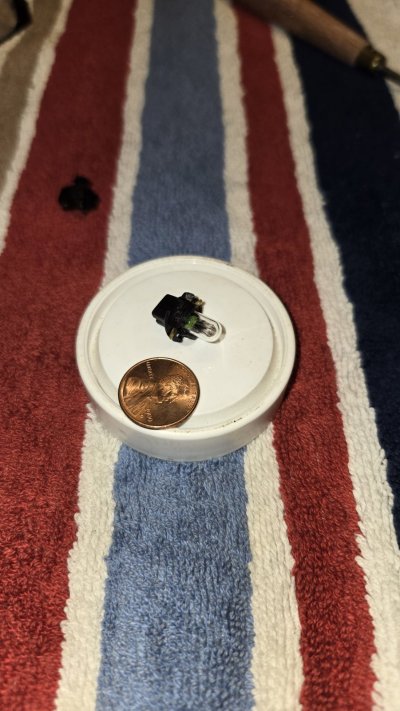
I need lamps for the wts cluster I got the anti tamper holders outbut local parts house is lost...
 

Attachments

  • 1780352774070109941559574579723.jpg
    1780352774070109941559574579723.jpg
    243.9 KB · Views: 9

Clb

Another old truck
Supporting Member
Joined
Mar 1, 2013
Posts
6,952
Reaction score
3,350
Location
nannyfornia
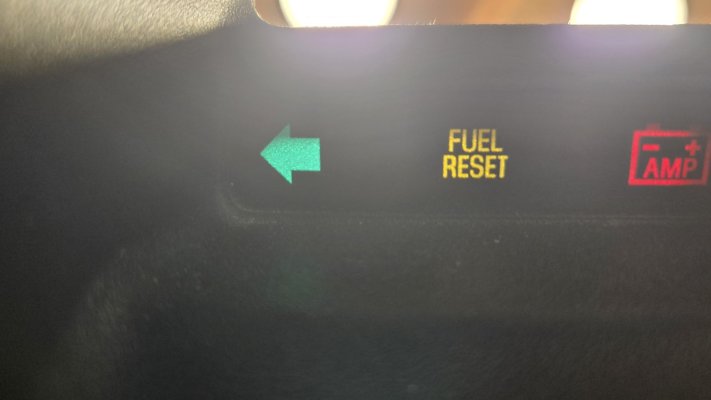
And *** ( nanny bot s u x )
what is this?
Fuel reset???
 

Attachments

  • 20260601_142810.jpg
    20260601_142810.jpg
    116.9 KB · Views: 4

Clb

Another old truck
Supporting Member
Joined
Mar 1, 2013
Posts
6,952
Reaction score
3,350
Location
nannyfornia
So
Doesn't the stroke use super high oil pressure to run the injectors? Or is the oil pressure sender in the video for the engine only?
Seems like that would not work out and read low???
 

Clb

Another old truck
Supporting Member
Joined
Mar 1, 2013
Posts
6,952
Reaction score
3,350
Location
nannyfornia
so a bullnose had a real oil pressure gage as I recall is that right?
if so that sender should be a better fit for this mod don't you guys agree?
only issue would be the thread pitch and fitting the 7.3 sender location, any input?
tia

looks like the lpop sender is real close to the same range as the 6.9 -7.3 ...
 
Last edited:

Nero

HD Diesel nut
Joined
Jan 3, 2022
Posts
4,209
Reaction score
4,793
Location
OR
Fuel reset is probably for the vacuum switch for filter restricted
 
Top