Tin bashing

david85

Full Access Member
Joined
Feb 21, 2008
Posts
4,829
Reaction score
1,095
Location
Campbell River, B.C.
Stuff looks really nice. Let me warn you about repairing the extended cab stuff. The repair panels are awful. I think the ones I have are Keystone that came from LMC. I haven't posted it yet but I will in my build thread. The thing will look like a jigsaw puzzle once I'm done with it. It's too short back to front and it's too thick at the door post. If you can at all help it, don't cut all the way back to the door gap. -cuss

I hear you. I went through that with my F150 years ago. In that case the steel was fairly thick though, and I was able to compress the truck extended cab to fit the patch panel. I won't need to replace much steel on this one though. Only on the back wall of the cab.
 

DOE-SST

1994 E350
Joined
Apr 17, 2010
Posts
318
Reaction score
22
Location
USA
Well,

I'll toss in my $.02

I absolutely hate rivnuts. Every time I run in to them during aircraft repairs, I substitute nutplates or other fasteners when possible.

If the fasteners that screw into rivnuts are removed with any frequency, or if the rivnut is subject to vibration, they eventually spin in their holes, making it aggravating to remove the fastener.

As a shadetree fix, I put a generous amount of industrial contact cement on the hole and standard rivnuts, let it dry until slightly tacky, then crimp the rivnut into the hole.

Better rivnuts have a male tab that mates to a female notch you cut into the hole, but you need the special tool to cut that notch.

Even better rivnuts have serrations on their flange that bite into the sheet metal to prevent spinning.

When working with steel cars, I tack weld them to the sheet metal if possible.
 

david85

Full Access Member
Joined
Feb 21, 2008
Posts
4,829
Reaction score
1,095
Location
Campbell River, B.C.
Well,

I'll toss in my $.02

I absolutely hate rivnuts. Every time I run in to them during aircraft repairs, I substitute nutplates or other fasteners when possible.

If the fasteners that screw into rivnuts are removed with any frequency, or if the rivnut is subject to vibration, they eventually spin in their holes, making it aggravating to remove the fastener.

As a shadetree fix, I put a generous amount of industrial contact cement on the hole and standard rivnuts, let it dry until slightly tacky, then crimp the rivnut into the hole.

Better rivnuts have a male tab that mates to a female notch you cut into the hole, but you need the special tool to cut that notch.

Even better rivnuts have serrations on their flange that bite into the sheet metal to prevent spinning.

When working with steel cars, I tack weld them to the sheet metal if possible.

I agree they're not perfect. So far I had to redo a few of them, but they drill out fairly easy with a step drill. I thought about tacking them, but was worried about warping the sheet metal. I'm actually thinking to order some SS nutserts as a fall back in case these ones fail. However, I will be sealing the bolts on install so I HOPE they'll be fine...time will tell. In reality, there is no reason to take the mirror brackets off once I have them on.
 

david85

Full Access Member
Joined
Feb 21, 2008
Posts
4,829
Reaction score
1,095
Location
Campbell River, B.C.
Well you know things are slowing down when you have to find you're own thread on page 3 LOL

Looks like this is as far as I'll get until the next set of days off. I went for about 3 weeks flat out but then company came over from overseas, other work had to get done...meh, you know how it goes. I still have a few days left, but I'm in holding pattern until going back to work.

Anyway, the doors and valance are done. Looks like all my diligent straightening paid off. I know where most of the dents should be, but I can't find them. The skin coat coat/blocking on the bottom of each door also worked really good too. Its straighter than factory now. And last but no least, the sealed metal folds are seamless thanks to the seam sealer and careful priming/prepping. It feels like waxy glass.;Sweet
 

Attachments

  • IMG_1435.JPG
    IMG_1435.JPG
    451.4 KB · Views: 22
  • IMG_1436.JPG
    IMG_1436.JPG
    289.5 KB · Views: 19
  • IMG_1438.JPG
    IMG_1438.JPG
    435.9 KB · Views: 21
  • IMG_1441.JPG
    IMG_1441.JPG
    359.7 KB · Views: 18
  • IMG_1437.JPG
    IMG_1437.JPG
    415.3 KB · Views: 18

FORDF250HDXLT

The life of an Indian is like the wings of the air
Supporting Member
Joined
Dec 27, 2009
Posts
6,456
Reaction score
1,127
Location
Maine & Oklahoma
this old classic truck of yours is going to be one sharp looking class act.i can't wait to see her completed! this is killing me lol.;Sweet
 

david85

Full Access Member
Joined
Feb 21, 2008
Posts
4,829
Reaction score
1,095
Location
Campbell River, B.C.
Well, long time no see. But I'm back!!! Between work and building a new shop, there wasn't much time for resto-work. The shop is almost done now, and spring is here again, so time to get back to work on the ol' beast.

I ended up leaving the truck in tact and tearing into the box first. Looks like the cab will be the last thing to go under the knife. In the mean time, I'm still driving it once in a while. I never get tired of being able to park it for a month or two, then come back to watch it fire off with less than one full crank rotation. Love these old IDIs.

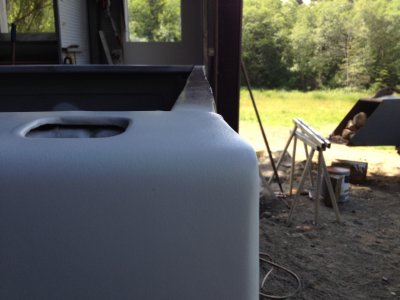
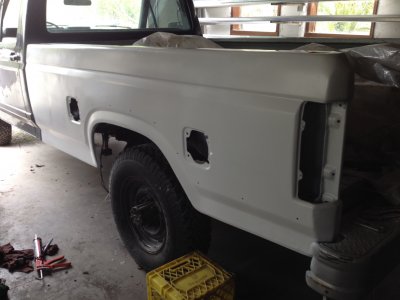
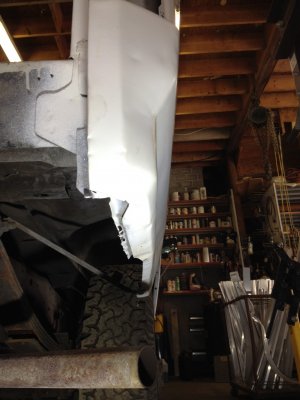
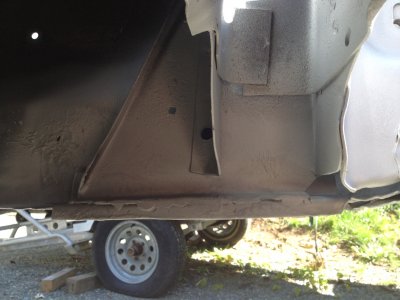
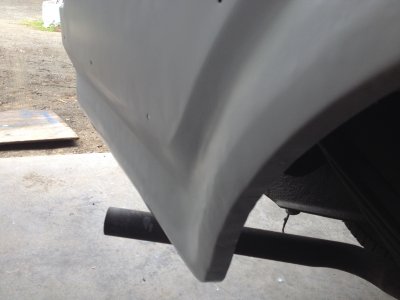
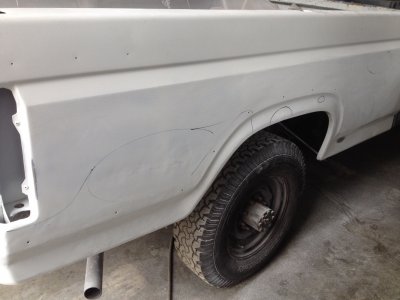
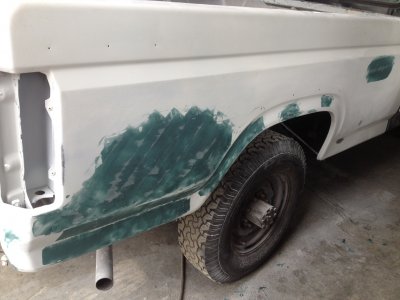
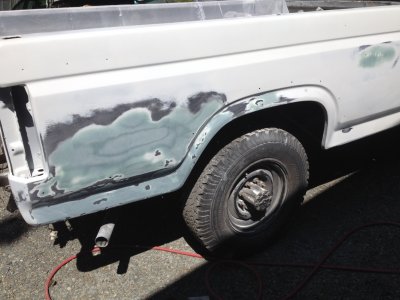
One side of the box is 95% done.

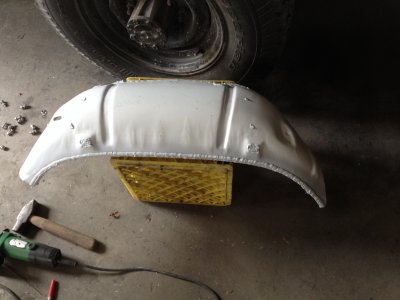
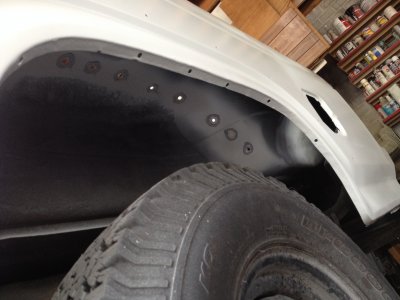
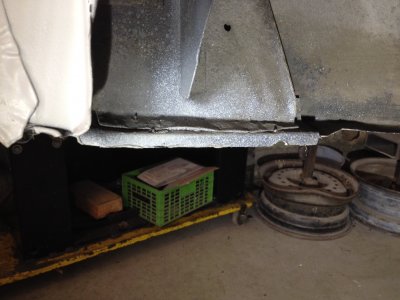
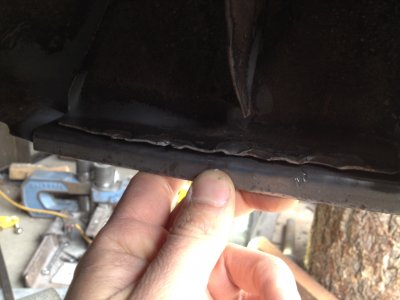
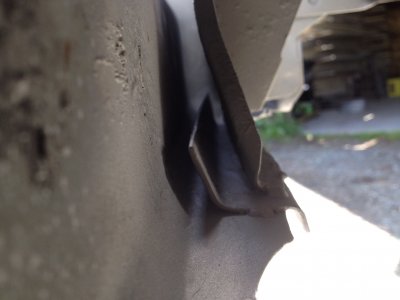
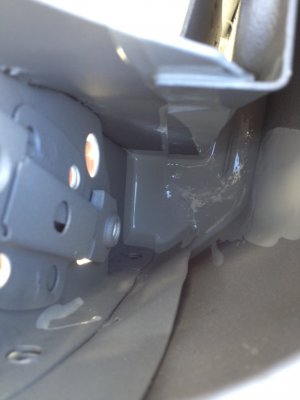
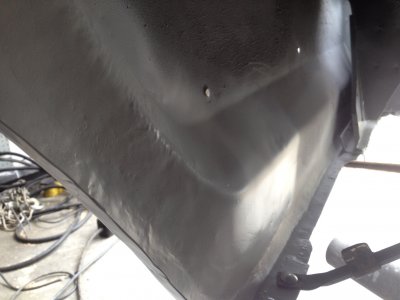
I removed the inner wheel well to make sure there wasn't any surprises in there (we all know this is usually the first place for rust to come through).

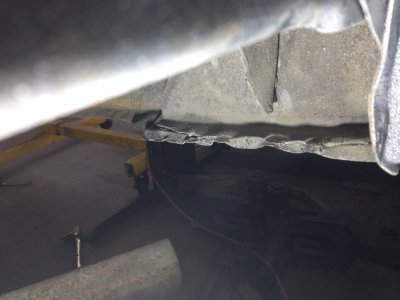
There wasn't any pitting, but the primer and zinc coating was under attack. With a good coating of oil it probably would have been fine. But I'm fussy.

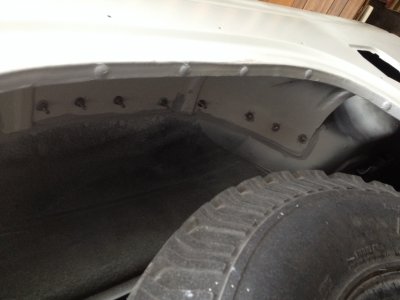
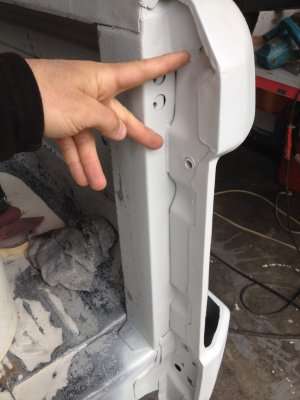
Cleaned it up with a grinder and gentle sand blasting (tried my best not to remove the surviving zinc), then primed/re-assembled everything with 316 alloy stainless hardware.
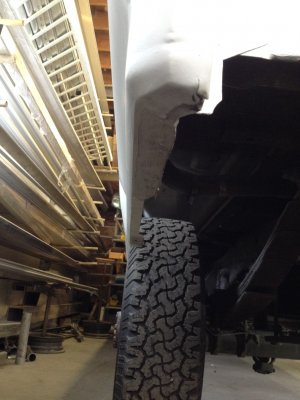
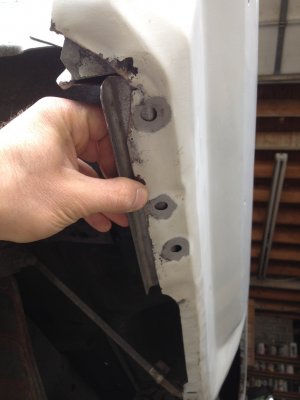
Yes, the carriage bolt heads will be visible if you look for them, but this way future corrosion problems can be fixed without having to cut welds out. This also means that the panels are placed over a fresh bead of urethane sealer, which should seal better than the factory pinch weld joint. Weld through primer is never perfect, and I didn't feel like trying panel-bond.

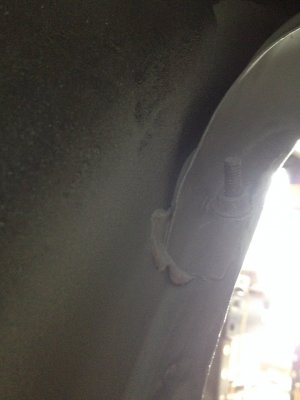
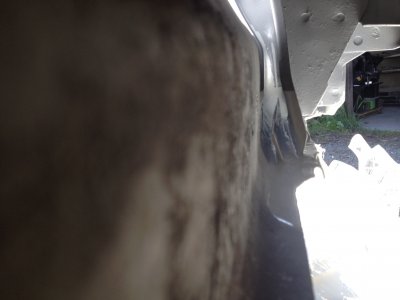
I also like the idea of having these stainless steel bolts as attaching points for whatever mudflaps I end up installing. The bolt can be sealed to the body, while the bolt stem can be left raw without risking a rust spot down the line.

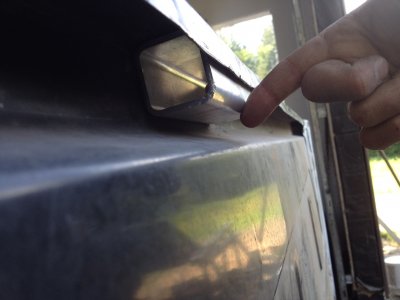
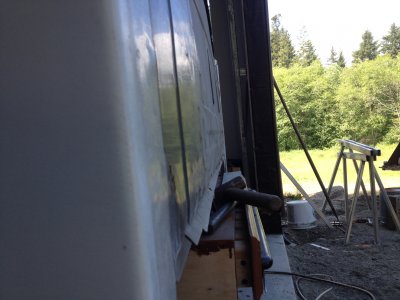
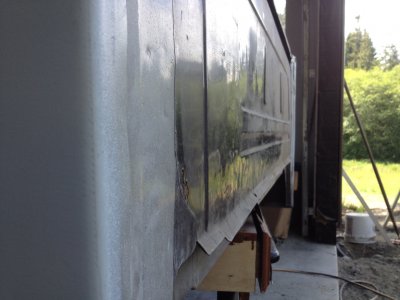
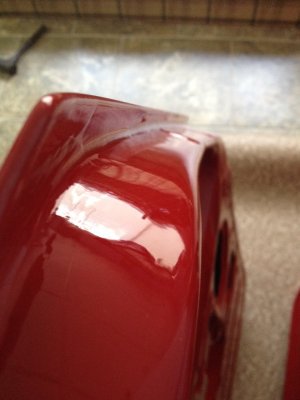
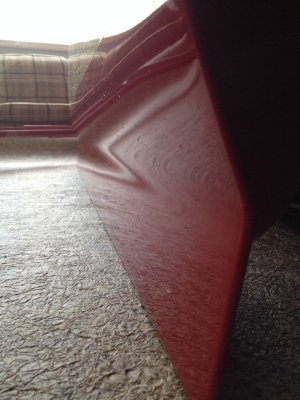
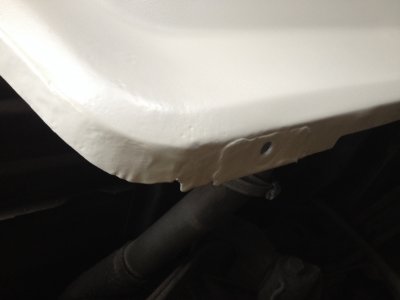
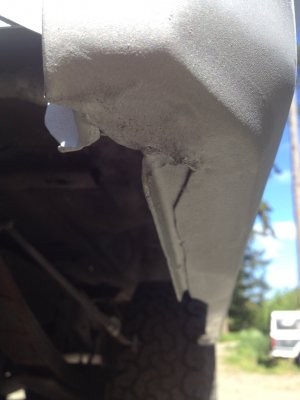
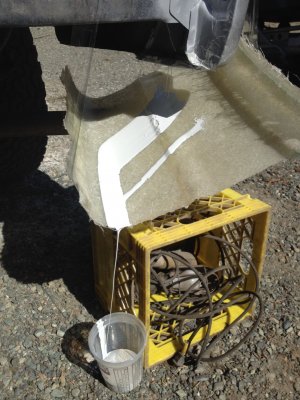
This box side actually needed a LOT of spot pulling to get the shape where you see it now since there were previous dents that were repaired with copious amounts of "pink stuff". Hoping it turns out ok once its painted. The upper box rail isn't perfect but... well, nothing is. The plan is to either install an aluminum bed liner that covers the top of the box (have one from the F150), or get a plastic liner that does the same. May decide to line-X or rhinoline as well. The bed will need a sandblasting to get all the surface rust off anyway.
 

Attachments

  • IMG_1677.JPG
    IMG_1677.JPG
    485.5 KB · Views: 15
  • IMG_1680.JPG
    IMG_1680.JPG
    510.4 KB · Views: 18
  • IMG_1681.JPG
    IMG_1681.JPG
    473.4 KB · Views: 16
  • IMG_1683.JPG
    IMG_1683.JPG
    285.3 KB · Views: 15
  • IMG_1684.JPG
    IMG_1684.JPG
    370.3 KB · Views: 16
  • IMG_1685.JPG
    IMG_1685.JPG
    413.1 KB · Views: 16

david85

Full Access Member
Joined
Feb 21, 2008
Posts
4,829
Reaction score
1,095
Location
Campbell River, B.C.
OK, that above post was for stuff from last year. Now for the work done in the last few weeks.

As it turns out, the fit and finish of 1980s ford trucks isn't exactly the best (for that matter, just about anything from the 80s LOL). Although this black donor truck was a good find in terms of not being rusted out, I gotta say, some of the workmanship was pretty bad. I found a few pinch welds that were either missing, or misplaced. Which leads me to the latest dilemma.

The rear, lower box corner on the passenger side was mis-aligned at the factory. Since this truck had the "Explorer" trim package, you wouldn't have known until removing the chrome and eye-balling the bare panel. The photos show the problem.

Notice how under the driver's side, there is a 3/8" gusset that hangs down vertical. This is pinched between the outer panel, and the inner trapezoid shaped brace (which in turn ties it to the rear box pillars and the rear bed reinforcing).

Now look to the passenger side. That 3/8" piece is still there, but got caught in the weld line and was mangled in the process. This wouldn't be much of a problem except for the fact that the rear, lower panel is now warped behind the rear tire. If I'm going through this much trouble, I might as well fix it. So I did...
 

Attachments

  • IMG_2195.JPG
    IMG_2195.JPG
    559.8 KB · Views: 19
  • IMG_2194.JPG
    IMG_2194.JPG
    552.4 KB · Views: 19
  • IMG_2192.JPG
    IMG_2192.JPG
    408.6 KB · Views: 18
  • IMG_2193.JPG
    IMG_2193.JPG
    350.9 KB · Views: 17

david85

Full Access Member
Joined
Feb 21, 2008
Posts
4,829
Reaction score
1,095
Location
Campbell River, B.C.
More drilling and cutting. Removed the reinforcing plate that ford's workers messed up and made my own replacement out of 16ga zinc coated steel.

Once the panel was lined up properly, I prepped everything for welding. Thought about bolting it like the fender wells, but decided against it since it needed to be fairly rigid. Once again, everything got a bit of sand blasting inside to remove the bubbled primer and zinc oxide. The good news is, not much rust.

With the panel straight, I drenched the inside region with zinc primer and let it set overnight.
 

Attachments

  • IMG_2196.JPG
    IMG_2196.JPG
    619.7 KB · Views: 15
  • IMG_2197.JPG
    IMG_2197.JPG
    396.2 KB · Views: 13
  • IMG_2198.JPG
    IMG_2198.JPG
    193.3 KB · Views: 14
  • IMG_2212.JPG
    IMG_2212.JPG
    439.4 KB · Views: 14
  • IMG_2213.JPG
    IMG_2213.JPG
    572 KB · Views: 16
  • IMG_2214.JPG
    IMG_2214.JPG
    582.2 KB · Views: 17
  • IMG_2215.JPG
    IMG_2215.JPG
    236.8 KB · Views: 15

david85

Full Access Member
Joined
Feb 21, 2008
Posts
4,829
Reaction score
1,095
Location
Campbell River, B.C.
And that brings us to today....

I used some clear packing tape to create a crude tub for the rear, bottom of the box corner. Then I poured the epoxy in, on top of the zinc. This is the only way I can think of to be absolutely sure that everything gets properly covered, even the stuff that's hidden. Although I will rag on the Ford's fit and finish, their use of total immersion priming did help these trucks last as well as they did (well, some of them, anyway).

First image shows the view looking down from inside the tail light location, last image shows my "high tech" recovery method, since I had to mix up about a pint of the stuff. The good news is the unused extra will stay viable for a few days if I keep it cool and covered.
 

Attachments

  • IMG_2217.JPG
    IMG_2217.JPG
    565.9 KB · Views: 22
  • IMG_2220.JPG
    IMG_2220.JPG
    180.4 KB · Views: 22
  • IMG_2221.JPG
    IMG_2221.JPG
    394.3 KB · Views: 19
  • IMG_2218.JPG
    IMG_2218.JPG
    363.8 KB · Views: 21

junk

Full Access Member
Joined
May 25, 2006
Posts
1,773
Reaction score
63
Location
Paullina, IA
Looks great. Nice and straight. You are right these poor trucks were never really straight from the factory.
 

david85

Full Access Member
Joined
Feb 21, 2008
Posts
4,829
Reaction score
1,095
Location
Campbell River, B.C.
More work. More to go.

The passenger side had a few distortions at the rear of the wheel arch. Most of it bashed and pulled out, but I will need to fill some of it. The photo from the inside shows the rippling of the wheel arch sheet metal. Its not so easy to see on the outside, but the marked lines show the general areas that need to be straightened out.

As for the photo with my hand, I'm pointing to two welds that I added to help reinforce that rear box pillar. These trucks were bad for cracking welds in this area and this one was no exception. Simply letting the tailgate fall open enough times can be enough to cause damage. The factory welds were good this time, but the design put pulling stress instead of shearing stress on the joint, so cracks simply formed next to the pinch welds.
 

Attachments

  • IMG_2225.JPG
    IMG_2225.JPG
    495.3 KB · Views: 16
  • IMG_2226.JPG
    IMG_2226.JPG
    431 KB · Views: 15
  • IMG_2227.JPG
    IMG_2227.JPG
    377.4 KB · Views: 18
  • IMG_2228.JPG
    IMG_2228.JPG
    529.8 KB · Views: 17
  • IMG_2229.JPG
    IMG_2229.JPG
    530 KB · Views: 20
  • IMG_2230.JPG
    IMG_2230.JPG
    559.3 KB · Views: 17

david85

Full Access Member
Joined
Feb 21, 2008
Posts
4,829
Reaction score
1,095
Location
Campbell River, B.C.
Well, I think I'm just about done with the tin bashing for the box sides. There are still some ripples, scratches and other minor stuff, but that should sand out with urethane (later).

So today I was welding holes in the cargo bed. I was dreading this but it wasn't so bad. There were a total of 17 holes, and about 5 inches worth of cracks spreading from one poorly located tie down bolt. Pretty much took the whole day but at least its done.

The closeups show both sides of the 2" hole that was put in for what looks like a camper or trailer plug. There was some minor warping for this one, but who cares with so many dents. If I go ahead with a linex job, it won't matter.

Now I just need to decide if I should try replacing the front wall, or straighten it the best I can and call it good. The devil on my shoulder is telling me to cut it out and make one from scratch with a square tube reinforcing at the top...Maybe I can even find a galvanized square tube...stupid devil...:mad:
 

Attachments

  • Patched cargo box holes.jpg
    Patched cargo box holes.jpg
    66.8 KB · Views: 17
  • IMG_2258.JPG
    IMG_2258.JPG
    777 KB · Views: 13
  • IMG_2265.JPG
    IMG_2265.JPG
    387 KB · Views: 13

david85

Full Access Member
Joined
Feb 21, 2008
Posts
4,829
Reaction score
1,095
Location
Campbell River, B.C.
Closeup on the repairs for the 5th wheel hitch bolts (or at least I THINK that's what they were for:dunno
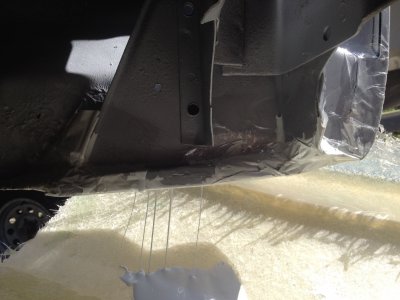
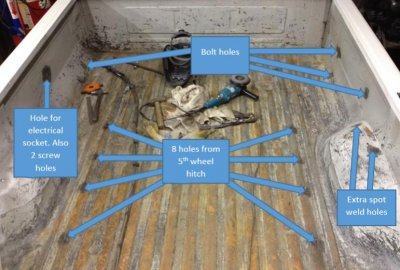
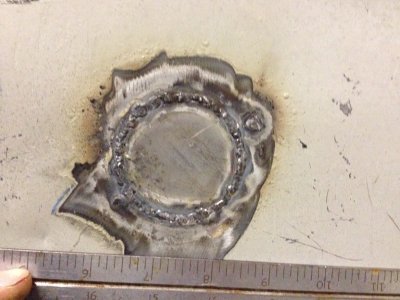
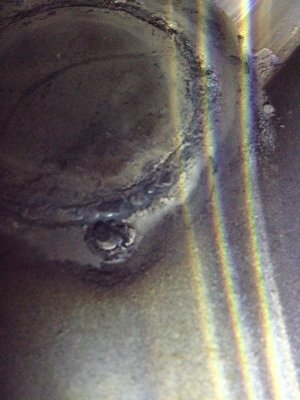
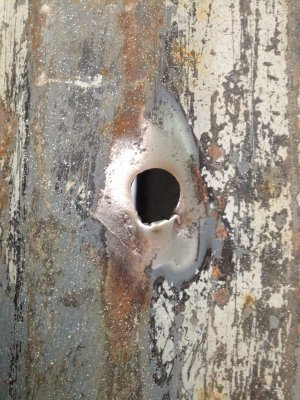
). Each hole was about 1/2" after shaping the opening and plug to fit properly.

The scary part is whatever they had bolted in here, it was only holding in the tin.
 

Attachments

  • IMG_2254.JPG
    IMG_2254.JPG
    521.6 KB · Views: 11
  • IMG_2255.jpg
    IMG_2255.jpg
    360.2 KB · Views: 10
  • IMG_2256.jpg
    IMG_2256.jpg
    381.9 KB · Views: 11
  • IMG_2257.JPG
    IMG_2257.JPG
    483.5 KB · Views: 12

david85

Full Access Member
Joined
Feb 21, 2008
Posts
4,829
Reaction score
1,095
Location
Campbell River, B.C.
Took the box off last night. Looks like I won't have to cut the front wall out. Its not perfect, but I'm satisfied with how much it straightened out. I'm also thinking to reinforce the top of the wall. A rounded corner 1.5" square tube will fit perfectly. I'm holding an aluminum piece, but I'll have to search for a steel pipe. This would also give me a proper hardpoint for tie-downs in the future.
 

Attachments

  • IMG_2268.JPG
    IMG_2268.JPG
    521.6 KB · Views: 14
  • IMG_2272.JPG
    IMG_2272.JPG
    508 KB · Views: 14
  • IMG_2275.JPG
    IMG_2275.JPG
    437.1 KB · Views: 13
  • IMG_2269.JPG
    IMG_2269.JPG
    617.3 KB · Views: 15
  • IMG_2273.JPG
    IMG_2273.JPG
    527.1 KB · Views: 14

Forum statistics

Threads
91,296
Posts
1,129,883
Members
24,108
Latest member
Lance

Members online

Top