Tin bashing

david85

Full Access Member
Joined
Feb 21, 2008
Posts
4,827
Reaction score
1,088
Location
Campbell River, B.C.
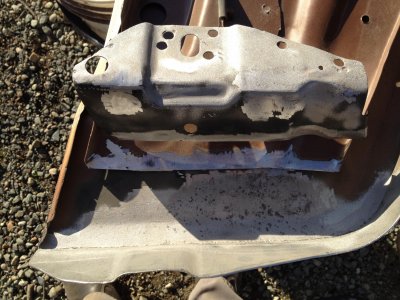
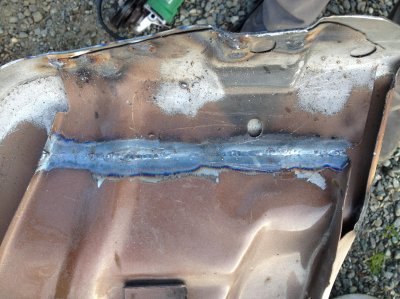
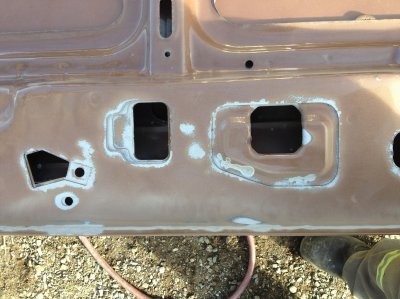
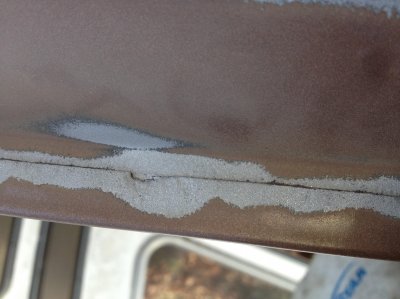
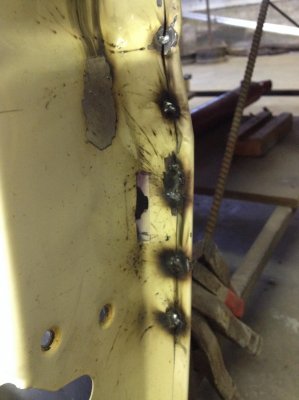
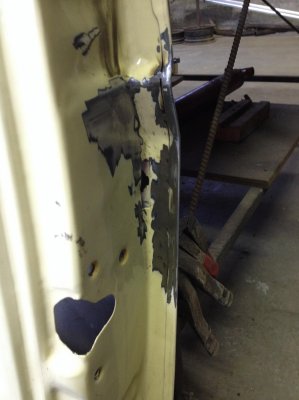
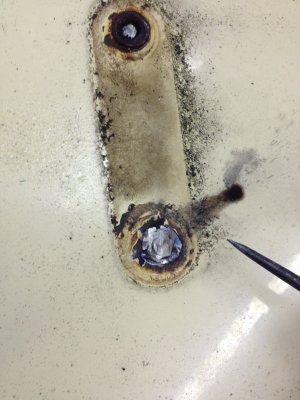
Slow pass is what causes the film of slag to get thicker and more noticeable. You're right, the faster you can progress, the better. Slow progress across any steel I've welded resulted on more slag buildup (black surface). With aluminum I can wash over the same spot a few times (still not advisable, but more forgiving than ferrous), but not with steel. One pass is really all the chance you get. The second adds noticeable amounts of surface slag and can cause burning and porosity. The reason I avoided a fast, hot pass was the risk of a blow through if the edges failed to blend while progressing. Since I was dealing with dissimilar thicknesses, and some pitting on the inside of the original sheet (which magnified the difference in heat capacity), I wanted to avoid this, which is why I opted for a slower pass. The black slag simply polished off to reveal nice bright solid silver underneath. After all, this isn't pressure welding;Sweet

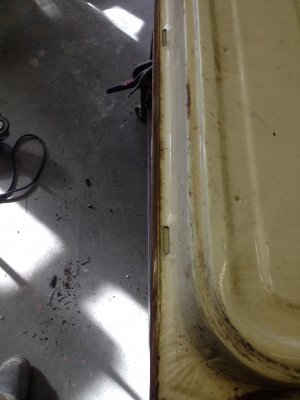
I've never done a lap joint with a welded patch probably and never will. Aside from being a crud/moisture trap, the connection will shift after each and every tack. This causes the weld to successively pull the two pieces closer and closer together like tightening the skin on a drum. Since most body panels have some kind of outward curve, this causes major warping by the time the weld is finished. At least with a tight, square butt joint, the two pieces are locked against each other and offer some resistance to the weld shrinkage. Does it add tension? Sure does, but at least the metal itself can't move anywhere near as much as with a floating lap joint. It was critical when I did the extended cab corners on my F150. I used the entire patch panel on one side. Clean from the rear wall all the way to the B -pillar halfway up the belt line. To this day that side of the truck is tight due to the tension in the weld but it stayed very straight and hardly any filler was needed.

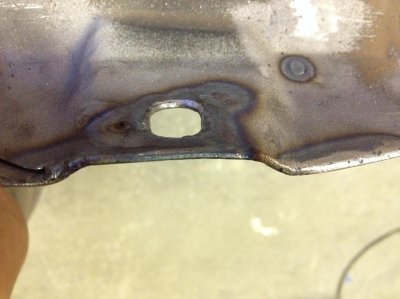
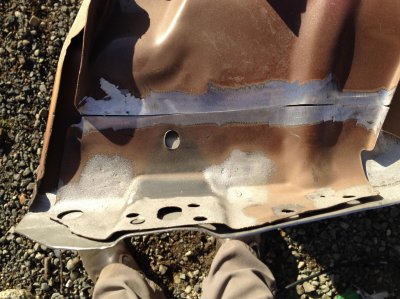
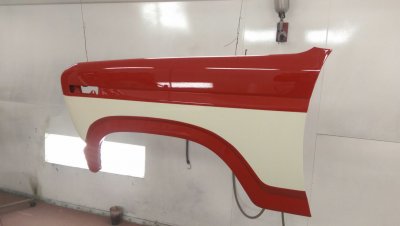
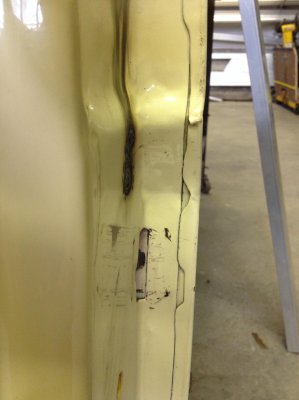
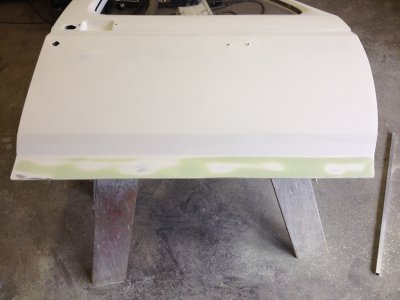
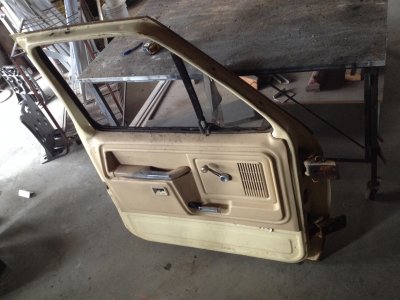
But for fenders like this, the area being worked on is very small,, its close to the edge of the part, and there are many corners and bends to control, and even hide warpage. The simply truth is, you could use almost any method you want for prepping and welding a small patch like this. Big sections of a quarter panel are where it gets interesting, and that's something I've never done from start to finish. I'd sooner replace the whole panel.

I've also heard some advantages in using lap joined epoxy bonded steel patch panels for non structural repairs. Supposedly the steel rips before the bond fails. In theory, if done right, the lap joint itself is completely sealed by the epoxy itself. Since no heat is put into the original panel, burning of factory paint and primer isn't an issue either so it "MAY" last well. I have no first hand experience though. From what I did see however, I can spot a glue on wheel arch repair on a pickup bedside just be eyeballing the extra convex shape. Overall, I'd still prefer to take my chances with welding.
 

david85

Full Access Member
Joined
Feb 21, 2008
Posts
4,827
Reaction score
1,088
Location
Campbell River, B.C.
Been a while but I'm getting back to it.

The fenders are actually finished and painted at this point but here are some of the missing steps along the way.
As you can see, the inner fender root at the rear were welded back on using autogenuos* welding on the upper cut. On the lower cut, I started with a few plug welds but then blended the outer edges together. Even the hole for the mounting bolt of the fender was sealed and then ground smooth. This means no path for moisture to creep in between two sharp edges of the inner and outer panel steel.

I ended up getting ahead of myself and not taking photos of the primer stage, but basically I carefully poured epoxy primer into the panel and then sloshed it around to make sure all the hidden stuff was safe. I did buy weld through primer but just couldn't bring myself to trust it. There's good reason why car body these days are totally immersed in primer before the paint goes on and I wanted to get as close to that as possible.

As for the color, my first plan was to keep the "Light Canyon Red" (Primary color) and replace the dark read bar with white. I wasn't really sold on the stock red colour but thought it would keep things simple not to change it. The painter wasn't able to find a code for the ford canyon red, so he showed me a stock paint chip that was similar, but a bit darker and more, well... red. The canyon red has more of an orange dusty tinge to it. He was able to find a code for the "Ford Special White" that I wanted though. It has a fair amount of yellow in it, but it goes well with the new red, and I'm glad he suggested it.

*Now that I know what its called, I have no excuse not to use the correct terminologyLOL
 

Attachments

  • IMG_1274.jpg
    IMG_1274.jpg
    991.2 KB · Views: 38
  • IMG_1275.jpg
    IMG_1275.jpg
    1,003 KB · Views: 41
  • IMG_1279.jpg
    IMG_1279.jpg
    848.9 KB · Views: 36
  • IMG_1273.jpg
    IMG_1273.jpg
    972 KB · Views: 35
  • IMAG1129.jpg
    IMAG1129.jpg
    105.8 KB · Views: 46
Last edited:

david85

Full Access Member
Joined
Feb 21, 2008
Posts
4,827
Reaction score
1,088
Location
Campbell River, B.C.
Not much work was needed on the hood. One minor ding had to be filled and that was about it for the top side.

The underside was carefully inspected and I spent lots of time spot shotting the minor surface rust that creeped from all those sharp edges at the front. The worst of it was (as usual) at the front fold of the hood. Some of the pitting actually made it through the outer fold, but it was still fairly minor (I can't imagine doing this kind of stuff without a sandblaster!;Sweet). After I was satisfied with the rust removal, I covered all the raw steel with epoxy again. The perimeter fold was also sealed with the same urethane sealer I used on the fender arches. THEN the whole thing was covered in urethane 2000 primer before being scuffed/wet sanded and then handing it off to the painter. But again, I don't have photos of the primer stage. I'll try and do better next time.
 

Attachments

  • IMG_1281.jpg
    IMG_1281.jpg
    970.2 KB · Views: 22
  • IMG_1282.jpg
    IMG_1282.jpg
    954.3 KB · Views: 21
  • IMG_1283.jpg
    IMG_1283.jpg
    840.3 KB · Views: 22

david85

Full Access Member
Joined
Feb 21, 2008
Posts
4,827
Reaction score
1,088
Location
Campbell River, B.C.
OK. Doors.

So far the passenger side looks decent. I haven't power washed the driver's side yet but I don't expect to find anything major.

Like the other parts, these are supposedly ford OEM replacements, so they have the spray in sound deadening and as an added bonus - actually fit the truck jamb! (unlike the crappy aftermarket door currently installed on the driver's side). I dry fit the passenger side shell on the truck yesterday to be 1000% sure no bashing or torquing would be required once the come back from paint.

Aside from minor sand basting and grinding to remove surface rust (and uncover two pin holes), I decided to make a few improvements on the door. The first was to increase the torsional stiffness by adding a larger gusset plate under the vent window frame. There is a tab here that joins the inner and outer halves of the door shell but its too small and flexes when the door is twisted. It might not be enough to matter, but the old driver's side door on my truck did develop cracks at the tab (no doubt the severely rotted out bottom seam didn't help). The only mod required will be to the plastic inner door cover, and it won't be visible once installed. It made a big difference in how easily I could twist the door by hand, so I'm happy with it.

My other mod was to add a stiffener spar on the outer skin behind the upper body line. I did this already on the driver's side door that is currently on the truck, and it worked very well. I used the urethane sealer to insulate the spar from the door skin and welded each end to the inside of the door shell. My plan is to re-enforce the inner door skin around the handle area too, but I'm not yet 100% sure how to do this. The idea is to eliminate (reduce) flex in the grab handle when pulling the door closed from the inside. Yeah, I know... nit picking, but hey, I'm having fun in the process.

Speaking of nit picking....One thing I did find with this door was the inner shell was properly secured under the fold next to the lock cylinder. I'm guessing maybe the blank they used to stamp the inner door shell was just a little shy of a full pattern. No biggie. I fixed it with a few tack welds that were then smoothed flat. Once primed, seam-sealed and painted, this minor defect will be erased from history.;Sweet

The new doors will also eliminate the drag-shoot, swing out towing mirrors that the truck came from factory with. The big mirrors are nice and look cool, but I never use them in the wide position and I don't feel like modifying these doors to accommodate them. I'm also hoping the lower profile fold away style mirrors will reduce the wind noise a little as well. Wind noise will be the subject of considerable experimentation later on. I may even try to double glaze the doors but I'll have to research that a little more when the time comes
 

Attachments

  • IMG_1366.JPG
    IMG_1366.JPG
    477.2 KB · Views: 29
  • IMG_1368.JPG
    IMG_1368.JPG
    398.7 KB · Views: 30
  • IMG_1369.JPG
    IMG_1369.JPG
    404.1 KB · Views: 26
  • IMG_1370.JPG
    IMG_1370.JPG
    454.7 KB · Views: 27
  • IMG_1371.jpg
    IMG_1371.jpg
    778 KB · Views: 25
  • IMG_1372.jpg
    IMG_1372.jpg
    656.6 KB · Views: 25
  • IMG_1373.jpg
    IMG_1373.jpg
    763.1 KB · Views: 20
  • IMG_1374.jpg
    IMG_1374.jpg
    583.7 KB · Views: 20

david85

Full Access Member
Joined
Feb 21, 2008
Posts
4,827
Reaction score
1,088
Location
Campbell River, B.C.
The inside spar is finished. It doesn't interfere with the inner panel cover but I kept it bolt on just in case I ever have to remove it for any reason down the line. As with the other mods, its not rock solid, just much stiffer than before.
 

Attachments

  • IMG_1376.JPG
    IMG_1376.JPG
    297 KB · Views: 107

david85

Full Access Member
Joined
Feb 21, 2008
Posts
4,827
Reaction score
1,088
Location
Campbell River, B.C.
Passenger side door is almost ready for paint.

Both sides are epoxy coated, while the inside already has the urethane. First the epoxy went down, then the folded edges were seam sealed, then urethane goes down last. I took a close up on the lower corner of the door to show how clean it looks after everything is finished. The hood looks even better now that the paint is on.;Sweet

I decided to do a quick skin coat of filler on the lower bodyline since there was one minor ding, and some wavy sheet metal. Max thickness of filler is probably 1/32". I might have been able to get the same results with urethane primer, but wasn't comfortable going that thick with it. Anyway, I'm happy with the shape now.

I'm hoping to lay down the final coat of urethane on the outside today if I can get that fresh coat of epoxy to cure fast enough to sand. Its a good product but has a pretty slow cure time.
 

Attachments

  • IMG_1377.JPG
    IMG_1377.JPG
    505.1 KB · Views: 25
  • IMG_1378.JPG
    IMG_1378.JPG
    429.9 KB · Views: 23
  • IMG_1379.JPG
    IMG_1379.JPG
    384.7 KB · Views: 23
  • IMG_1380.JPG
    IMG_1380.JPG
    512.3 KB · Views: 23
  • IMG_1382.JPG
    IMG_1382.JPG
    432 KB · Views: 22

bbjordan

Snow Monkey
Joined
Feb 24, 2011
Posts
1,421
Reaction score
393
Location
Ashern Manitoba
The inside spar is finished. It doesn't interfere with the inner panel cover but I kept it bolt on just in case I ever have to remove it for any reason down the line. As with the other mods, its not rock solid, just much stiffer than before.

That is genious! Probably a safety upgrade as well!

Nice work btw. ;Sweet
 

david85

Full Access Member
Joined
Feb 21, 2008
Posts
4,827
Reaction score
1,088
Location
Campbell River, B.C.
While waiting for that epoxy to do its thing, I dug the driver's side door out of storage. As expected its not in as good condition.

There was one wide, shallow dent just in front of the door handle below the body line, and it looks like who ever installed the handle over tightened the rear bolt, deforming the sheet metal. Both issues are fixed now.

Another problem was the bolts for the lower mirror bracket refused to let go. I did my best but ended up snapping both off and had to grind out what was left of each nut. I'm not too worried about it because there are kits available to replace these sheet metal nuts. I think it was LMC that carried it...but I'll have to look into that. I'm even tempted to make something because I hate waiting for shipping over the border.

Biggest disappointment was the bottom door edge/fold. The visible pitting is not as bad as on the other door, but there is a slight expansion happening at the lower lip. So rust is in there. I might just let it slide but I'll have to take a much closer look after power washing it inside out. I'm thinking to just sand blast the crap out of the inside and outside and then pour epoxy into it. THEN undercoat, oil, fluid film...etc.... I REALLY don't want to pull open that fold but I tend to get fussy about these things.:frustrate

The triangle window track is also pretty much rotted away. The one currently in my truck should be in better shape though, so I'm not worried about it.
 

Attachments

  • IMG_1383.JPG
    IMG_1383.JPG
    647.7 KB · Views: 19
  • IMG_1384.JPG
    IMG_1384.JPG
    344.5 KB · Views: 20
  • IMG_1386.JPG
    IMG_1386.JPG
    280.1 KB · Views: 17
  • IMG_1387.JPG
    IMG_1387.JPG
    295.2 KB · Views: 17
  • IMG_1388.JPG
    IMG_1388.JPG
    227.3 KB · Views: 17
  • IMG_1389.JPG
    IMG_1389.JPG
    203.9 KB · Views: 18
  • IMG_1390.JPG
    IMG_1390.JPG
    573.7 KB · Views: 17
  • IMG_1391.JPG
    IMG_1391.JPG
    467.5 KB · Views: 16

david85

Full Access Member
Joined
Feb 21, 2008
Posts
4,827
Reaction score
1,088
Location
Campbell River, B.C.
Very nice work! ;Sweet
I like the idea of using removable door stiffeners.

That is genious! Probably a safety upgrade as well!

Nice work btw. ;Sweet


I'm actually trying to conjure up a bracket that ties the inside and outside stiffeners together in a way that adds backing to the lower mirror bracket (roughly an "L" shape). I need to double check that it won't interfere with the window regulator.
 

mccall52

Full Access Member
Joined
May 19, 2013
Posts
131
Reaction score
0
Location
Woodstock, GA
Glad to see the door lock knob hole in the top is there, since they appear to be the early models with the weird lock slider below the armrest.
 

david85

Full Access Member
Joined
Feb 21, 2008
Posts
4,827
Reaction score
1,088
Location
Campbell River, B.C.
SCORE!!!!!

YES!!! Went to Lodco (Home grown western Canadian parts retailer) and they had the nuts I needed. Won't have to wait for shipping from the mainland or USA afterall:hail

It seems like everyone has a different name for these things but "nutsert" or "rivet nut" come up. I already forgot what the parts guy called them. I'll still need to add some kind of spacer behind the flange since these ones are not as thick as what came off. If I use them as is, the tin door skin will get pilled into the mirror bracket and stretch/crack the paint in the process.
 

Attachments

  • Nutserts.jpg
    Nutserts.jpg
    234 KB · Views: 77

david85

Full Access Member
Joined
Feb 21, 2008
Posts
4,827
Reaction score
1,088
Location
Campbell River, B.C.
Well, here's the solution.

I took a stainless steel washer and welded it the collar of the nut, ground it clean and installed it in a test piece of 16 ga steel. The finished flange is the same thickness as the insulator plastic so the door skin won't be pulled when the bolts are tightened. These are wider than factory, but modding the plastic won't be a problem.

FYI, this style of nut is available in stainless steel, but finding anything that exotic in my town? Not happening. And I can't really afford to wait several weeks to get something like this:
http://www.suncorstainless.com/rivet-nut-insert

At any rate, the wider flange, and the fact that its stainless will hopefully head off any rust problems from the lower bracket. The nut expands as its compressed so it "SHOULD" be water tight. Or at the very least, not vibrate loose of any paint/sealer that I intend to drown it in.
 

Attachments

  • IMG_1393.JPG
    IMG_1393.JPG
    192.1 KB · Views: 16
  • IMG_1394.JPG
    IMG_1394.JPG
    202.6 KB · Views: 15
  • IMG_1395.JPG
    IMG_1395.JPG
    243 KB · Views: 15
  • IMG_1397.JPG
    IMG_1397.JPG
    302.8 KB · Views: 15
  • IMG_1398.JPG
    IMG_1398.JPG
    271.9 KB · Views: 14

junk

Full Access Member
Joined
May 25, 2006
Posts
1,773
Reaction score
63
Location
Paullina, IA
Very cool I love nutserts. They are handy for those blind nut applications. I would maybe think about a little clear silicone before the screws go in to seal them. Or maybe some antiseize. But wouldn't want that possibly running down the paint.

First class work! Looking Awesome!
 

david85

Full Access Member
Joined
Feb 21, 2008
Posts
4,827
Reaction score
1,088
Location
Campbell River, B.C.
Very cool I love nutserts. They are handy for those blind nut applications. I would maybe think about a little clear silicone before the screws go in to seal them. Or maybe some antiseize. But wouldn't want that possibly running down the paint.

First class work! Looking Awesome!

Hey, I'll take a little run of grease over bubbling rust any day. I might try sealing the bolts in when I install it but I'll decide when I get there. It will be a while before I'm at that stage though.

I sandblasted the bottom door edge and it doesn't look too bad. The lifted lip happens to line up with some of the spray in foam applied inside at the factory, so it may not be rust inside there after all. It could just be a lip that was never fully pressed down. In any case, I decided it wasn't worth opening up to make sure. Instead shot the inside of the door with fine silica sand (YUCK!), then cleaned it all out. Wiped it down with acetone and then poured some zinc rich epoxy primer inside the door. Leaned the door around to spread it and then cut the tape I had over the drain holes to recover any excess. Both doors are now treated with this method.

I may still decide to seam seal on top of this, but I'll probably just shoot it with a good quality rubberized undercoating and then spray Fluid Film in the doors once that's set up. Fluid Film clings, saturates and creeps uphill so it will get everywhere, given enough time. Any one of these steps is above and beyond what ford deemed necessary at the factory, so I hope to never have a rusted door seam on this truck again. I still have to test fit the driver's side door shell before I go too nuts in the resto work. Right now I'm waiting on the epoxy to set up enough that I can handle the door again.
 

Attachments

  • IMG_1400.JPG
    IMG_1400.JPG
    420 KB · Views: 15
  • IMG_1401.JPG
    IMG_1401.JPG
    435.6 KB · Views: 20
Top