Crewcab Project

catbird7

Full Access Member
Joined
Feb 15, 2011
Posts
1,598
Reaction score
1,347
Location
PA
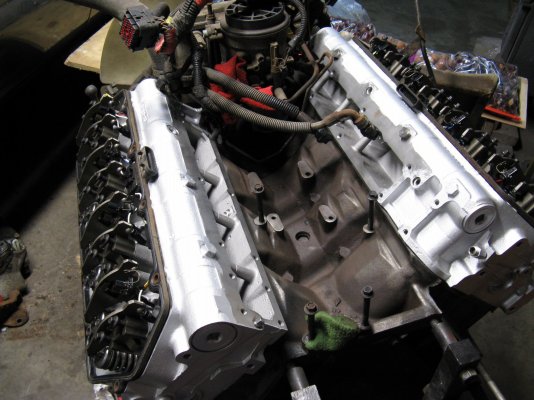
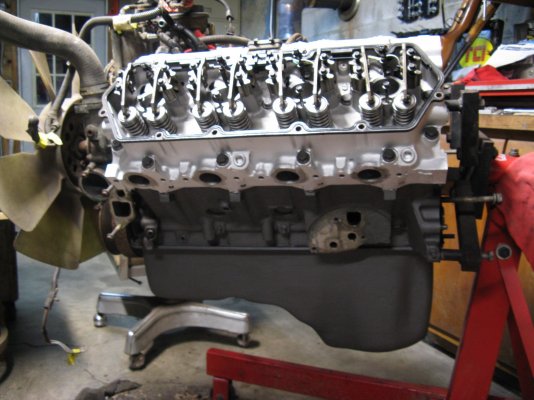
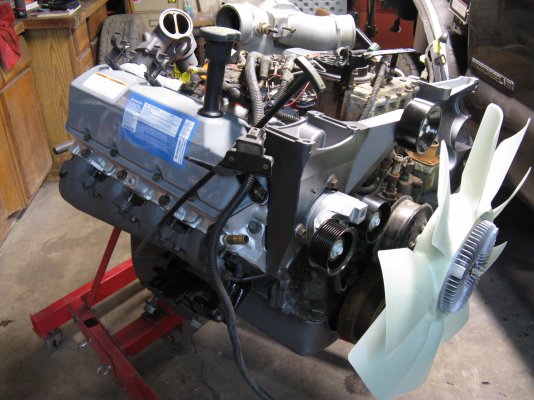
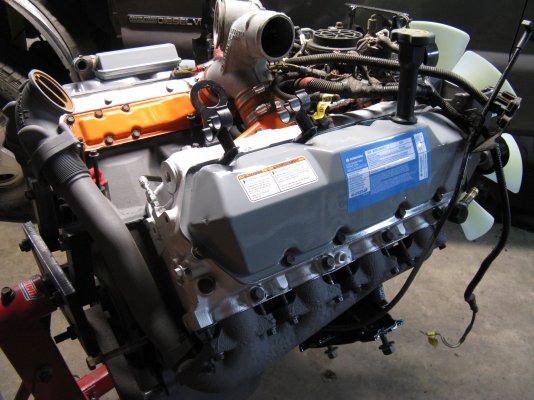
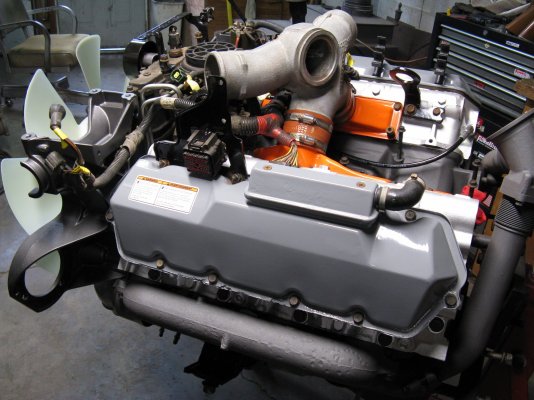
Hunting season is winding down and no grass to mow, so I finally have time to dedicate to this project. Started disassembly of the low mileage 7.3 that had the cylinder head with rust hole. Pulled both heads and the cylinder walls look great.
You must be registered for see images attach
 

IDIBRONCO

IDIBRONCO
Joined
Feb 5, 2010
Posts
12,235
Reaction score
10,925
Location
edmond, ks
Judging by the cross hatch in the three cylinder that show, it looks like it's barley been ran after the cylinders were honed.
 

catbird7

Full Access Member
Joined
Feb 15, 2011
Posts
1,598
Reaction score
1,347
Location
PA
I know the fella who bought this truck new, I bought it from him as a parts truck. It had around 130,000 miles on it. He used rotella oil and changed regularly. It looks great on the inside and terrible on the outside. Plow truck with tons of salt exposure. I had to drop two wrench sizes on the head bolts that were not under the value covers. And over course don't forget the cylinder head had a hole rusted through it.
 

IDIBRONCO

IDIBRONCO
Joined
Feb 5, 2010
Posts
12,235
Reaction score
10,925
Location
edmond, ks
I still find that crazy. I'm not doubting it at all, but I just can't imagine that. It's completely beyond my experience.
 

catbird7

Full Access Member
Joined
Feb 15, 2011
Posts
1,598
Reaction score
1,347
Location
PA
Salt and salt brine they put on our roads are very corrosive. I hose down underside of our vehicles with diesel and motor oil mix. Also squirt regular motor oil inside the doors till it comes out of the weep holes.
 

catbird7

Full Access Member
Joined
Feb 15, 2011
Posts
1,598
Reaction score
1,347
Location
PA
Finally got the engine cleaned up and torqued the heads down. New o-rings on the injectors next.
 

Attachments

  • IMG_1010.JPG
    IMG_1010.JPG
    324.6 KB · Views: 8
  • IMG_1013.JPG
    IMG_1013.JPG
    271.8 KB · Views: 8

catbird7

Full Access Member
Joined
Feb 15, 2011
Posts
1,598
Reaction score
1,347
Location
PA
Replaced all of the o-rings on each injector and installed. Also installed rocker assembly and push rods. Last photo, this was on two of the injectors. This engine was never disassembled from new so not sure what it is???
 

Attachments

  • IMG_1017.JPG
    IMG_1017.JPG
    285 KB · Views: 12
  • IMG_1019.JPG
    IMG_1019.JPG
    333.1 KB · Views: 11
  • IMG_1022.JPG
    IMG_1022.JPG
    248.7 KB · Views: 11

aggiediesel01

Full Access Member
Joined
Dec 29, 2016
Posts
531
Reaction score
417
Location
Houston, TX
Where were they on the injectors? Looks kind of like an oring was sheared during install and the sheared part was squished by the body for years
 

catbird7

Full Access Member
Joined
Feb 15, 2011
Posts
1,598
Reaction score
1,347
Location
PA
Makes sense. Both were on the "stem" / "shaft" (not sure what the proper name is) between the bottom o-ring and the one in the middle. One injector on each side of the engine.
 

catbird7

Full Access Member
Joined
Feb 15, 2011
Posts
1,598
Reaction score
1,347
Location
PA
More cleaning, does it ever end! Valve covers, dog box, and lower rad fitting bead blasted and acid washed. Next they get painted with high temp POR 15. Also swapped out the hard fuel lines to new flexible. Getting close to dropping this thing in....
 

Attachments

  • IMG_1039.JPG
    IMG_1039.JPG
    257.2 KB · Views: 4
  • IMG_1041.JPG
    IMG_1041.JPG
    330.3 KB · Views: 4

catbird7

Full Access Member
Joined
Feb 15, 2011
Posts
1,598
Reaction score
1,347
Location
PA
New fuel lines installed + a bunch of Ford Motorcraft parts waiting to be installed.
 

Attachments

  • IMG_1049.JPG
    IMG_1049.JPG
    295.6 KB · Views: 7
  • IMG_1047.JPG
    IMG_1047.JPG
    283.1 KB · Views: 7

catbird7

Full Access Member
Joined
Feb 15, 2011
Posts
1,598
Reaction score
1,347
Location
PA
Clutch comparison. Top center is what I bought to install. Lower left is South bend from the crewcab (note it has one broken spring and one missing). Lower right is factory original from the parts / plow truck. Comparing all note the different designs, specifically size and number of springs as well as the width of the contact area on each disc.
 

Attachments

  • IMG_1043.JPG
    IMG_1043.JPG
    375.8 KB · Views: 13

lotzagoodstuff

Supporting Member
Supporting Member
Joined
May 19, 2007
Posts
2,726
Reaction score
668
Location
Carmel, IN
I’m sure you already know this, but Southbend can rebuild that clutch. It looks like the one you bought is pretty heavy, but you can’t have too many spares.
 

catbird7

Full Access Member
Joined
Feb 15, 2011
Posts
1,598
Reaction score
1,347
Location
PA
Thanks, I was not aware they are serviceable. Just about have the engine ready to drop in. Replaced a ton of parts. I'll take a few photos before it goes in. It has been plenty cold here so lots of guilt free garage time.
 

catbird7

Full Access Member
Joined
Feb 15, 2011
Posts
1,598
Reaction score
1,347
Location
PA
Engine ready to drop in. "Finally"!
 

Attachments

  • IMG_1053.JPG
    IMG_1053.JPG
    323.9 KB · Views: 9
  • IMG_1055.JPG
    IMG_1055.JPG
    322.7 KB · Views: 9
  • IMG_1057.JPG
    IMG_1057.JPG
    327.1 KB · Views: 9

Latest posts

Forum statistics

Threads
91,217
Posts
1,128,504
Members
24,045
Latest member
Ramtough01
Top