7.3 Head Gasket Replacement-ARP Head Stud Install

79jasper

Chickenhawk
Joined
Oct 13, 2012
Posts
17,367
Reaction score
1,930
Location
Collinsville, Oklahoma
Ah, throw it on some Jack stands and pull em. Lol could also benefit from it sitting lower.

Sent from my SAMSUNG-SM-G935A using Tapatalk
 

riotwarrior

Supporting Member
Supporting Member
Joined
Sep 19, 2006
Posts
14,778
Reaction score
483
Location
Cawston BC. Canada
Looking fine so far...

Well that organizer is pretty cool...looking at those online and the valve one too....but....wood is cheap...and so am I... ;Poke

If things go well my remaned 7.3 will be getting some mods soon..

Thanks for sharing....I enjoy seeing how others go about there work...and the tyre off is good idea
 

tbrumm

Full Access Member
Joined
Mar 24, 2012
Posts
1,224
Reaction score
187
Location
Richland Center, WI
Thanks for sharing....I enjoy seeing how others go about there work...

Thanks, Al. Unfortunately, the way I go about my work is in my driveway as I don't have a garage. And even if I did I probably wouldn't be able to get the CC all the way in anyway. I also have limited "tooling", but am acquiring more all the time. The main point I want to make is that these old trucks CAN be repaired in your driveway with limited tools and limited experience. Unlike the new trucks that need a "cab lifting fixture" just to be able work on the engine. The worse part of the whole thing (as Mel stated in his HG article) is turning that first bolt and tearing down a vehicle that is running perfectly fine (with the exception of a small water leak in my case).
 

tbrumm

Full Access Member
Joined
Mar 24, 2012
Posts
1,224
Reaction score
187
Location
Richland Center, WI
Okay, so teardowns always bring about the need for parts inspection, and my heads will going to the machine shop so for cleaning, inspection, new valve stem seals and new OEM valve springs, and whatever else the machinist may find needs to be done (hopefully not much as the engine only has 108K on it at this point). Just my quick, limited inspection shows that none of the pre-cups have any cracks;Sweet
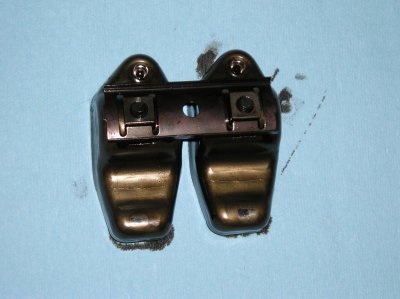
, cross hatching is still visible in all cylinders with no appreciable ring ridge, rockers all look good, etc. BUT, I did find a couple of things that may be of concern and would appreciate some feedback on. The end of the intake valve stem on No. 3 has some "roughness".
You must be registered for see images attach

I looked at the corresponding rocker and it is fine - just a smooth shiny spot on it. I am thinking the valve was installed this way from the factory? Is it worth worrying about? I also found that No. 7 has way more carbon buildup on the underside of the head than any of the other cylinders. Leaking injector or something else? The injector is a newer Stanadyne from Russ that he installed a good used pintle in after I damaged it on install. (By the way, although I did the pintle damage, Russ helped me out and put the good used pintle in the injector and all I did was pay for shipping there and back - Thanks again Russ!)
You must be registered for see images attach

Before teardown, I drained the coolant and put in tap water with 2 gallons of Restore Plus acid based coolant flush. I ran this in the engine for about 2 hours and then drained. I then put tap water back in and ran the truck for a couple of hours and drained and flushed and flushed some more. The cooling passages were nice and clean when I started working on this project, but the truck has now sat without coolant in it for two weeks and now it is all orange flash rust. Sigh, it just makes me sick looking at it. So now I am faced with using the Restore Plus again after I have the truck back together to get rid of the flash rust (read that as "using an acid based coolant flush on my nice new gaskets and oil cooler o-rings).
And speaking of the oil cooler, I haven't taken it out yet but the cooler pipe looks pretty bad - I will see how it cleans up with the sandblaster.
You must be registered for see images attach
 

tbrumm

Full Access Member
Joined
Mar 24, 2012
Posts
1,224
Reaction score
187
Location
Richland Center, WI
Thanks, Al. Already have run a coolant filter for along time. The vinegar would probably be more gentle on the gaskets than the Restore Plus. How much vinegar do you usually put in the 8 gallon system?
 

tbrumm

Full Access Member
Joined
Mar 24, 2012
Posts
1,224
Reaction score
187
Location
Richland Center, WI
By the way, I have a complete set of 34 - 7.3 headbolts just removed. Seem like they are still in decent shape. I am putting in studs so don't need 'em. If anybody wants 'em I will give 'em to ya - just pay the shipping.
You must be registered for see images attach
 

typ4

Supporting Member
Supporting Member
Joined
Dec 24, 2005
Posts
9,109
Reaction score
1,393
Location
Newberg,OR
Check that guide on that valve. That rocker almost has to have some tip or fulcrum wear.
 

tbrumm

Full Access Member
Joined
Mar 24, 2012
Posts
1,224
Reaction score
187
Location
Richland Center, WI
Thanks, Russ. I will see if I can post up a pic of that rocker. The tip looked okay to me, but what do i know? The heads are going to the shop so I will have the machinist check it out.
 

tbrumm

Full Access Member
Joined
Mar 24, 2012
Posts
1,224
Reaction score
187
Location
Richland Center, WI
Check that guide on that valve. That rocker almost has to have some tip or fulcrum wear.

Here is pic of the tip of the rocker that corresponds with that ugly valve tip. There does appear to be bit of a "ridge" on the tip.
The rocker in question is on the right in the pic.
You must be registered for see images attach
 

Attachments

  • 001.JPG
    001.JPG
    779.3 KB · Views: 119

tbrumm

Full Access Member
Joined
Mar 24, 2012
Posts
1,224
Reaction score
187
Location
Richland Center, WI
Okay, been away for a week for the wedding of my Wife's niece in upstate New York. Of course, we did not take the truck but took the Wife's '08 Ford Edge. AC worked great, and it needed to with two dogs in the car - don't want them to do any "heavy-breathing" from being overheated. Drive was uneventful except for I-80 being a parking lot south between Chicago and Gary, In. Anyway, back to the problem at hand. I bought a T83T-6513-A valve spring compressor and removed the valve spring from the No. 3 intake valve.
You must be registered for see images attach

The valve itself looks good except for the roughness on top of the stem.
You must be registered for see images attach

So after I had the spring removed, I set up my half thou indicator on magnetic base and checked the clearance between the valve stem and valve guide.
You must be registered for see images attach

This is not the exact service manual procedure for checking this clearance, as the manual calls for a special tool (Valve stem clearance tool "TOOL-6505-F") to be clamped on the valve stem. The manual states the service clearance spec. is 0.0055". The guide to stem clearance on this valve, as measured with the dial indicator setup shown, is just under 0.0030". I rotated the valve to several different positions within the guide and "pushed" the valve stem toward the dial indicator with hand pressure. Just my inexperienced opinion, but the clearance on this valve would seem okay, but I would really appreciate some experienced feedback on that.
You must be registered for see images attach

Here is the setup for checking stem to guide clearance from the manual.
You must be registered for see images attach
 

tbrumm

Full Access Member
Joined
Mar 24, 2012
Posts
1,224
Reaction score
187
Location
Richland Center, WI
I called one machine shop and the owner said it would be a month before he could look at the heads. He does a lot of truck and tractor pull work, and with it being pulling season, I can certainly understand that. I have a couple of other shops to call, but being as the truck was running fine, I wonder if I can do basic head work myself? Obviously, I can't magnaflux the heads, but I can disassemble the valve train and clean them up.
 
Last edited:

tbrumm

Full Access Member
Joined
Mar 24, 2012
Posts
1,224
Reaction score
187
Location
Richland Center, WI
The valve stem replacement looks simple, but calls for two special tools: a valve seal installer T83T-6571-A and a "plastic valve seal guide". There are a couple of valve seal installers listed on e-bay now, but would a deep well socket work for this? The plastic guide has no specs in the manual - what do you use for that?
You must be registered for see images attach

If, I replace the No.3 intake valve with a new one, what needs to happen with the valve seat-anything? Does the new valve need to be "fitted" to the existing seat? Does the seat need to be replaced when installing a new valve. I have almost no knowledge in this area.
 

riotwarrior

Supporting Member
Supporting Member
Joined
Sep 19, 2006
Posts
14,778
Reaction score
483
Location
Cawston BC. Canada
Most valve grind head gasket kits come with sleeves for valve tips and an installer tool for seals...tap or press seal onto guid place cap on valve...kinda like have a medicine capsule....the slide the valve on up inside the head past seal.

Thats what I know...but really best check seats too does it need valve grind etc???
 

Latest posts

Forum statistics

Threads
91,333
Posts
1,130,534
Members
24,136
Latest member
m2rtin
Top