

Factory ATS turbo Elbow upgrade

junk

Full Access Member
Joined
May 25, 2006
Posts
1,773
Reaction score
63
Location
Paullina, IA
As part of my engine swap I'm enlarging the turbo outlet to use a 3" band clamp versus the 2.5" or so that's on it now. I didn't really hit 3" the whole way as I do have a 1" piece of 2.75" ID tubing to close the gap. I know there are some gaps in the pictures because I get excited and forget to take pictures. I don't have my exhaust system and down pipe yet, but once I get that I'll show how I modify the 95-97 power stroke down pipe to work with this. This LINK has more pictures.

Here you can see the difference between the factory clamp flange area and the 3" clamp flange. This is after I cut the factory flange off the elbow. Factory on the right.
You must be registered for see images attach


Here is the fixture I made to hold the elbow for welding. This is before I welded the fixture.
You must be registered for see images attach


Here is the fixture I made that bolts into my power hacksaw to cut off the factory clamp flange and about 1" of the elbow that gets necked down. The 5/16" bolts are recessed into the plate to allow it to bolt flat into the saw. A 1/2" bolt worked great for holding it in to the t-slot.
You must be registered for see images attach


Here is the factory elbow sitting in my saw when I was figuring out the fixture.
You must be registered for see images attach
 

junk

Full Access Member
Joined
May 25, 2006
Posts
1,773
Reaction score
63
Location
Paullina, IA
Sorry for the pic quality, but here is a mock up of the cut elbow in the fixture with the 3" flange. The fixture only locates the new flange in position relative to the elbow and angle relative to the elbow. It doesn't located the flange to the hole in the elbow. I eyeballed that once I had the spacer tube machined up.
You must be registered for see images attach


I took a piece of 2.75" X 3.125" tube and turned a small section of it to fit in the 3" flange. I wish I'd of used 3" tube, but the 2.75" really worked well.
You must be registered for see images attach
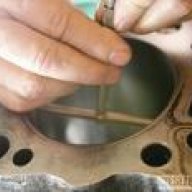

This is the Piece of tube inside the flange. I made the turned area extra deep to give me flexibility when fitting it up to the elbow.
You must be registered for see images attach


And this is the finished elbow with the flange and tube welded on. These aren't pretty welds, but should work. Actually they are pretty good for me. I wish I could lay pretty welds. The welds on the bottom that I did last looked the best.
You must be registered for see images attach


I haven't painted it yet, but plan to put some high temp paint on it before installing it. Thought I'd share how I spent my afternoon. I had a great Fathers day! ;Sweet;Sweet
 
Last edited:

racin460

Full Access Member
Joined
Dec 13, 2012
Posts
214
Reaction score
0
Location
York PA
Do you plan on using the fixture again? If not would you be interested in passing it around to other members?
 

icanfixall

Official GMM hand model
Joined
Apr 10, 2005
Posts
25,858
Reaction score
682
Location
West coast
I'm impressed with your ability to work thru a project. The way you fabricated everything is impressive. My only issue is your welding skills. It really looks like to used a MIG welder squirting out wire for the weld. Thats not the best way of doing this job but it will work. TIG is really the only true way to do this kind of weld and cleanlyness is paramont to a good weld. Your not welding cast iron like many think that material is. Its cast steel so it will weld. Both sides needs to have a bevel of about 37 degrees for good full penatration too. The root pass should punch thru the two pieces and actually make a weld bead on the inside of the pipe. If you were doing stick weld you can tell its punching thru by the sound of cooking bacon and eggs. Hmmm.. Really love that sound.. Makes me hungry for bacon... Still an impressive way of making sure everything is correctly positioned for welding.
 

junk

Full Access Member
Joined
May 25, 2006
Posts
1,773
Reaction score
63
Location
Paullina, IA
I think I plan to use this again to build an exhaust housing for my crewcab. We'll see though. I currently have the ATS housing with the slip joint, but like the band clamp idea much better. I was partly playing when I built up all the stuff for this. It wasn't really needed, but did make it easy to get it back together.

Gary, you are correct I did MIG weld this. I don't disagree that for full pen I should have beveled both edges when I butt welded the tube to the cast elbow. Now I will ask the question if the full pen is needed here? I'm not holding high pressure's or great strength. I might grind that out to a bevel and reweld it to see how that turns out. You've got me wondering. On the flange to tube weld I ended up with a fillet weld and I'm completely comfortable with how that went even though it's ugly.

Question why would the TIG be better on this weld? Also would you have preheated this before welding?
 

icanfixall

Official GMM hand model
Joined
Apr 10, 2005
Posts
25,858
Reaction score
682
Location
West coast
No preheat is needed but you could have taken the chill of the materials too. Aluminum MUST be preheated for a good weld but thats a differant material too. Had you beveled the joint you could have gone back inside and ground smooth any weld on the inside if you felt it was going to bother the exhaust flow. The reason TIG is so much better than MIG is you have much better control and heat to weld with. Using a foor peddle for the heat and being able to actually see the weld as your adding weld rod gives you a better penatration and weld buildup. Watch TIG welding on Utube a couple of times and compare that to MIG. Its an artwork when done correctly. I did it nearly everyday for three years in the machine shop I retired from. Some of the welds were 12 to 15 ft long... Thats when we were replacing steamcut steam turbine case plates. I weld and the big time machinsts do the machining. I couldn't make a mistake but they sure could. They were working on half of the steam chest of the turbine at a time. Then when we assembled the two case halfs they had to line up prefectly. Our tuff weld job was the joints that got steamcut. No undercutting of the weld was allowed. Then the grinding and fileing and honing back to the factory surface was really hell.
 

'94IDITurbo7.3

HAMMER DOWN!
Joined
Mar 29, 2011
Posts
5,353
Reaction score
3
Location
Fowlerville Michigan
i did the same as you pretty much. i cut a piece of my welding wire(MIG) and used that as a spacer between the casting and the v-band flange. the weld doesn't look good, but it has been on there for a year now, doesn't leak at all and is holding great. i didn't get 100% penetration either.
 

junk

Full Access Member
Joined
May 25, 2006
Posts
1,773
Reaction score
63
Location
Paullina, IA
I remember reading your thread when you did it also. From the looks of it you ended up shorter on the overall height of the elbow as you welded the flange directly to the elbow. Did this cause any issues with downpipe fit?
 

'94IDITurbo7.3

HAMMER DOWN!
Joined
Mar 29, 2011
Posts
5,353
Reaction score
3
Location
Fowlerville Michigan
i had to beat the hell out of the firewall and also put a dent in my down pipe, but i don't think what i did with the outlet flange had anything to do with it honestly. had i made the outlet longer like you did it would have just changed where i had to dent the pipe.

I did have to modify the end of the downpipe where the rest of the exhaust bolts up, the way it came it was pointed right into the trans x-member. if my outlet was longer(like yours) i would have had to make a sharper bend to clear the x-member.
 

Latest posts

Forum statistics

Threads
93,030
Posts
1,156,239
Members
26,618
Latest member
Nathanelliott44

Members online

Top