Seat swap - I gone done it LOL

david85

Full Access Member
Joined
Feb 21, 2008
Posts
4,844
Reaction score
1,111
Location
Campbell River, B.C.
:rotflmao Nothing is ever easy, huh buddy?

I guess notLOL (see? karma - this is all because I poked fun at your engine swap:rotflmao)
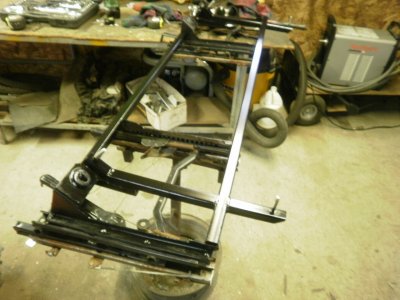
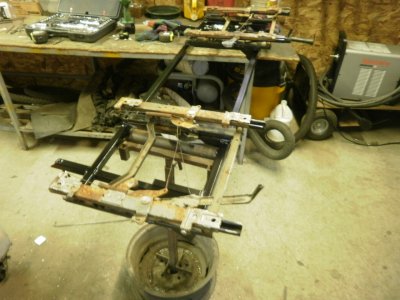
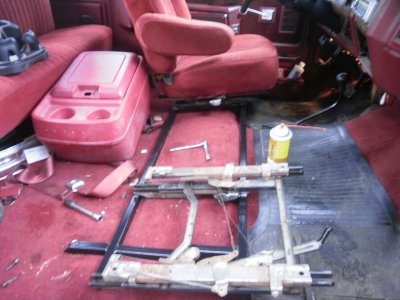
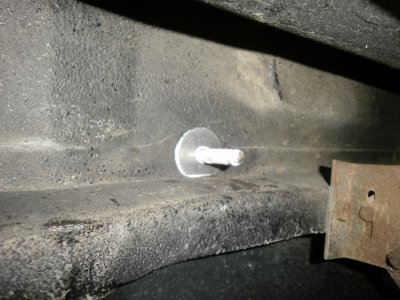
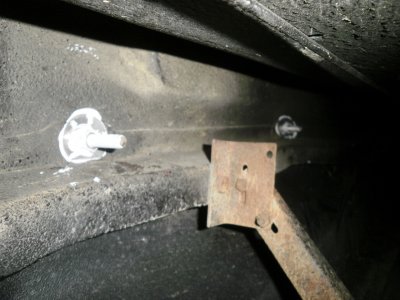
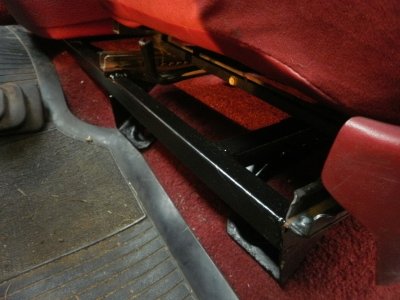
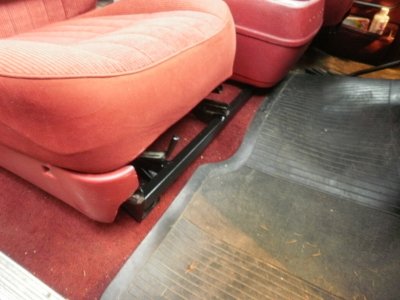
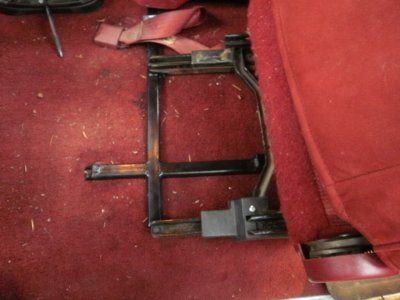
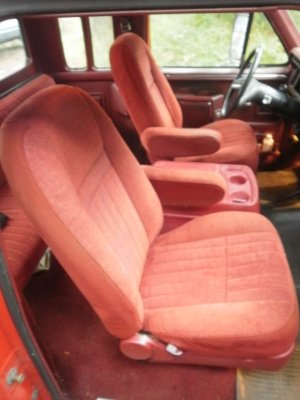
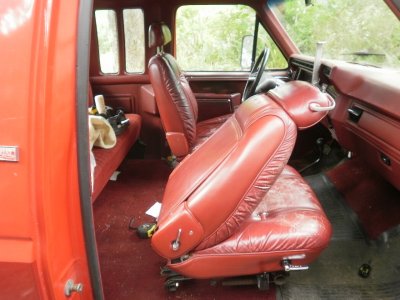
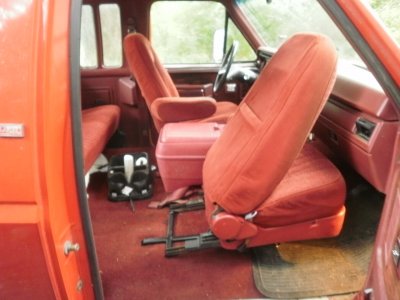
Almost there though. Seats are bolted down and secure. Still have to clean (boil) the center console before mounting it. Did the last of the install in the rain, and I'll wait untill some better lighting comes along before taking more pictures of the end result.

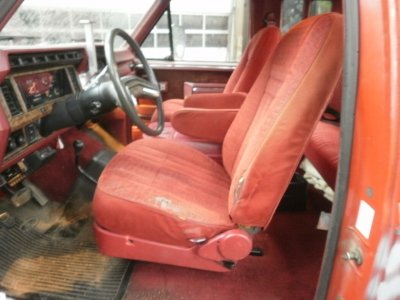
David85, that looks like a GREAT setup! I envy your new bucket seats. My bench seat is slowly starting to sag...

Thanks, so far I like them but still haven't driven the truck (wait five minutes:D)

You can correct that issue with your seat to some degree. I used foam carpet underlay in my old bench seat to fill things in again. The bench in my F150 was horrible and I fixed that one too. Still not as nice as buckets but at least there is something to keep your spine from folding over:puke:

If I remember right, there should be a zipper at the bottom of the backrest that you can access with it tilted forward. Once thats open you can return it to the upright position to reach up and drag some foam in. There is a way to completely disassemble the backrest on those things too, but its been too long since I did it that I can't remember (there might be a flap or plastic channel hook thats accessed from behind). I do remember that the metal support at the top of the back rest was bent in on mine, which contributed more to the sagging.
 

david85

Full Access Member
Joined
Feb 21, 2008
Posts
4,844
Reaction score
1,111
Location
Campbell River, B.C.
Well I took it for a ride this evening and I think I like them.

First stepping in feels like the truck is trying to assimilate the driver with how tight it feels. The legs and feet in particular are very comfortable, thanks to just the right amount of support at the knee. In the end, I have a slightly lower position for my head that results in even better cluster display. Anyone with this era of truck will know about the steering wheel trying to block off the high beam indicator - not a problem anymore with the steering wheel in the neutral position, only now it actually feels right to have the wheel there;Sweet.

The seats are also rock solid and makes it feel even more like a different truck. When going over bumps or around corners, I don't shift at all and neither does the seat. Support at the flanks and shoulders is also nice. Still not too sure about the lumbar support, but that would be very easy to mod if I decide to.
 

david85

Full Access Member
Joined
Feb 21, 2008
Posts
4,844
Reaction score
1,111
Location
Campbell River, B.C.
Here is the frame after paint. I didn't bother with cleaning off the tracks because, well I didn't bother. The only reason they rusted to begin with was the fact that the truck donor was damp inside. The fabric and foam was damp and that retained the moisture enough to rust the unpainted steel. Generally only the lower roots of the seat frames rust where they bolt to the floor due to poor sealing from the factory. In this case, they had a light zinc coating on them in that area.

The frame is very hard to see once the seats are installed, so I also took a shot of the driver's side dropped on.

(sorry about the blurry image - my camera seems to be picky about twitching when holding down the shutter button)

To attach through the floor, I went out and bought some stainless steel lock washers and "fender" washers. Since I didn't use nylock nuts, I didn't want the nuts to loosen after some use, so the lock washers were some extra insurance. The wide fender washers were to close off the rather large hole left in the floor by the OEM mounting nuts (which are VERY prone to rusting solid after being disturbed - if you can even get them to give up), but also to spread the load nice and wide against the floor sheet metal.

The washers turned out to be slightly too wide against the floor stringer, so I used the benchtop sheers to trim them down a bit.

Next came the ProForm PF211 urethan sealer on the side of the washer going against the floor. This way there is no risk of rust getting in through here and with any luck, I won't get any creeping corrosion on the seat frames either (ford really should have used sealer from factory, but I digress).

The urethane is among the best I have been able to find so far since it is UV resistant, perminantly firm and flexible (harder than silicone, but never gets as hard as regular seam sealer), will bond to just about anything, and doesn't shrink as it cures, so there is no risk of cracks forming of sealing a seam joint. Here its an overkill though....just the way I like it

The washers flexed a little when the nuts were torqued into place but I'm fine with that since it spreads the load that much better. Also note how the sealer oozes out from under the flange, which should keep the moisture out.

Again, appologies for the poor quality, but it was pitch black before the camera flash went off, thanks to the sun being gone for about 3 days now-cuss
 

Attachments

  • P7050342a.JPG
    P7050342a.JPG
    624.4 KB · Views: 4
  • P7050343a.JPG
    P7050343a.JPG
    620 KB · Views: 3
  • P7050344a.JPG
    P7050344a.JPG
    624.7 KB · Views: 4
  • P7060345.JPG
    P7060345.JPG
    567.1 KB · Views: 5
  • P7060347.JPG
    P7060347.JPG
    610.3 KB · Views: 6
  • P7060349.JPG
    P7060349.JPG
    611.9 KB · Views: 4
  • P7060350.JPG
    P7060350.JPG
    604.6 KB · Views: 5

david85

Full Access Member
Joined
Feb 21, 2008
Posts
4,844
Reaction score
1,111
Location
Campbell River, B.C.
Finally, I can show the interior.

The frame is hard to see with the seats in their upright position either in front or behind, but what is visible looks clean.

First picture is below the front of the driver's seat.
Second picture is below the front of the passener seat.
Third picture is behind the passenger side seat with it moved fully forward (this is what you would see if climbing into the back while looking down).


Looks pretty much OEM even though its technically out of a 1991(ish) pickup or bronco, not exactly sure if there is a way to tell for sure.

Aside from being comfortable for the front occupants, I really like how far forward the seats slide forward making it probably the easiest extended cab truck I've ever seen for rear seating access (short of having an extra door).

The driver's side isn't in perfect shape as you can see in the last photo, but its still very comfortable and I may have it redone eventually. Got one quote today and will likely never go back there again LOL (over $500). Another guy says he will get back to me if he can locate the fabric, but I've already found potential sources online for raw fabric or completely new upholstery (sent Email and waiting for reply) and the offer free samples to verify correct match.

Also took the truck for about a 2 hour drive today and wasn't sore at all by the end. Maybe a little sleepy from being a little too relaxed, but not sore at all.


The last two photos are a quick before and after to show the difference in how far the ford seats move forward thanks to the compound track setup.

And that should just about do it. I still have to get a latch for the console but other then that, its basically done.
 

Attachments

  • P7060354.JPG
    P7060354.JPG
    607 KB · Views: 10
  • P7060358.JPG
    P7060358.JPG
    607.2 KB · Views: 9
  • P7060357.JPG
    P7060357.JPG
    610 KB · Views: 8
  • P7060360.JPG
    P7060360.JPG
    614.1 KB · Views: 9
  • P7060355.JPG
    P7060355.JPG
    608.5 KB · Views: 10
  • P7030342.JPG
    P7030342.JPG
    623.6 KB · Views: 8
  • P7060356.JPG
    P7060356.JPG
    607.9 KB · Views: 10
Top