Seat swap - I gone done it LOL

david85

Full Access Member
Joined
Feb 21, 2008
Posts
4,849
Reaction score
1,114
Location
Campbell River, B.C.
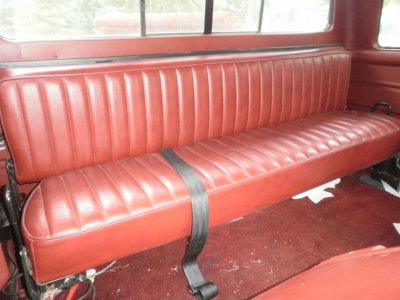
I asked for some opinions about some bucket seats a while back and ended up getting them, along with the rear bench. So far, the rear is in since thats the easiest to swap.

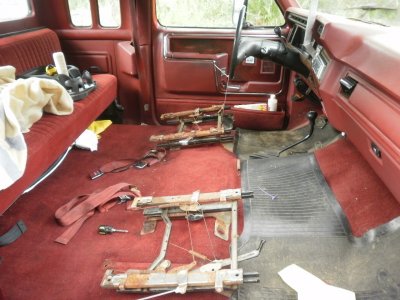
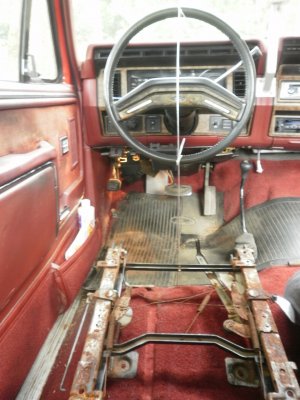
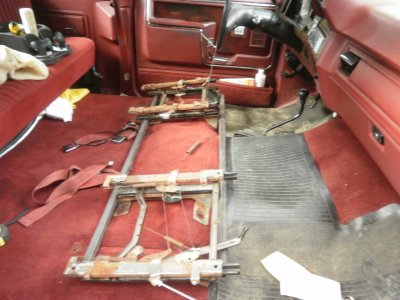
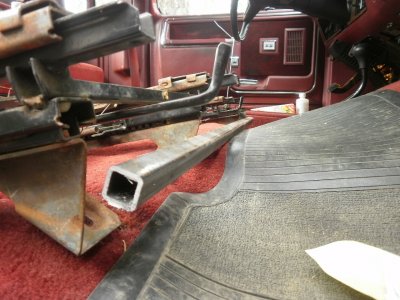
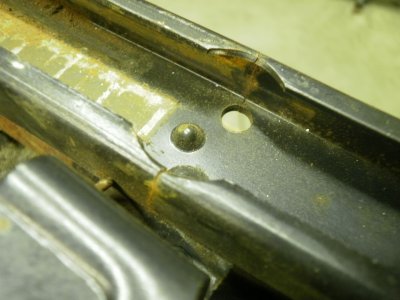
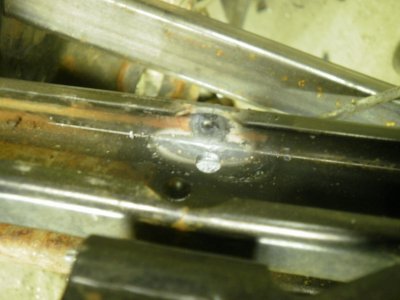
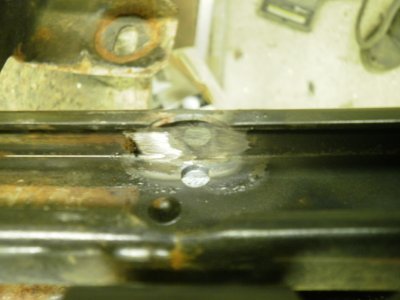
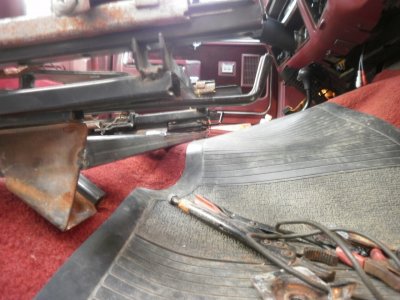
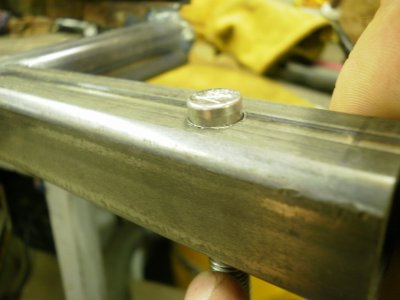
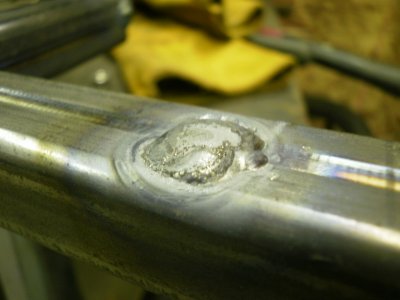
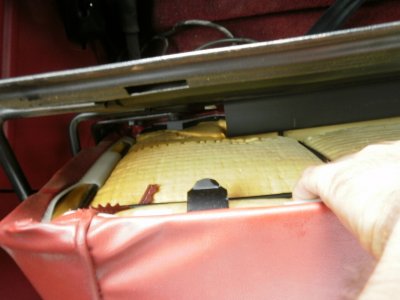
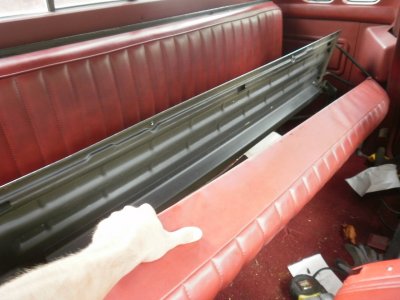
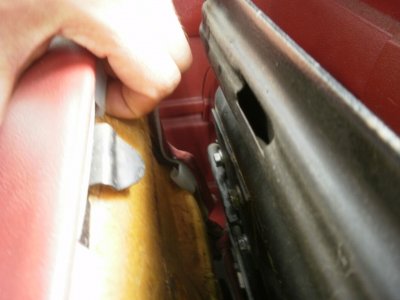
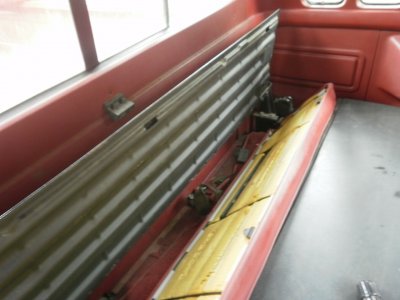
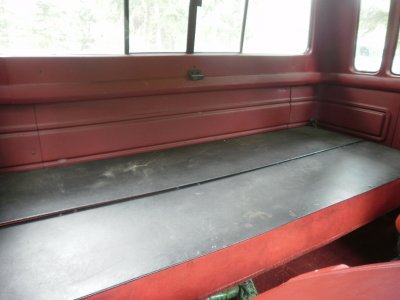
Rather than change everything out, steel frames and all, I simply removed the cusions from the donor truck and swapped those into mine. Less work, and the frames in my truck were cleaner anyway.

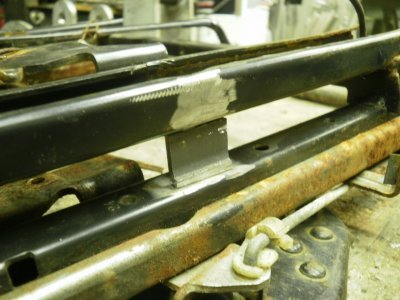
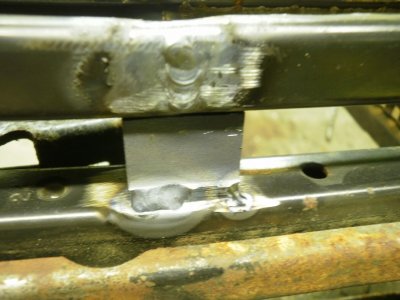
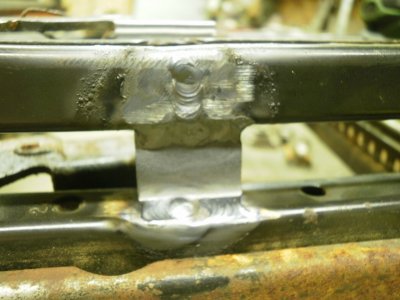
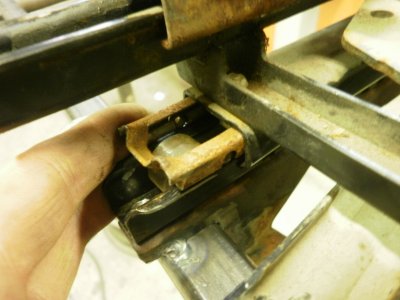
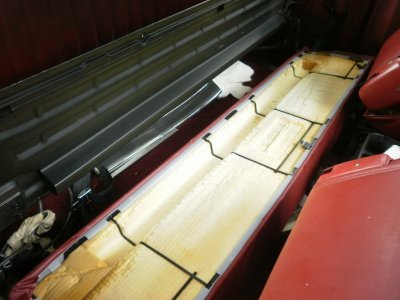
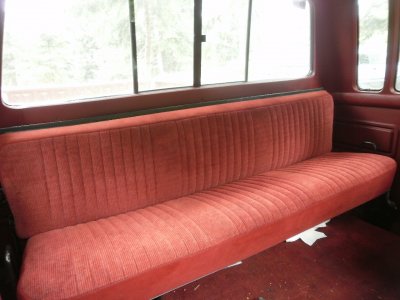
The cusions are attached with phillips screws and drop into slots on the frames (see pics), so its really easy to take apart even in the cab. Whats even nicer about this setup, is you can easily remove the fabric (which had mold stains on it from sitting in the damp wrecker for a couple years). So I removed them, and after applying spot shot stain remover, they went through the wash - twice (to produce black coffee). They glow and smell like new now;Sweet

Its even enough to drown out the stench of 80/90 gear oil that I used to prevent body rust in the cab.:rotflmao

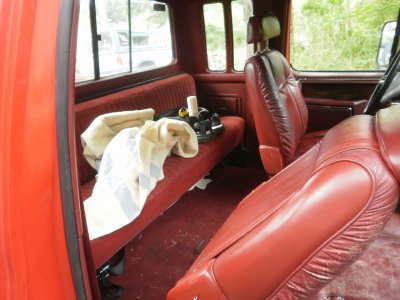
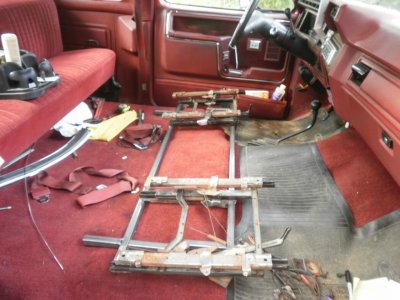
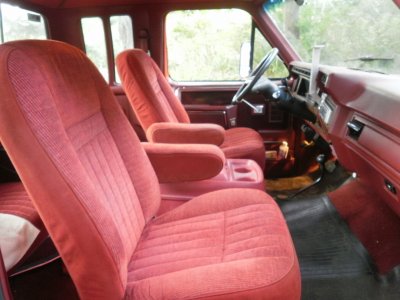
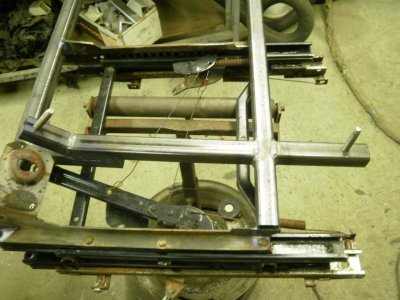
The old cushions are still in great shape but I kept getting complains that they were too cold in the winter and too hot in the summer (a bit hard too). I might try to sell them, but generally these seats never wear out so they may just get tossed. The front seats will take a little more doing since my truck doesn't have the correct floor mounts to accomodate separate seats (Planning to make a adapter frame to reuse the original mounts as I did with my current leather seats). However, those seats were also stripped down to the bare frames for similar cleaning and will be a bit longer before they can go in.

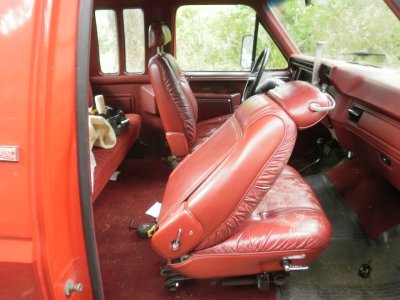
The passenger side bucket is practically mint, but the driver's side has the usual burn mark on the outside corner from sliding in and out. If I like them enough, I may end up having that seat redone eventually.
 

Attachments

  • P7030342.JPG
    P7030342.JPG
    605.1 KB · Views: 21
  • P7030343.JPG
    P7030343.JPG
    604.2 KB · Views: 16
  • P7030344.JPG
    P7030344.JPG
    563.9 KB · Views: 12
  • P7030345.JPG
    P7030345.JPG
    604.3 KB · Views: 11
  • P7030346.JPG
    P7030346.JPG
    609.5 KB · Views: 12
  • P7030347.JPG
    P7030347.JPG
    696.7 KB · Views: 12
  • P7030348.JPG
    P7030348.JPG
    696.9 KB · Views: 10
  • P7030349.JPG
    P7030349.JPG
    698.1 KB · Views: 13
  • P7030351.JPG
    P7030351.JPG
    691.3 KB · Views: 13
  • P7030350.JPG
    P7030350.JPG
    603.1 KB · Views: 18
Last edited:

itsacrazyasian

residentcrazyasian
Joined
Nov 4, 2010
Posts
2,128
Reaction score
1
Location
boca raton, fl
Looks good! I need to do something about my seats. I was driving my buddy's 2008 Stuper Duty earlier today and coupled with a tweaked 6.4 and comfy seats... Plus a super smooth suspension compared to my leaf spring sprung truck.
 

94f450sd

Supporting Member
Supporting Member
Joined
Oct 12, 2005
Posts
6,617
Reaction score
55
Location
somewhere,ma
Looks good! I need to do something about my seats. I was driving my buddy's 2008 Stuper Duty earlier today and coupled with a tweaked 6.4 and comfy seats... Plus a super smooth suspension compared to my leaf spring sprung truck.

went for a ride in a 2011 f350 today.man what a nice ride but ugly interior and nose :puke:
 

david85

Full Access Member
Joined
Feb 21, 2008
Posts
4,849
Reaction score
1,114
Location
Campbell River, B.C.
Thanks. After having the truck for a while, I've decided to start making it a bit more comfortable since I will try and keep it for as long as I can.

Here you can see one of the other problems with the current leather buckets. They just don't tilt or slide far enough forward for any grown individual to get in and out of the back easily. The ford buckets have a compound track setup that allows them to slide all the way to the dash (even the driver's side slides that far forward;Sweet).
 

Attachments

  • P7030342.JPG
    P7030342.JPG
    623.6 KB · Views: 22
  • P7030343.JPG
    P7030343.JPG
    615.1 KB · Views: 20

david85

Full Access Member
Joined
Feb 21, 2008
Posts
4,849
Reaction score
1,114
Location
Campbell River, B.C.
After a few minutes with the shop vac, I put the new tracks in place and started measuring things up. I used a piece of Tig Rod and put the steering wheel level to get the track lined up (stock holes in the floor no where near good close enough). Once I got it centered, I cut the steel stock and am currently tacking it together. Once I get the height right and add the brackets, it will be ready for a dry fit. The steel 1" tubing will just barely clear the floor, and it will not allow the center console to rest as low as factory, but I don't care. This way it will be at least as strong as OEM, and I won't have to add any new holes ;Sweet(planning to mount the console off the same frame).
 

Attachments

  • P7030344.JPG
    P7030344.JPG
    603.8 KB · Views: 25
  • P7030345.JPG
    P7030345.JPG
    617 KB · Views: 25
  • P7030347.JPG
    P7030347.JPG
    629.2 KB · Views: 31
  • P7030348.JPG
    P7030348.JPG
    619.6 KB · Views: 28
  • P7030349.JPG
    P7030349.JPG
    616.2 KB · Views: 26

RedTruck

Registered User
Joined
Feb 13, 2006
Posts
739
Reaction score
0
I may have missed something here, but what are the seat tracks out of?

Looks like a great job. Thanks for posting

Paul
 

david85

Full Access Member
Joined
Feb 21, 2008
Posts
4,849
Reaction score
1,114
Location
Campbell River, B.C.
The donor truck that they came out of did not originally have these seats in there, so it could be they came out of a bronco or some extra cab pickup. But I think they are all a matching set. I'm maybe half way through making the support frame that will allow me to perminantly install them (plenty of pictures to catch up with when that happens).

I completely stripped down all the seats to the foam, frame and fabric to clean the fabric off, so the tracks were one of the first things to come off.
 

itsacrazyasian

residentcrazyasian
Joined
Nov 4, 2010
Posts
2,128
Reaction score
1
Location
boca raton, fl
btw the fact that the drivers seat gets so close to the pedals is the reason why i own one of these! I can't drive a stick shift dodge easily!
 

david85

Full Access Member
Joined
Feb 21, 2008
Posts
4,849
Reaction score
1,114
Location
Campbell River, B.C.
Never drove a stickshift dodge, but did drive an OBS powerstroke (with captains chairs) once. Wasn't bad, but I don't seem to have a heavy enough foot to match the stock clutch. It was better after the SMF conversion though. The truck had plenty of getup but man the owner was a slob. Spare change pouring out of every pocket and matched only by the overflowing cigarette butts and fast food wrappers. I shudda charged more:rolleyes::puke: (getting sick just thinking about what it took to get the shift cover off....)

Back to the seats.

Last night I found that the outer track on the driver's side seat was cracked almost all the way through......what to do.....

I decided to do a partial teardown on that track and drilled out some of the rivets that hold it together and double as stoppers to keep the slider from falling out either end. Once out, I could better access the damaged part

Next came the repair. Since this was near one of the levers (which is riveted in too), I decided it wasn't worth trying to do a complete all round repair on the track since tying it to the upper secondary track (the one only used when sliding the seat forward for entering and exiting the rear of the cab) would make it stronger than factory.

I ended up doing a partial weld up one side where I could easily reach in to do a good job, and then added a spacer to tie the two tracks together; effectively creating a truss between the two.

The first picture of the weld is a blend weld halfway through (everything is Tig welded). It was possible because I purposely left enough of the corner in tact to provide the "filler" material. The upper weld didn't have enough parent material to spare, so filler was used. I was having some fun with it, since I don't usually get to work with delicate parts like this, and even fewer times with clean steel.

I reached in with an angle grinder using a zip blade to clean off the inside penetration of the weld to make sure it wouldn't interfere with the slider. A grinding wheel would have been to thick to get in all the way.

Once the repair was done, I put the sliders and rollers back in, replaced the drilled off rivets with a tall plug weld, and called it a night.
 

Attachments

  • P7030342.JPG
    P7030342.JPG
    612.9 KB · Views: 10
  • P7030343.JPG
    P7030343.JPG
    699.7 KB · Views: 9
  • P7030344.JPG
    P7030344.JPG
    598.8 KB · Views: 9
  • P7030345.JPG
    P7030345.JPG
    617 KB · Views: 9
  • P7030347.JPG
    P7030347.JPG
    614.5 KB · Views: 9
  • P7030348.JPG
    P7030348.JPG
    602.3 KB · Views: 9
  • P7030349.JPG
    P7030349.JPG
    613.4 KB · Views: 10
  • P7030350.JPG
    P7030350.JPG
    610.3 KB · Views: 8
  • P7030352.JPG
    P7030352.JPG
    611.8 KB · Views: 8

david85

Full Access Member
Joined
Feb 21, 2008
Posts
4,849
Reaction score
1,114
Location
Campbell River, B.C.
.......and for today, I wasted a ton of time mulling over how to finish off the support frame. The easy way out would have been to knock a few holes through the floor to use some of the original bucket mounts on the front, and then just drill clean through the rear cross bar for the rear support - but I just couldn't bring myself to do it.

Instead I went with my original plan to only mount off the factory hardpoints in the floor of the truck since rust is a MAJOR concern for me. The underbody of the cab is nearly mint due to a high quality undercoating (scrape some areas off and you can actually see the red overspray on the grey factory primer), and I'd like to keep it that way.

Another problem I had, is the frame ended up being a good 1.5~2 inches too high! So again, I had to rework some of the parts to get it low enough to be proper.

Lots of time was spent checking and rechecking everything to make sure the driver's side seat felt just right. The distance between the seat and the door panel, the height and visibility over the hood. Checked to make sure the steering wheel didn't obstruct view of the instruments (anymore than before), tried to sit in the seat as natural as possible and verified the steering column was absolutely centered in front of me, and also verified that in a fairly neutral seating position, that the arm rests lined up with the door rests.

Whew.....after all that (and several dry runs), I had the frame tacked together and corrected to where the mounts would line up with the factory floor hardpoints. Then I put the seats and center console back in and took the final shot. The seats feel pretty good and I don't think I'll change the position or height of the support frame anymore, so tomorrow I might be able to finish the job.

Still have to tear it all out again, close off all the welds, and then put some black enamel on the bare steel.

One thing I noticed right away is these seats are space savers. The bucket backrests are less than 2" thick in the middle before even sitting down. This adds for a little extra leg room for anyone sitting on the back bench. I know the original bench seat had a REALLY thick backrest, and the chrysler leather buckets I've been using up to now were also pretty thick.

The driver's side seat could be in better shape but if I like them enough after using them for a while, I may decide to have it professionally redone, foam and all. The passenger side seat doesn't need a thing though.

I think its a nice match too;Sweet
 

Attachments

  • P7040355.JPG
    P7040355.JPG
    620.1 KB · Views: 20
  • P7040356.JPG
    P7040356.JPG
    618.1 KB · Views: 17
  • P7040357.JPG
    P7040357.JPG
    624.5 KB · Views: 35

david85

Full Access Member
Joined
Feb 21, 2008
Posts
4,849
Reaction score
1,114
Location
Campbell River, B.C.
Almost done!:sly

the frame is covered in some black paint and waiting to dry. After that, it goes in for good.

All the welds have been properly finished and the hold down bolts are also perminantly welded in. Since I didn't feel like driving into town to get some bolts, I used some stainless steel anchors and modified them to fit.

These are supposed to be rated at 4000lb pull out strength when installed in good quality concrete, so I think they will be enough for the seats. I again used a blend weld on the top wall to attach the stems since it was clean, easy, and this way puts compression stress on the parts instead of tensile stress (if they were welded to the underside, for example).

The front two angled stems drop in first, then the rear two tilt down for the install. It was dry fitted, so it should go in pretty easily either late tonight or tomorrow morning. It will depend on how long the paint takes to dry.
 

Attachments

  • P7050342.JPG
    P7050342.JPG
    562.9 KB · Views: 5
  • P7050343.JPG
    P7050343.JPG
    594.7 KB · Views: 4
  • P7050344.JPG
    P7050344.JPG
    564.1 KB · Views: 3
  • P7050346.JPG
    P7050346.JPG
    572 KB · Views: 5
  • P7050347.JPG
    P7050347.JPG
    575.5 KB · Views: 7
  • P7050348.JPG
    P7050348.JPG
    618.1 KB · Views: 6

towtruckdave

Resident Nutcase
Joined
Mar 6, 2010
Posts
583
Reaction score
8
Location
Cleveland,OH-Nashville,TN
:rotflmao Nothing is ever easy, huh buddy?


Last night I found that the outer track on the driver's side seat was cracked almost all the way through......what to do.....

I decided to do a partial teardown on that track and drilled out some of the rivets that hold it together and double as stoppers to keep the slider from falling out either end. Once out, I could better access the damaged part

Next came the repair. Since this was near one of the levers (which is riveted in too), I decided it wasn't worth trying to do a complete all round repair on the track since tying it to the upper secondary track (the one only used when sliding the seat forward for entering and exiting the rear of the cab) would make it stronger than factory.

I ended up doing a partial weld up one side where I could easily reach in to do a good job, and then added a spacer to tie the two tracks together; effectively creating a truss between the two.

The first picture of the weld is a blend weld halfway through (everything is Tig welded). It was possible because I purposely left enough of the corner in tact to provide the "filler" material. The upper weld didn't have enough parent material to spare, so filler was used. I was having some fun with it, since I don't usually get to work with delicate parts like this, and even fewer times with clean steel.

I reached in with an angle grinder using a zip blade to clean off the inside penetration of the weld to make sure it wouldn't interfere with the slider. A grinding wheel would have been to thick to get in all the way.

Once the repair was done, I put the sliders and rollers back in, replaced the drilled off rivets with a tall plug weld, and called it a night.
 

Dave7.3

Diesel ******
Joined
Feb 14, 2010
Posts
595
Reaction score
0
Location
South Dakota
David85, that looks like a GREAT setup! I envy your new bucket seats. My bench seat is slowly starting to sag...
 

Forum statistics

Threads
91,372
Posts
1,131,193
Members
24,170
Latest member
Seven4eight

Members online

Top