Tow and Haul RV transporter build

tonkadoctor

Full Access Member
Joined
May 5, 2006
Posts
3,776
Reaction score
0
Location
none ya bidnes
Busy day today. Cleaned up the shop a bit and had a customer over that bought some stuff from me on Evilbay, then he bought even more stuff that he saw and liked.... Hate when that happens.


Finished welding up the left bumper.
You must be registered for see images attach


Squared it up and welded it to the frame.
You must be registered for see images attach


Had to see what the lights looked like in it.
You must be registered for see images attach


Here's a good look at the channel for the pin on ramps.
You must be registered for see images attach


Got the right side tacked up. Will finish it up tomorrow after I get back from Northern Tool to pick up 10 more lbs of welding rod.
You must be registered for see images attach
 

towcat

Supporting Member
Supporting Member
Joined
Jun 24, 2004
Posts
18,196
Reaction score
1,439
Location
SantaClara,Ca/Hamilton,TX
tonka-
you might want to look into LED's. I've had problems with vibration in the taillight boxes in the past that would literally cut the lifespan of the bulbs to 1/4 of their rating. they do have plug-in LEDs now without needing special plugs. the whole thing looks good tho:thumbsup:
 

tonkadoctor

Full Access Member
Joined
May 5, 2006
Posts
3,776
Reaction score
0
Location
none ya bidnes
Thanks TC

I will be getting LED as soon as cash is flowing again. Budget is tight right now and the LED's I like are about $35 each..... You know the ones that have about 60 LEDs in them and blind you when they hit the brakes.:D

Don't have $400 to spend on lighting it up like a Christmas tree right now. Just easier to get the bumpers and wiring set up the way I want now than try to punch holes and hack wiring later so for the first month or 2 it rolls with $50 worth of incandesent.
 

cat3176

Registered User
Joined
Jan 28, 2008
Posts
32
Reaction score
0
Location
Nixa, Mo
Good Lookin project you got going tonkadoctor. Should look real good when finished.
 

Freightrain

Just "B" it........
Joined
Jan 12, 2005
Posts
363
Reaction score
0
Location
Ohio
I always like those sequential >>> LED lights,,,,,,,,,,so I bought a pair for the front bumper of my Mack. NOT cheap, but cool anyway.

I put 4- 4" 7 LED lights out back and they are BRIGHT!!!! Like to convert the rear of my Haulmark trailer to LED too, but have to make a filler panel to take the place of the typical BIG trailer light assy. Have to come up with some stainless so I can polish it and make it a touch "blingy" (on a faded trailer LOL!!)
 

tonkadoctor

Full Access Member
Joined
May 5, 2006
Posts
3,776
Reaction score
0
Location
none ya bidnes
Thanks CAT

Ya Freight, I love those sequential LED turn signals. I need to dig into the kick panel on the drivers side. I know on air brake equipped F800's there is a connector in there to hook up the pigtail for 7 pin semi trailer connection that separates the brake and turn signals unlike the RV 7 pin connection.

If I can figure out how to easily separate the signals, without hacking the wiring all up, I'd like to ditch the center red light and put amber turn signal there instead as well as use the center side marker light for a turn signal too. Just havn't sat down and really gave it some thought yet or asked for help from somebody that knows these a lot better than I do..... Like Towcat.


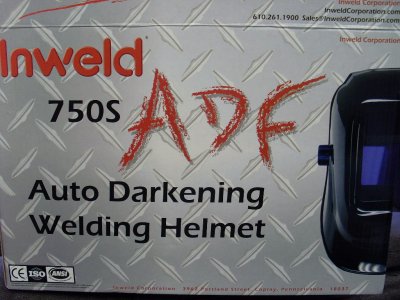
Had to make a pit stop at Northern Tool and get 10 more lbs of welding rod today.... Took Mama with me and she talked me into finally spending a little on a new welding hood. They had these automatic darkening hoods with shift on the fly 9-13 shade lenses on sale for $45. WOW what a difference it makes in productivity and being able to see what you are doing. Now the old hood is permanently designated a full face grinding shield...... Could have done without the cheesy flame graphis though.
You must be registered for see images attach


Got the right side tail light / bumper assembly welded up.
You must be registered for see images attach


Ground down.
You must be registered for see images attach


And welded on.
You must be registered for see images attach


Started work on the stinger receiver. Drilled 7/8" hole for the grade 8 7/8" pin.
You must be registered for see images attach

You must be registered for see images attach


Cut the 4" channel to length
You must be registered for see images attach


Made the holes for the 7 way RV plug
You must be registered for see images attach

You must be registered for see images attach
 

69dieselfreak

well that nice
Joined
Mar 21, 2008
Posts
1,349
Reaction score
0
Location
rimrock arizona
be careful of those cheesey auto darkening hoods sometimes the shade wile your welding goes away and lets just say its like what the hell
just rember you get what you pay for
for my miller hood was like $325
 

tonkadoctor

Full Access Member
Joined
May 5, 2006
Posts
3,776
Reaction score
0
Location
none ya bidnes
Man I'd never spend $300+ on a hood, even if I did this full time. I only need it to last 30 days and if it craps out I'm taking it back.
 

towcat

Supporting Member
Supporting Member
Joined
Jun 24, 2004
Posts
18,196
Reaction score
1,439
Location
SantaClara,Ca/Hamilton,TX
be careful of those cheesey auto darkening hoods sometimes the shade wile your welding goes away and lets just say its like what the hell
just rember you get what you pay for
for my miller hood was like $325
I've spent the same on some fancy swiss mfg'd hood. it crapped out a couple of years later and I was told it needed to have the batteries replaced. ok...go do it. then they told me that the only way to do it was to replace the unit. nonono...
Now I have a $135 unit that works just as well and if it takes a ****, no biggie....I'll just go get another.
 

69dieselfreak

well that nice
Joined
Mar 21, 2008
Posts
1,349
Reaction score
0
Location
rimrock arizona
I've spent the same on some fancy swiss mfg'd hood. it crapped out a couple of years later and I was told it needed to have the batteries replaced. ok...go do it. then they told me that the only way to do it was to replace the unit. nonono...
Now I have a $135 unit that works just as well and if it takes a ****, no biggie....I'll just go get another.

really that sucks ive had mine for a year and a half and it a champ if that happens i couldnt afford the 325 to fork out now if it took a crap but id just go the rout you took
 

tonkadoctor

Full Access Member
Joined
May 5, 2006
Posts
3,776
Reaction score
0
Location
none ya bidnes
The only single difference between a $45 hood and a $100 hood was the size of the lens. That's it. Small lens if fine for me.
 

geonc

SPIDER BAIT
Joined
Dec 22, 2003
Posts
7,271
Reaction score
1
Location
NECKVILLE North Carolina
I'm fussy about my lids {helmets}....Those cheap lids are OK for stick and mig....but throw in the higher freq given off from TIG and they just don't cut it.

The other factor ---and what will cause the lens to shutter back and forth is the placement and amount of sensors.

most of those cheapies have only 2 and they are mostly about center of the lens----move the stinger or mig gun just right and you will get flashed :eek:-cuss-cuss....

The better lids from Miller, Speedglass and Jackson Next Gen have 4 sensors at the outer corners :hail:hail


on edit...the better lids also will self power and charge the batteries from the UV given off by the arc.....
 
Last edited:

towcat

Supporting Member
Supporting Member
Joined
Jun 24, 2004
Posts
18,196
Reaction score
1,439
Location
SantaClara,Ca/Hamilton,TX
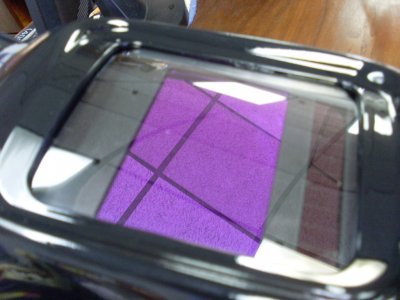
Here's the one I just got.
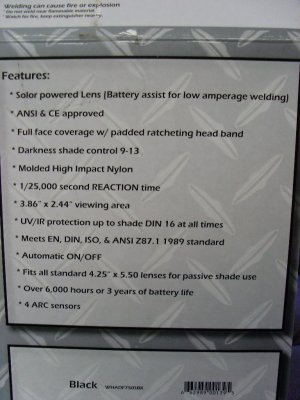
I don't do much welding to be quite honest, I have plenty of accomplices who do and I like to watch them work:D So far, plasma, arc, mig and tig.....it does fine. It's got the four sensors like what Geo likes and has the big window.;Sweet
The specs look pretty good too.
One last thing. it weighs half as much as my fancy swiss helmet did.
You're prolly wondering why I spent do much on the first one even though I don't weld much. I had a really close call with a eye injury years ago so I am paranoid about my remaining eyesight.
 

Attachments

  • SL372963.JPG
    SL372963.JPG
    285 KB · Views: 6
  • SL372964.JPG
    SL372964.JPG
    286.7 KB · Views: 12
  • SL372962.JPG
    SL372962.JPG
    170 KB · Views: 9
Last edited:

tonkadoctor

Full Access Member
Joined
May 5, 2006
Posts
3,776
Reaction score
0
Location
none ya bidnes
Geez Calvin, ya even use that thing yet LOL.

I can't blame you about your eyes. That's why I wear a welding helmet when grinding now instead of those flimsey plastic face shields. I had a spark get past a shield, through a vent hole in some goggles and past my glasses and lodge in my eye scratching my cornea 20 some years ago, made for a fun trip driving to the emergency room with only one eye and hurt like a sumnabeach for days. Still gun shy with a grinder and any thing else throwing chips.


Got the 3-1/2" stinger receiver welded up.
You must be registered for see images attach

You must be registered for see images attach

You must be registered for see images attach


Made the bracket for the safety chains.
You must be registered for see images attach

You must be registered for see images attach


Welded the stinger receiver into place and started to put the new flanges on the beavertail portion of the frame.
You must be registered for see images attach

You must be registered for see images attach
 

tonkadoctor

Full Access Member
Joined
May 5, 2006
Posts
3,776
Reaction score
0
Location
none ya bidnes
We'll start these two posts with a smile.
You must be registered for see images attach


Making lanyards with 1/16" coated cable and using 1/4-20 stainless nuts for swedges. These lanyard will help save me a from Murphy's law and my own poor memory. For these lanyards, using nuts is fine and I inherited a bunch of these SS 1/4" nuts so I gotta use them for something. I won't do something like this on winch cable. The welded on loops are a piece of chain link.
You must be registered for see images attach

You must be registered for see images attach

You must be registered for see images attach

You must be registered for see images attach

You must be registered for see images attach


Fabricated the mount for the ICC identification marker lamps, these lights are required on trucks and trailers ofer 80" wide.
You must be registered for see images attach


Also fabricated the mount for the center channel ramp.
You must be registered for see images attach

You must be registered for see images attach


To be continued.........
 
Top