Self oil burning

1mouse3

Full Access Member
Joined
Nov 28, 2013
Posts
1,388
Reaction score
968
Location
il
Round 2 and another pack, did save some over what was left last time for final clean up.

You must be registered for see images attach

You must be registered for see images attach


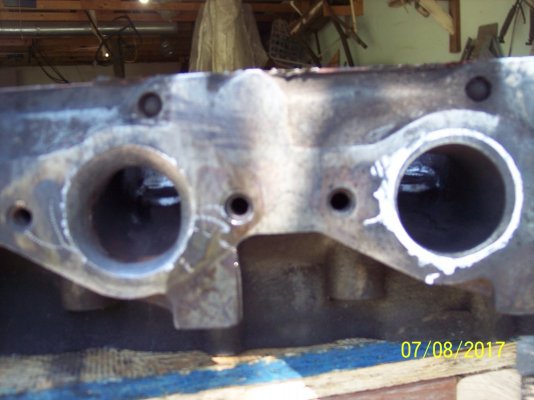
The roof of the exhast port is a pitted mess like the other head. Do have a carbide bur that might have enogh life left to clean this up a bit better, will get to that latter on.

You must be registered for see images attach


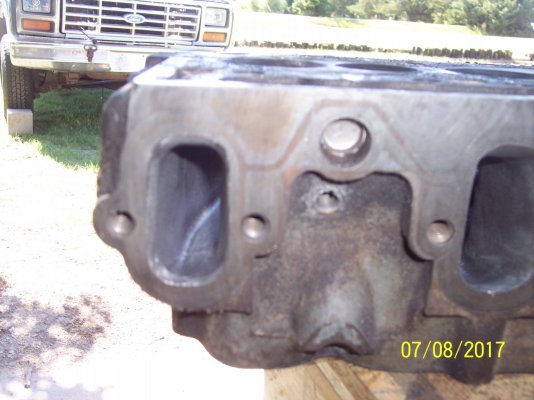
This end cleans up well along with the start of the intake runner, the other side of the intake missed a photoshoot. There is a transition point in the intake runner that I cant really get to, so best can do on that runner is about 90%.

You must be registered for see images attach


So could say Im done but think can do a little better.

You must be registered for see images attach
 

Booyah45828

Full Access Member
Joined
May 2, 2017
Posts
883
Reaction score
674
Location
Ohio
We didn't They came back from the machine shop in plastic bags and ready to be installed on an engine.
Oh, you were a rebuilder and not the machinist. I'd consider myself a rebuilder as well, but the only local machinist I trust always seems to be out a month. Some jobs we can't wait that long, so I dig the old sioux/lisle/kline tools out from under the bench and do it myself.
 

1mouse3

Full Access Member
Joined
Nov 28, 2013
Posts
1,388
Reaction score
968
Location
il
Debating on the path to take on truing the block and head serface. Think I like this ideal and go with a large tile, I would rather do it my self. Measure how much I take off, then that will be the given amount the valves need recessed with a valve job when the heads get sent for the guides.

xc_hide_links_from_guests_guests_error_hide_media
 

1mouse3

Full Access Member
Joined
Nov 28, 2013
Posts
1,388
Reaction score
968
Location
il
Since there was a bit of burn out on the gasket face, I pulled a gasket to see how far off it was. Intake side is almost a match so that side dose not need tothced.


You must be registered for see images attach


So with the bur armed and ready to chew up the pitting, I also blened out to the gasket a bit as well.

You must be registered for see images attach


I ground out the port till the the pitting was almost gone and this is after sanding. Yes shinny, now dont go temp me to polish this up.

You must be registered for see images attach


Know with the exhaust at 98% on this head, got one more to go. The delema will be if should finger the intake to get that one better.

You must be registered for see images attach
 

IDIBRONCO

IDIBRONCO
Joined
Feb 5, 2010
Posts
12,318
Reaction score
11,031
Location
edmond, ks
When I port heads, I put the gasket over the ports and then mark around the inside of the gasket with a white out pen. Then I remove the gaskets before touching the ports. Yes, I've also found that the intake ports are pretty close to matching the gaskets. That doesn't keep me out of them though. I've found the same thing with 302/351W heads. Sorry for the slightly out of focus picture.
 

Attachments

  • 002.JPG
    002.JPG
    209.7 KB · Views: 6

1mouse3

Full Access Member
Joined
Nov 28, 2013
Posts
1,388
Reaction score
968
Location
il
When I port heads, I put the gasket over the ports and then mark around the inside of the gasket with a white out pen.

Yea it would not be bad to mark it out before hand. I was seeing a burn mark on the gasket face and used that as refernce to how far to go. Would do a little at a time then recheck with the gasket.

Yes, I've also found that the intake ports are pretty close to matching the gaskets. That doesn't keep me out of them though.

What all did you do to the intake side and what method did you use to get to the halfway transition in the port? I can feel a imperfection there that I cant see or get the sanding bits to.

edit: point of interset is left wall where it fall out of sight.

You must be registered for see images attach
 
Last edited:

IDIBRONCO

IDIBRONCO
Joined
Feb 5, 2010
Posts
12,318
Reaction score
11,031
Location
edmond, ks
What all did you do to the intake side and what method did you use to get to the halfway transition in the port? I can feel a imperfection there that I cant see or get the sanding bits to.

edit: point of interset is left wall where it fall out of sight.
I still removed that slight bit of material that sits inside the gasket ports. I mostly smoothed out the roughness from the casting and then smoothed out my carbide burr marks with the same type of sandpaper rolls that you are using. As for the mid point, I just got it the best that I could. I did buy some cheap (probably Chinese) extended burrs that are 6-8" long (I'd have to measure to be sure of the lengths) and I'd use them to get inside those points the best that I could. One isn't very straight at the burr end so it makes a big vibration and probably shortens the service life of the burr, but I only use them at those points anyway. One more thing that I do is to do a small amount of work at the "raised" places where the valves come through into the ports. They have a sharp transition from the flat tops to the sloped sides. I make a radius of about 1/8" (maximum) just to give the air a smoother flow. Most of what I do is smoothing out the casting imperfections and could be done without the carbide burrs. They just make that part faster to do. In my mind, the smoother the air flow is, the better it will flow. I'll give you a piece of advice even though it looks like you're not removing a lot of material. In the exhaust ports, one side has a bolt hole next to it. DO NOT remove too much material there otherwise you'll grind through into the bolt hole like I did. That made me say a four letter word as loudly as I could. Here's a glimpse at my intake ports. Both of these heads are now running on my Blue Truck.
 

Attachments

  • 001.JPG
    001.JPG
    232.9 KB · Views: 5

1mouse3

Full Access Member
Joined
Nov 28, 2013
Posts
1,388
Reaction score
968
Location
il
One more thing that I do is to do a small amount of work at the "raised" places where the valves come through into the ports. They have a sharp transition from the flat tops to the sloped sides. I make a radius of about 1/8" (maximum) just to give the air a smoother flow.

That is about what I did and with the exhast side, it looked to be a slight restriction for flow so pulled it back to the guide some. I also dug in a little beween the wall and the raised boss to blend it some as well.

You must be registered for see images attach
 

1mouse3

Full Access Member
Joined
Nov 28, 2013
Posts
1,388
Reaction score
968
Location
il
I'll give you a piece of advice even though it looks like you're not removing a lot of material. In the exhaust ports, one side has a bolt hole next to it. DO NOT remove too much material there otherwise you'll grind through into the bolt hole like I did.


Thanks and I think I know where the penetration occured. Whould it happen to be on this wall that is oddly square just on entering the port? If so the note to be made is to not blend in or gasket match this wall much at all, I though something was up so did not touch it much.

You must be registered for see images attach
 

IDIBRONCO

IDIBRONCO
Joined
Feb 5, 2010
Posts
12,318
Reaction score
11,031
Location
edmond, ks
Yep. That's it. I still gasket matched the outer part of the port, but I didn't remove much material deeper than about 1/4" inside the port from that surface.
 

1mouse3

Full Access Member
Joined
Nov 28, 2013
Posts
1,388
Reaction score
968
Location
il
This is the marking I used as a staring point. You can see the pitted ring easy but not the 2nd carbon ring in this photo, it is the 2nd line out.

You must be registered for see images attach


I accepet @IDIBRONCO challenge to try at going full round and little close to the gasket this time

You must be registered for see images attach


After that I blended in a little and tryed not to touch the bad wall much.

You must be registered for see images attach


Now went lightly removing the pitting and blended out some, more on the base to make the hump gradual. I think there might be coolant under there, so dont go to far in.

You must be registered for see images attach


Now to what I did to guide boss, I had already started with the sanding rolls. I dug a slight bit in the trench till smooth, then made a better more of a taper to the roof.

You must be registered for see images attach

You must be registered for see images attach


Then on to the valve seat, there is a high ridge. I blended it in into the port so is not a sharp edge. I would not touch this if you dont plan to get a valve job since chance of toching the seat, tape it and stay away if you dont want a valve job

You must be registered for see images attach

You must be registered for see images attach


Then is on to repeating for the rest of the head, I did not give my self enough play time so to be continued.

You must be registered for see images attach
 

1mouse3

Full Access Member
Joined
Nov 28, 2013
Posts
1,388
Reaction score
968
Location
il
Yesterday was experimental and I backed off slightly today. This is what I came up with the port job based on a full gasket match.


You must be registered for see images attach


Since doing a bit more work and want them to match. I stopped at harbor junk to pick up there better caliper, I would be impresed if they can maage to mess up a digital one.

You must be registered for see images attach


These are the specs I came up with for the port job and matched the rest on this head to.

You must be registered for see images attach

You must be registered for see images attach

You must be registered for see images attach

You must be registered for see images attach

You must be registered for see images attach

You must be registered for see images attach


So porting is done for the most part on this head, just need to go over it with the saning rolls. Now need to go back over the other to bring it to this spec.

You must be registered for see images attach
 
Last edited:
Top