84 F-250 full rebuild

Leewhiskey

Registered User
Joined
Jul 15, 2021
Posts
9
Reaction score
10
Location
Cannon Falls, MN
So this winter after a year and a half of this truck being in my shed I have finally made the time to get to this project. It starts with an 84 F250, 4x4 diesel with the 4spd and 4.10s. It currently has a bad knock in the engine. I plan to use it for a daily driver, so longevity and reliability will mostly be the focus for this build. I acquired a 87 F350 with the diesel and a banks turbo for a donor truck, a tree had fallen on the cab and I’ve spent the past couple weeks tearing that down.

The 84 will be getting the engine, axles (with 3.55s), springs and 1356 case from the 87. I snagged a 5spd out of a 93 at a junkyard as well. I’m working on refreshing all the drivetrain to have that ready before I pull the 84 apart.

The engine will be fully torn down and rebuilt, it doesn’t matter to me that it ran when I pulled it, I like to know what I have. I plan to put a cam in, probably keep the turbo, gapless rings, whatever else it needs. Also rebuilding the 5spd, tcase and axles. I'll tear apart the 84 engine at some point to see what the knock is.

Other plans… The front axle will be getting upgraded to the 95-97 front brakes, rear axle is getting switched to early 2000 ford van discs and an LSD carrier. I have the pedal assembly, hydroboost, power steering pump and serpentine setup off a 92 f-super. I found a 86 with factory A/C at the pull your own yard so I grabbed the venting and heater box so I can put A/C in mine. Still need a dash panel though. I want to go with electric fans, although I don’t know exactly what I’ll do yet, they will probably be somewhere between the Windstar fans and that sweet setup Ken had in Project Queso. Fuel and charging system upgrades, group 31 batteries, nice stereo, LED headlights, will probably fabricate a new rear bumper and have it chromed, I cannot find a new drop bumper anywhere…. I’m sure I will stumble on other ideas along the way but that’s what I’ve got for now.

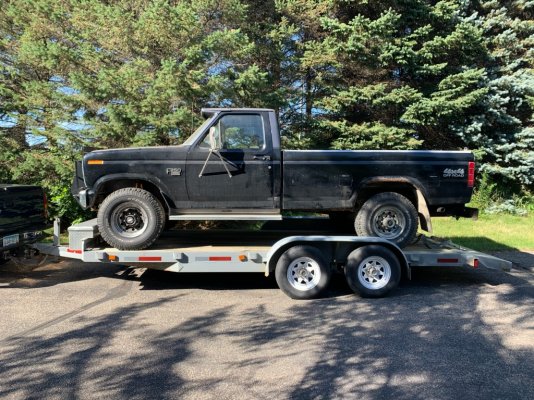
This is the only picture I have of the truck, more will come. Taken the day it got trailered to my place...
 

Attachments

  • Truck.jpg
    Truck.jpg
    395 KB · Views: 17

nitroguy

Full Access Member
Joined
Nov 12, 2012
Posts
247
Reaction score
321
Location
Kalispell, MT
Awesome! Can't wait to see your progress. Take lots of pics along the way and post them here, often! When it's too cold to be in my shop, I like to live vicariously through other's determination and will that vastly outpace my own.
 

franklin2

Full Access Member
Joined
Feb 24, 2009
Posts
5,179
Reaction score
1,414
Location
Va
I will warn you, the A/C conversion is not simple. You will be cutting one or more large holes in your non-A/C firewall to get it installed. I guess this is not a problem since you are re-doing the whole truck anyway, but that is why they had those weird dealer installed units back in the day. A full factory style A/C conversion is a pain.
 

Isaac Ristow

Full Access Member
Joined
Jul 11, 2018
Posts
234
Reaction score
158
Location
Somerset Wisconsin
Here's my 84 I did. Started as a 83 F250 6.9 T19 4x4. Body had some rust so instead of fixing it I flew out to Colorado and drove home a 84 F250 460 2wd c6. I took my IDI 83 chassis dropped a 7.3 IDI in with a Rajay turbo kit I bought and head studs motor was military rebuilt with low miles I had it all opened up everything looked good. I put a ZF5 in from a buddy and a LUK SMF clutch kit. Injectors came from Russ (typ4) Put 3 inch straight pipe in its not loud at all. I redid my entire AC system all new components with a red orifice on 134a it blows 28 degree air on a 80 degree day. I also built a gauge panel to go in where the ash trey was that holds Isspro mechanical temp and oil pressure and EGT and a Banks dynofact boost gauge. I swapped my rear dana 60 3.54 for a Dana 70 4.10 and a front diff for the TTB with 4.10. I redid all the brakes seals U-joints as well I also got rid of them stupid big nylock nuts for the rear wheel bearings and got double nuts with the locking tab ring for a dana 70 dodge. My shifter shaft has since been rapped in header rap and I have installed ''Ford the best never rest'' mud flaps front and rear along with matching floor matts and I've taken the automatic column out for a tilt manual trans column and a manual gauge cluster with LED back lighting. I still always find more stuff to do to it once I get a garage I'm going to have it professionally painted
You must be registered for see images attach
 

Leewhiskey

Registered User
Joined
Jul 15, 2021
Posts
9
Reaction score
10
Location
Cannon Falls, MN
Awesome! Can't wait to see your progress. Take lots of pics along the way and post them here, often! When it's too cold to be in my shop, I like to live vicariously through other's determination and will that vastly outpace my own.
I'll do my best with pics, especially when I'm doing things others may want to copy. My determination goes to about 0 degrees, lower than that its hard for the heater to keep up in the shop, especially with as windy as it's been.
I will warn you, the A/C conversion is not simple. You will be cutting one or more large holes in your non-A/C firewall to get it installed. I guess this is not a problem since you are re-doing the whole truck anyway, but that is why they had those weird dealer installed units back in the day. A full factory style A/C conversion is a pain.
Fortunately I had found out the firewall's were not the same before I pulled everything out of the junked truck, so I took measurements and pictures and hopefully that will help. I will have the whole front end off and the whole dash out so at least I won't have stuff in the way. This conversion is something I haven't looked into as much but I knew I wanted A/C and I like stuff to match factory.

Over the past few days I’ve pulled apart both axles to see what parts I need to order. This is my first time working on a Dana 60 and I’m impressed. No wonder everyone wants one… The axle shafts are much beefier than I expected, comparing them to the Sterling. Found the new style 2 piece axle seal inside too. Gears and bearings looked good, except for the bottom ones on the king pins, there were some rust spots so they’ll be replaced. The rear is the standard ford 10.25, same condition internally as the front but it will be getting new gears because I want the long pinion, I already scored a yoke. As much as I would like a trutrac, $50 for a limited slip carrier at the junkyard was easier on the wallet. If I set it up right it’ll be fine for what I do and I can always upgrade later.

On to the brakes…

Front axle - I can’t even remember what started me on the path to get to this modification, I know there was a lot of reading and searching. (I can’t be the only one who goes down these internet rabbit holes…? I hope not.) I found brackets/kits that can convert these kingpin 60’s to newer dodge or chevy brakes with 14” rotors and still have the 6.5 lug spacing but you would need a 17” wheel to clear the caliper. I already had 16” wheels and tires set aside for this truck though. I hoping I can find a way to make a similar style bracket work, but the rotor could become a problem since it remains inboard and the chevy conversion moves it outboard. I have an idea, so we'll see what comes of it. I drew up a bolt pattern (irregular pentagon, thanks ford) and a rough outline of the brackets in CAD and sent them to the laser. I'm having them cut from thin steel first to check my hole spacing and do some mock up. I should have them back this morning.


Rear axle disc conversion – My original plan was to just buy the conversion from somewhere, I think it uses Cadillac calipers and chevy rotors or something. I wasn’t really a huge fan of doing it this way though. Well, on one branch of the aforementioned rabbit hole, I stumbled into the conversion on the fordmann website.

From everything I measured and found, the brakes on the E250 and E350 vans with the semi floating axles are the same as the full floating. The local pull your own yard had several of these so it was easy to acquire everything. I will have the flanges laser cut out of ½ inch steel along with some setup blocks to space the flange off the hub properly. I spent a couple hours measuring a rusty backing plate and drawing it up, double checking and such. After all that (of course) I find the drawing fordmann had with dimensions, maybe I missed it before or it's new. Anyway, overlay his with mine, 3-5 thousandths difference in a few places. Good enough.
 

Isaac Ristow

Full Access Member
Joined
Jul 11, 2018
Posts
234
Reaction score
158
Location
Somerset Wisconsin
Thats a nice looking truck. You don't drive it in the winter do you?
Thanks! and absolutely not parked every winter along with my two Chevy c30s. I have a 13 f250 and a 86 idi with a plow I drive in the winter. The 83 was actually my second pickup I bought when I was 17 I'll be 25 this year no intentions to ever sell it either. Sadly it sits outside now but I keep it clean and park it before salt hits the roads and it stays parked until rain washes all the salt away. Once I have a place to park it inside I will have it all repainted as it's a little faded from Colorado
 

Leewhiskey

Registered User
Joined
Jul 15, 2021
Posts
9
Reaction score
10
Location
Cannon Falls, MN
The rear axle is back from the rebuild shop. New gears, new yoke, new clutchs... Once I get the brake brackets from the waterjet I'll finish putting it together.
You must be registered for see images attach


Turns out changing over to the 95-97 front brakes on a kingpin axle is a rather big PIA. It looks possible if you really want them but there are a couple of issues that make it difficult. The back of the spindle barely sits above the back of the rotor (red arrow, 60-80 thousandths maybe) so a straight bracket would be awful close without a spacer. Also, the offset needed from the face of the knuckle to bolt on the caliper bracket is about 3/4 of an inch and then adding the piece for it to bolt to could create issues with the bottom king pin bolts. It would be some creative design and welding that I eventually decided I didn't want to mess with.
You must be registered for see images attach

Once I saw how difficult this was going to be I started looking for other options. Easiest one would be just running original calipers and rotors but I had started down this road already and I'm pretty stubborn. I thought about the front rotors off my dodge but they were too thick for the ford caliper. Before I dug further into the dodge setup I found that the Chevy HD brakes from 2000-10 are a pretty easy swap, done mainly by guys ditching the IFS for a Ford Dana 60. The caliper bracket needs to be cut to clear the knuckle, a casting nub has to be ground off the caliper, and you have to get the hubs machined a little for the rotor to clear. In return you get outboard, 1.5" thick, 13" rotors, and bolt on calipers. The brackets I did find that are made for this were not in stock so I decided to get my own cut. Off to the junkyard for some setup pieces. After a lot of careful measuring and several double checks the CAD file I sent to the water jet should land me within minor grinding/reaming for fitment... I printed it on paper and overlayed it as a final check. We'll see.
You must be registered for see images attach

I have all the pieces for both axles cleaned up and ready for assembly. Found a shop that can turn the hubs once I get the measurements. Turns out some threaded rod and properly sized sockets works pretty good for installing the inner axle seals on the D60. The waterjet said about a week, then I will have more pics of the setup and get the axles completed.
You must be registered for see images attach
 

Leewhiskey

Registered User
Joined
Jul 15, 2021
Posts
9
Reaction score
10
Location
Cannon Falls, MN
It’s been a busy week but I’ve managed to get the rear axle done and ready to go under the truck. The parking brake assemblies, rotors and calipers for this conversion came from an 2006 E-350 with the semi floating dana 60 rear. The E-250s are the same from everything I found. The parking shoes and hardware kits change around 2004. It appears the backing plates and parking brakes were shared with the super duties as well, I don’t know when it started or for how long, but the parts listings were the same for 06. The conversion on Fordmanns site uses the older style shoes and hardware and he had to use a different spring to clear the hub. The spring in this kit allowed me to use it with some shoe modification.

Here are all the brackets for the front and rear brakes. Total cost for all 6 pieces out of ½” steel was $350.
You must be registered for see images attach


The waterjet has some deflection when cutting this thick and I chose to keep tolerances tight and fit as necessary. A 41/64th drill through the bolt holes and a die grinder with a carbide bit to take the deflection out of the axle hole and they slid on perfectly.

From the face of the wheel hub to the face of the bracket is 3.8 inches. A 1 inch square tube with a .030 shim set this perfectly for me. I tack welded a few places and fit everything else together before final welding. The left side I set at 33 degrees tilted back. The right side I forgot the angle and to take a pic, but I matched the angle of the caliper bracket mounting bolts to the left side. It’s different because the backing plates are the same so the right side is flipped over.
You must be registered for see images attach

You must be registered for see images attach

You must be registered for see images attach
 

Leewhiskey

Registered User
Joined
Jul 15, 2021
Posts
9
Reaction score
10
Location
Cannon Falls, MN
On to the shoe modifications, I will try to be thorough. This was a tedious process, I’ll bet I had the shoes on and off the backing plates 20 times checking fit with the hub, but I know it would take a lot less time now that I know what needs to be done. Since I’ll have a stickshift I wanted a parking brake, if it were an automatic I don’t think I would have bothered. I’ll color code each modification with the attached pictures.

Red- For starters you need to grind off parts of the shoe that would interfere with the hub.

Green- I used a burr bit to grind the holes for the return spring a little out and in so the spring could sit further out and not rub on the hub. I also had to notch the backside of the shoe with a grinding wheel to allow the “V” of the spring to sit in the shoe. This could be avoided I think if you cut the notches further toward each other, but I wanted to maintain good spring tension. I also had to add roll pins to keep the spring straight, it tended to bow into the hub.

Blue- The adjuster rides/rubs on the hub in the original location so I used a welder and grinder to move the notches out from center. There is a little nubb on the shoe that will interfere with the adjustment wheel that needs to be ground off as well.

Pink- Since the adjuster sits further from center now the spring for it will bind. The holes for the spring need to be cut toward the adjuster so the hooks can sit lower. You’ll have to play with this a little, if the spring is too tight to the adjustment wheel it’ll be very difficult to turn it. The shoe frame also has to be cut out to allow room for the coils, I cut right next to the lining and notched it to the middle of the frame.
You must be registered for see images attach

You must be registered for see images attach

You must be registered for see images attach

I think the pic below shows everything I did pretty clearly, except the notch for the spring "V" on the backside.
You must be registered for see images attach
 

Leewhiskey

Registered User
Joined
Jul 15, 2021
Posts
9
Reaction score
10
Location
Cannon Falls, MN
All this gave me about 1/8 inch clearance from the hub on both the spring and adjuster. It looks like to service the parking brake I'll have to pull the hubs unless I get really creative, but thats something I'm willing to live with.
You must be registered for see images attach

You must be registered for see images attach

I finished welding all the way around the bracket, painted it and mounted everything up.
You must be registered for see images attach

You must be registered for see images attach

You must be registered for see images attach

New axle bolts (maybe studs) are on the list with lugnuts and caps. I will be getting dust shields cut for the rear along with ones for the front brakes once I get them drawn up.

I’ll have the front axle together soon.
 
Top