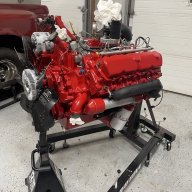
Removing 6.9/7.3 Adaptor Plate with Starter

Old Goat

Full Access Member
Joined
Jan 14, 2021
Posts
2,401
Reaction score
2,541
Location
Northern Nevada
I have the T-19 Transmission remove.
Bell Housing.
Pressure Plate and Clutch Disk.
Fly Wheel.
Rear Main Seal rear Plate.
And finally got the %#@* Speedy Seal removed.

Iam looking at the Adaptor Plate, and looks like just 2
large Bolts at the top hold it on...Correct?

Iam thinking of removing them, and drop it down and
out with the Starter (after wires removed).
Is this doable? Or are there Dowel pins to deal with?

Iam thinking of doing this, remove Starter and wash off the oil and other crud off it as well as the Adaptor.
Looks easier than trying to get to the top Bolt on the Starter.

Once done, then throw all the new junk back on before the next storm comes in, and start grinding through the gears

Goat
 

Jesus Freak

Full Access Member
Joined
Apr 3, 2022
Posts
4,441
Reaction score
5,055
Location
Crestview, FL
Sounds heavy, Goat. Probably doable, but the starter and cast iron adapter is gonna be heavy and awkward.
 

Lumberjackchuck

Full Access Member
Joined
Jan 23, 2023
Posts
184
Reaction score
204
Location
New Jersey
This is fresh in my head Goat, yes it’s just the two bolts at the top. I would definitely do that to get the top bolt on the starter. Previously I had gotten that bolt with a crows foot wrench.

Definitely recommend the power master 9050 starter if your going to replace. That thing spins nice!
 

Old Goat

Full Access Member
Joined
Jan 14, 2021
Posts
2,401
Reaction score
2,541
Location
Northern Nevada
Yeah It looks awkward. thinking of placing Floor jack under the Starter, have my Wife control it as it comes down.

I do have the 9050 Starter installed. Just thought it would be a good time to pretty her up.
Don`t want a cranky Starter this winter.

I found 2 of the F2TZ-6701-A Rear Main Seal with Speedy Sleeve installed in the rubber seal with the tool to push her into the Rear Plate.
These are NLA from Ford, lucked out a dealer had these laying around.
Hope it goes on easier than old Speedy was coming off.

Speaking of heavy, that dang FW was heavy enough. Used Floor Jack under FW, removed all Bolts except for one. Unscrewed it out almost all the way. Slid FW towards me so it would get just past the exhaust cross over pipe and onto the Jack pad. Then removed bolt and Wife lowered down the Jack.


Goat
 

Lumberjackchuck

Full Access Member
Joined
Jan 23, 2023
Posts
184
Reaction score
204
Location
New Jersey
I do have the 9050 Starter installed. Just thought it would be a good time to pretty her up.

Unfortunately the valley pan drain seems to drain everything down this adapter plate and it goes right over the starter. It’s definitely an ugly spot if you’ve had some leaks.
 

Old Goat

Full Access Member
Joined
Jan 14, 2021
Posts
2,401
Reaction score
2,541
Location
Northern Nevada
The major leak is the right VC.
That VP drain hole isn`t very big. It is square, the size of a 3/8" Ratchet extension.
No leaks in the pan as far as I have seen when looking in there once in a while.

I have 2 engines in the shop, I`ll take a look at the rear to see what the drain looks like.

Depending on the weather, when I get this project buttoned up. I have the R&D IP and Injectors to install. Be a good time to pull the Intake Manifold and clean up the VP area.


Goat
 

TahoeTom

Registered User
Supporting Member
Joined
May 19, 2010
Posts
777
Reaction score
142
Location
S. Lake Tahoe, CA
I like to use alignment dowels to R&R the flywheel , Replace a couple of the bolts with same thread and heads cut off. No way I could hold it in place to start bolts without them.
 

Old Goat

Full Access Member
Joined
Jan 14, 2021
Posts
2,401
Reaction score
2,541
Location
Northern Nevada
I already have a couple of the old bolt heads cut off and ready for the install.
That FW is one heavy sucker.


Goat
 

Old Goat

Full Access Member
Joined
Jan 14, 2021
Posts
2,401
Reaction score
2,541
Location
Northern Nevada
I just came across my thread from almost a year ago.
Thought I would add a couple things here.

When I reinstalled the FW, I had some long bolts I got
from the Hard ware store of the same thread as the FW
Bolts. Got long one`s so the treads were short enough
to screw into the Crank and with a smooth shaft for the
heavy FW to slide on w/o any additional friction from any
threads.
(make since?)
Top Crank bolt was at 12, Set FW on a short 2x4 on the
Floor Jack at 12, with help from my Wife, rolled it under
the truck and lifted it into position. Then slide FW on the
alignment dowel, and throw on your bolts. Be sure to use
lock tite on them.

Did the same with the Pressure Plate.

>>>>>>>>>>>>>>>>>>>>>>>>
A little side note here.

Couple moths back replaced the IP, Injectors, Manifold,
VP etc....
I removed the Fuel Filter and set aside, and the VP and
the tall plate the filter bolts to and the 5LB spacer block
for the VP.
Now bolting it back together is a P I T A getting the bolts
started and hold all this together.
The Locating Dowels for the FW are the same thread as
the bolts that hold this stuff to the block. Screwed in a
couple and hung the parts and made it so easy.
Be sure to use lock-Tite on the threads, and especially
the 2 for the VP.


Goat
 
Top