BDCarrillo
Full Access Member
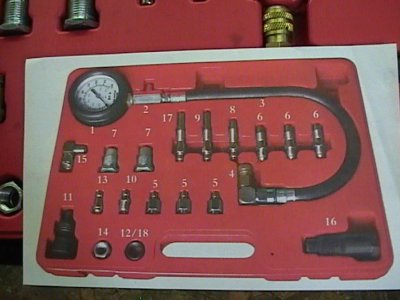
I do know a few threads on this forum mentioned that the cheap Harbor Freight kit could be modified, but details were lacking...
First common complaint: Stuck gauge or air bleed doesn't work. Note that the bleed is depressed in the photo below. I'm not sure what kind of valve it is, but giving the bleeder several stiff whacks (with something like the pictured clamp) will depressurize the gauge. I suppose you're fighting the built-up internal pressure of the gauge assembly.
Second common complaint: The adapter listed for the 6.9 or 7.3 IDI doesn't work. Out of the box, this is true. However, by removing the valve core, trimming it to length, chamfering the end, and replacing the valve core it will work. I used a 1" belt sander to grind it down to length (about 1/4" removed) and then chamfered the edges with sand paper. Make sure to blast it out with air before replacing the valve core. Start slightly longer than the numbers in the photo and work it down to size, just to be safe.
For comparisons sake, my modified $30 kit adapter, a Beru glowplug, and the $130 kit adapter, all aligned by the shoulder which seals them to the head.
Compression test procedure:
1: Remove air filter assembly
2: Disconnect glow plug relay (white wire shown below, ziptied out of the way)
3: Disconnect Fuel Shutoff Solenoid (connector towards front of vehicle, on top of injection pump, drivers side)
4: Disconnect and remove glow plugs with a 3/8" deep socket. Many have reported that it's easier with 1/4" drive sockets. (difficulty may vary based on engine year/turbo)
5: I opted to make a "bump starter" that energizes the starter relay. This can be done with a momentary switch connected between the battery positive and small post on the relay. This allows you to stand in front of the engine and observe the gauge directly. See photo
6: Install adapter in glow plug hole, gently snug down.
7: Attach gauge. I opted to secure it with a small clamp.
8: Energize starter relay, allow to crank 6-8 revolutions. Be consistent and use the same number of revolutions per cylinder tested.
9: Record pressure, gently whack silver bleeder below the gauge. It will pop briefly at higher pressures, then drain normally at lower pressures.
Repeat 6-9 for each cylinder. Numbers WILL vary... a variance of 20-25% OR 40 psi between the highest and lowest has been considered the "norm" from other threads on here... use your judgment or post up your own thread with your numbers. Similarly, reported numbers have varied from mid 200's to mid 400's. Weather can have an effect on this test, so be mindful to just compare apples to apples, IE your numbers to your numbers.
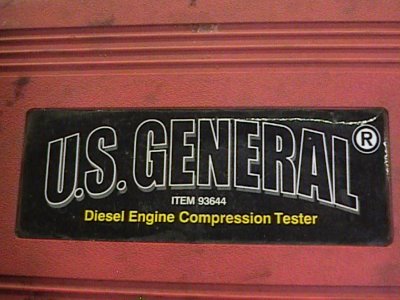
Hopefully I covered everything relevant to successfully run a compression test with the $30 Harbor Freight kit (Item # 93644).
First common complaint: Stuck gauge or air bleed doesn't work. Note that the bleed is depressed in the photo below. I'm not sure what kind of valve it is, but giving the bleeder several stiff whacks (with something like the pictured clamp) will depressurize the gauge. I suppose you're fighting the built-up internal pressure of the gauge assembly.
You must be registered for see images attach
Second common complaint: The adapter listed for the 6.9 or 7.3 IDI doesn't work. Out of the box, this is true. However, by removing the valve core, trimming it to length, chamfering the end, and replacing the valve core it will work. I used a 1" belt sander to grind it down to length (about 1/4" removed) and then chamfered the edges with sand paper. Make sure to blast it out with air before replacing the valve core. Start slightly longer than the numbers in the photo and work it down to size, just to be safe.
You must be registered for see images attach
For comparisons sake, my modified $30 kit adapter, a Beru glowplug, and the $130 kit adapter, all aligned by the shoulder which seals them to the head.
You must be registered for see images attach
Compression test procedure:
1: Remove air filter assembly
2: Disconnect glow plug relay (white wire shown below, ziptied out of the way)
You must be registered for see images attach
3: Disconnect Fuel Shutoff Solenoid (connector towards front of vehicle, on top of injection pump, drivers side)
You must be registered for see images attach
4: Disconnect and remove glow plugs with a 3/8" deep socket. Many have reported that it's easier with 1/4" drive sockets. (difficulty may vary based on engine year/turbo)
5: I opted to make a "bump starter" that energizes the starter relay. This can be done with a momentary switch connected between the battery positive and small post on the relay. This allows you to stand in front of the engine and observe the gauge directly. See photo
You must be registered for see images attach
6: Install adapter in glow plug hole, gently snug down.
7: Attach gauge. I opted to secure it with a small clamp.
8: Energize starter relay, allow to crank 6-8 revolutions. Be consistent and use the same number of revolutions per cylinder tested.
9: Record pressure, gently whack silver bleeder below the gauge. It will pop briefly at higher pressures, then drain normally at lower pressures.
Repeat 6-9 for each cylinder. Numbers WILL vary... a variance of 20-25% OR 40 psi between the highest and lowest has been considered the "norm" from other threads on here... use your judgment or post up your own thread with your numbers. Similarly, reported numbers have varied from mid 200's to mid 400's. Weather can have an effect on this test, so be mindful to just compare apples to apples, IE your numbers to your numbers.
Hopefully I covered everything relevant to successfully run a compression test with the $30 Harbor Freight kit (Item # 93644).