OB_WAN
Full Access Member
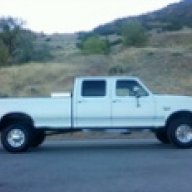
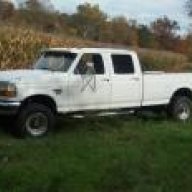
I just completed a body lift on my IDI and wanted to share my steps. Let me know if I missed anything.
The primary purpose of the lift is for installation of a banks turbo kit.
I used hockey pucks I purchased off ebay. took 6 pucks for the cab. I have not lifted the bed yet but due to the sagging body rubber mounts I'm going to have to do something interesting to the bed to get alignment. I'm thinking it's about 3/4" lift needed. Not too worried about it for now. BTW, if you need pucks, let me know. I bought them @ a little over $1 ea and have plenty of extras.
1. I spent several days spraying the bolts with PB Blaster to loosen them up prior to the work. Primary spray required is on the front two bolts in the grill area.
2. it takes 2 people, 1 to hold the nut/bolt on the bottom, another to run the impact/breaker bar from the top.
3. front bolts were accessed using several 1/2" extentions(to get access to above the grill) and a deep socket(I think it was 11/16). nuts were corroded(battery acid and brake fluid) so I had to use a hammer to drive the socket on. bolt on the bottom is 5/8.
4. other 2 bolts on each side are accessed under the carpeting in the front floorboard(under a rubber/plastic grommet) and behind the rear bench seat near the rear wall. bolts were 5/8, nut underneath was 7/8. you can get a 7/8 combination wrench in the area on the driver side rear mount tucked in above the gas tank brackets. the rest of the nuts are easy access.
5. after removing all bolts/nuts, loosely reset the bolts on whichever side you are NOT going to do first. this will stop the cab from sliding off the frame when lifting.
6. I have an auto and I SHOULD have loosened the shift linkage prior to lifting the body. Do this or read my other post regarding damage(http://www.oilburners.net/forums/showthread.php?t=38827). aside from the shift linkage, keep an eye on the transmission harness to ensure it isn't over stretched. loosen it from the skid plate if needed. I wasn't worried about the brake lines since they're coiled and stretched with the lift. but no guarantees.
7. I used the ford jack raised on a cinder brick to lift the body(because my hydraulic jacks are on the fritz). I used an extra hockey puck to ensure I didn't damage the underside of the body during lifting. lift point was slightly back of centered under the front door.
8. there are supposed to be keys on the front bolt that when removed, allow removal of the bolt. My bolt was thoroughly adhered to the front body mounts so I didn't force it. Some others have simply torched the bolts off but the front rubber replacement bushings are pricey so I just kept mine as-is. this will require significant lifting of the cab to clear the bolts.
9. pucks were center drilled using a drill bit just slightly larger than the bolt diameter. piece of cake.
11. The inner cab bolts will need to be replaced with bolts ~1" longer(or better yet as some have said in prior posts, get some stainless allthread, 7/16" course thread). I originally thought I could make the existing ones work but that didn't happen. because I didn't have transportation to the HW store, for the front cab bolts I used the rear bolts and added 1" worth of washers for spacing. for the rear cab bolts, I ended up cutting the heads off the front cab bolts, finding some other bolts I had lying around the same diameter, and welding the two together to make a bolt 7" long. It will be a temporary solution until I find some allthread or a 7" bolt.
12, I forgot to loosely set one rear cab bolt during lifting. the cab shifted a few inches. it was not difficult to push it back. my cab is still not aligned perfectly and will require some lifting/shifting to get it back in alignment but wasn't too bad. it was too heavy to shift when sitting on the pucks but I didn't really have a lot of leverage.
with 2 sets of hands for loosening/tightening bolts, the correct hardware for replacement, and being lucky enough not to break any bolts(the front two would be possible culprits or if you live in salt territory), it should take < 3hrs. plan for longer just in case.
steps to realign shift linkage
1. re-tighten bolt on linkage
2. it might be set but just in case
3. with engine off, put the vehicle in D(shift down to 1st and then move it back 2 detentes.
4. loosen linkage bolt, get back in the cab and align column to D.
5. re-tighten bolt
hope this helps anyone thinking about doing the lift. I've read that doing a lift 2+" may cause firewall clearance issues for the steering? just to forewarn you. there are other posts that may go in to more detail on that.
The primary purpose of the lift is for installation of a banks turbo kit.
I used hockey pucks I purchased off ebay. took 6 pucks for the cab. I have not lifted the bed yet but due to the sagging body rubber mounts I'm going to have to do something interesting to the bed to get alignment. I'm thinking it's about 3/4" lift needed. Not too worried about it for now. BTW, if you need pucks, let me know. I bought them @ a little over $1 ea and have plenty of extras.
1. I spent several days spraying the bolts with PB Blaster to loosen them up prior to the work. Primary spray required is on the front two bolts in the grill area.
2. it takes 2 people, 1 to hold the nut/bolt on the bottom, another to run the impact/breaker bar from the top.
3. front bolts were accessed using several 1/2" extentions(to get access to above the grill) and a deep socket(I think it was 11/16). nuts were corroded(battery acid and brake fluid) so I had to use a hammer to drive the socket on. bolt on the bottom is 5/8.
4. other 2 bolts on each side are accessed under the carpeting in the front floorboard(under a rubber/plastic grommet) and behind the rear bench seat near the rear wall. bolts were 5/8, nut underneath was 7/8. you can get a 7/8 combination wrench in the area on the driver side rear mount tucked in above the gas tank brackets. the rest of the nuts are easy access.
5. after removing all bolts/nuts, loosely reset the bolts on whichever side you are NOT going to do first. this will stop the cab from sliding off the frame when lifting.
6. I have an auto and I SHOULD have loosened the shift linkage prior to lifting the body. Do this or read my other post regarding damage(http://www.oilburners.net/forums/showthread.php?t=38827). aside from the shift linkage, keep an eye on the transmission harness to ensure it isn't over stretched. loosen it from the skid plate if needed. I wasn't worried about the brake lines since they're coiled and stretched with the lift. but no guarantees.
7. I used the ford jack raised on a cinder brick to lift the body(because my hydraulic jacks are on the fritz). I used an extra hockey puck to ensure I didn't damage the underside of the body during lifting. lift point was slightly back of centered under the front door.
8. there are supposed to be keys on the front bolt that when removed, allow removal of the bolt. My bolt was thoroughly adhered to the front body mounts so I didn't force it. Some others have simply torched the bolts off but the front rubber replacement bushings are pricey so I just kept mine as-is. this will require significant lifting of the cab to clear the bolts.
9. pucks were center drilled using a drill bit just slightly larger than the bolt diameter. piece of cake.
11. The inner cab bolts will need to be replaced with bolts ~1" longer(or better yet as some have said in prior posts, get some stainless allthread, 7/16" course thread). I originally thought I could make the existing ones work but that didn't happen. because I didn't have transportation to the HW store, for the front cab bolts I used the rear bolts and added 1" worth of washers for spacing. for the rear cab bolts, I ended up cutting the heads off the front cab bolts, finding some other bolts I had lying around the same diameter, and welding the two together to make a bolt 7" long. It will be a temporary solution until I find some allthread or a 7" bolt.
12, I forgot to loosely set one rear cab bolt during lifting. the cab shifted a few inches. it was not difficult to push it back. my cab is still not aligned perfectly and will require some lifting/shifting to get it back in alignment but wasn't too bad. it was too heavy to shift when sitting on the pucks but I didn't really have a lot of leverage.
with 2 sets of hands for loosening/tightening bolts, the correct hardware for replacement, and being lucky enough not to break any bolts(the front two would be possible culprits or if you live in salt territory), it should take < 3hrs. plan for longer just in case.
steps to realign shift linkage
1. re-tighten bolt on linkage
2. it might be set but just in case
3. with engine off, put the vehicle in D(shift down to 1st and then move it back 2 detentes.
4. loosen linkage bolt, get back in the cab and align column to D.
5. re-tighten bolt
hope this helps anyone thinking about doing the lift. I've read that doing a lift 2+" may cause firewall clearance issues for the steering? just to forewarn you. there are other posts that may go in to more detail on that.