Turbo time thanks to head gasket leak

BioFarmer93

OPEC Hater
Joined
Sep 19, 2009
Posts
687
Reaction score
26
Location
Jacksonville, Florida
Hey Everybody,
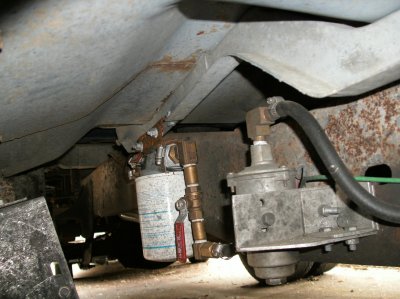
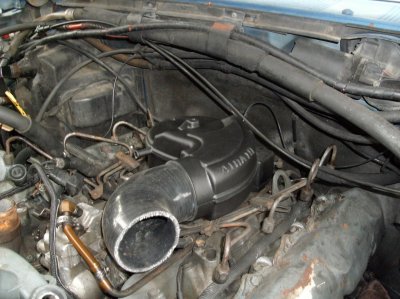
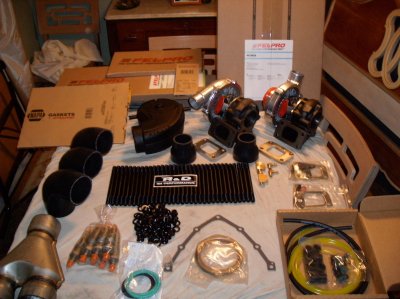
It's been awhile since I checked in, but I still read most days.. Well, Henry has become afflicted with a head gasket leak or two, what appears to be a front main seal leak and possibly a rear seal leak. While I have the engine out the ZF-5 is going to be rebuilt- I'm tired of my shifts sounding like I've never driven a manual before and having to hit 2nd real fast before I can go into reverse without sounding like my goal is smoothing all the teeth from the gears. I have a set of turbo heads that I've been sitting on for a couple of years that I just had redone- valve job, new guides, magna-fluxed, yada yada.. Anyway, in true Biofarmer style, I didn't ever even consider the possibility that there might be fitment issues between N-A and turbo heads. The Felpro gasket set I got is listed for both, but this is seldom traveled territory for me. I'm finally able to order my ARP studs today- had to save a while for those, because when all is said and done, Henry will be sporting two Volvo turbos, each mounted as close to the end of each exhaust manifold as is practicable. The oil cooler will receive maintenance during this time, as well as a general evaluation of everything I can think of- oh yeah, it's about time for a new oil pump also.. The current one works, but the pressure could stand to be about 20psi higher at idle. Already have the valley pan, all gaskets (except oil cooler) rebuilt and pop matched BB code injectors and intercooler. Yet to be acquired are the two used turbos (that go straight to Russ for rebuilding) various piping & odds and ends. I'm sure a lot of you that have done this before have some pearls to share about the process. This is my first time rebuilding anything bigger than a Harley, so be gentle..;);)
 

vandy7.3

Full Access Member
Joined
Dec 29, 2013
Posts
168
Reaction score
0
Location
wardsville, missouri
Sounds like you got a good game plan none the less. I hope it all works out good and that you like the setup you're going to, sounds damn cool that's for sure. Out of your whole post first thing to catch my eye was Henry. I would like to say you stole my trucks name haha. But I just bought mine this year and one way or another it got the name Henry.
I had to say something, just couldn't imagine anyone else calling there truck the same thing.
Either way it's awesome and ill be subscribed and following your build the whole way

Sent from my SAMSUNG-SGH-I537 using Tapatalk
 

BioFarmer93

OPEC Hater
Joined
Sep 19, 2009
Posts
687
Reaction score
26
Location
Jacksonville, Florida
Thanks Vandy,
I'll try to keep it interesting, shouldn't be too hard with all the mistakes I'm likely to make..
Since I'm doing it at home in the driveway in a deed restricted HOA subdivision, the actual engine
pull is going to have to be done fast, so I can get it into the garage before anyone notices what's
going on. The front of the truck is up pretty close to the garage door, so the front clip can't really
be seen from the street. Northern Tool has a 1500 lb. engine stand for a good price, and I can
rent a heavy duty engine hoist for a day to pull it. What I was hoping for from OB members were any
time saving tips, tricks, methods or "don't do such and such!" that they were willing to share to make
this job go as smoothly as possible.
 

icanfixall

Official GMM hand model
Joined
Apr 10, 2005
Posts
25,858
Reaction score
673
Location
West coast
Some tips I found about pulling an engine.. You do not have to remove the hood but taking off the hood hinge springs will get you more room to lift out the engine. You will need something to prop the hood open because you have removed the springs that holds it open. Once the engine is out just close the hood and nobody knows whats different. Slide some 1/4 inch plywood or cardboard between the fan and the radiator . Then remove the radiator. That way you wont harm the radiator by the fan. Then removing the fan is easy. Remove the accessories off the front of the engine for more working room too. You can leave the ac charged up too. Just wire up the compressor to something on the drivers side of the engine bay. Same with the power steering pump. Please take puctures with what ever you have. Camera or cell phone. These can really help when you try to install something. Bag all the nuts and bolts for anything you take off. Place a piece of paper in the bag telling you what it is. ?Removing the motor mount nuts is usually a slow tuff job. the 4 of them can be removed at any time. the starter needs to come off for more working room too. Support the trans too. Use the longest extension you have to reach the bell housing bolts. There are 6 of them. Several extensions making up about a 24 inch extension makes reaching the top bolts easy. If you have a auto trans you are going to need to hand crank the engine 360 degrees to remove the 4 torque converter nuts. I use a large screwdriver on the flywheel teeth about 2 or 3 teeth at a time to move the crank around. Its slow but it works well. If you break exhaust manifold bolts don't worry much. Many manifolds are on ebay all the time. The manifolds do not need to come off the heads to do head gaskets. If you don't have a gasket set yet I have both a 6.9 or 7.3 head gasket set. I will sell it to you for $100.00 with free shipping. I don't have any main or rod bearings but do have a new oil pump if you choose to install a new one. Check the prices on ebay and around town. then tell me what you will pay for it. This is the new and not rebuilt pump. Your going to need a valley pan gasket too. I have 2 but want to keep one for a spare just in case issue. Make an offer on that too. Its also a felpro gasket. Cleaning out the head bolt threads requires a bottoming tap called a 1/2x13 tap. If you can't find one just grind flat a starting or plug tap. I usually use a 1/16 inch cutoff wheel on my grinder to cut off the ends. Do not allow the tap to turn blue or the temper is ruined. Grind a little and cool in cold water gets it down quickly
 
Last edited:

TahoeTom

Supporting Member
Supporting Member
Joined
May 19, 2010
Posts
749
Reaction score
113
Location
S. Lake Tahoe, CA
At idle 20 psi is about all you will get. Before replacing the oil pump replace the sender unit at the rear of the valley pan and see if it reads higher. With mine it seemed like just cleaning the electrical contact to the sender improved the reading on the factory gauge. An aftermarket gauge is a big improvement over the factory one.
Edit: I see you have an aftermarket gauge. I should have figured that out since you knew the psi.
 

BioFarmer93

OPEC Hater
Joined
Sep 19, 2009
Posts
687
Reaction score
26
Location
Jacksonville, Florida
I vaguely seem to remember that the AIRAID 300-100 intake hat fits our engines- can anyone confirm this?
You must be registered for see images attach
 

BioFarmer93

OPEC Hater
Joined
Sep 19, 2009
Posts
687
Reaction score
26
Location
Jacksonville, Florida
Well, the money was saved, parts were purchased and the prep work has begun. If it doesn't rain next weekend then the engine gets pulled. I've been following Vandy7.3's build and other turbo refit posts, gleaning all the info I can. I won't know how much else may need to be done to Henry until I get it opened up, but that's a given. Until then y'all can enjoy some pre-pull pic's...

The old radiator finally rotted out, so I replaced it with a Champion aluminum and fabbed up an almost air tight shroud for the e-fans, with one way EPDM flaps riveted on for "open cruise/closed stop" action.

Since charge cooling is is important (especially in summertime FL.) I got a 31"x12"x4" bar and plate 'cooler- 3" in & out.. Bottom brackets in place.

Don't know about you, but anytime I see an old bed frame in the trash, I grab it- and I don't sell it for scrap since they are great for making things out of..

Some minor dental surgery was needed to get fresh air to the 'cooler, so the task was attended to.

That piece of bed frame angle in its finished form as the 'cooler upper support bracket.

This is a little earlier in the scheme of things, but the Walbro Industrial E-Lift Pump with the isolation valves & Goldenrod water block pre-filter in front of it has been a real life saver, I just keep a spare filter behind the back seat. It can be completely swapped out on the side of the road in under two minutes.

The Airaid 300-100 intake hat turned out to fit perfectly, but I'd like to use a gasket for a good seal- does anyone know of something, flat or O-ring, that will work?

I have gathered all gaskets, valley pan, seals, rebuilt BB injectors, ARP studs, turbos, and most of the oil plumbing.. Yet to be acquired is the air piping and exhaust piping.
 

Attachments

  • GEDC0070.jpg
    GEDC0070.jpg
    795.7 KB · Views: 47
  • GEDC0084.jpg
    GEDC0084.jpg
    980.3 KB · Views: 44
  • GEDC0089.jpg
    GEDC0089.jpg
    828.7 KB · Views: 43
  • GEDC0083.jpg
    GEDC0083.jpg
    524.1 KB · Views: 47
  • GEDC0093.jpg
    GEDC0093.jpg
    511 KB · Views: 44
  • GEDC0072 (2).jpg
    GEDC0072 (2).jpg
    602.8 KB · Views: 51
  • GEDC0078.jpg
    GEDC0078.jpg
    631.3 KB · Views: 60
  • GEDC0069 (2).jpg
    GEDC0069 (2).jpg
    547.9 KB · Views: 58

vandy7.3

Full Access Member
Joined
Dec 29, 2013
Posts
168
Reaction score
0
Location
wardsville, missouri
Oh ya, I'm looking forward to this build. I'll be following right in your foot steps, besides the twin turbos. But I'll be doing the intercooler and that air raid intake hat looks like a good piece to have for routing the pipe. Can't wait to see how this turns out
 

BioFarmer93

OPEC Hater
Joined
Sep 19, 2009
Posts
687
Reaction score
26
Location
Jacksonville, Florida
Oh ya, I'm looking forward to this build. I'll be following right in your foot steps, besides the twin turbos. But I'll be doing the intercooler and that air raid intake hat looks like a good piece to have for routing the pipe. Can't wait to see how this turns out

Vandy, You know that I'm remote mounting those turbos, right? That Airaid hat is made from some kind of thick tough plastic, but I'm not sure it would be the best solution if you're gonna have your turbo in the traditional location..
 

vandy7.3

Full Access Member
Joined
Dec 29, 2013
Posts
168
Reaction score
0
Location
wardsville, missouri
You don't think the turbo in its normal location will clear that intake hate? I know you can use the factory ats hat and run an intercooler, it just looks like a pain. I planned on using r&d's intake manifold when I did my intercooler but that air raid intake hat looks like it would work and make running IC pipe a little easier
 

vandy7.3

Full Access Member
Joined
Dec 29, 2013
Posts
168
Reaction score
0
Location
wardsville, missouri
Oh I didn't even think about that. I doubt that would be a problem, especially since I have a turbo blanket on the exhaust side. I can drive it to work and pop the hood and lay my hand on the blanket and it's barely even warm.
 

Latest posts

Forum statistics

Threads
91,284
Posts
1,129,785
Members
24,099
Latest member
IDIBronco86
Top