IDIBRONCO
IDIBRONCO
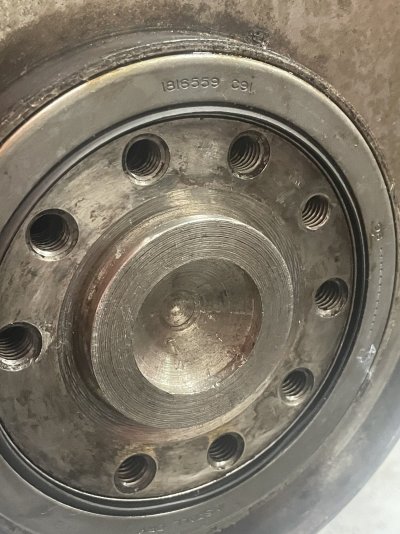
Yes that is a crank repair sleeve. It's designed to make the back of the crank where the sleeve rides smooth. The seal lip will leave a small groove in the crank after many millions of times of the crank rotating around inside of the seal. You can't install the repair sleeve with the seal and plate installed. before you try to install the sleeve, be 100% sure that there isn't one already on there. If there is, you need to remove the old one first. I use a sharp chisel, held at a pretty flat angle to the back of the crank and break it loose. I hold the chisel close to parallel to the part of the crank with the flywheel bolt holes in it. You want to damage the old sleeve but not the crank. Since the sleeves are made of such this material, once you damage the old sleeve, you will be able to peel it away from the crank fairly easily. Next, make 100% sure (again) that the place on the crank where the sleeve goes is smooth. If not, you will damage the new sleeve on installation and the seal will leak. I "gat" ti drop the transmission and replace the sleeve in an ambulance one time because the guy who built the engine didn't bother to remove the burr that was on the seal area of the crank. I just used a small flat file to smooth out the burr. After I was done, it didn't leak. We also put a thin coat of red Lock Tite on the inside of the sleeve where it sits against the crank. I still do that today even though I'm not sure that you need to. It is a slight press fit so the new sleeve should hold without the Lock Tite, but that's one habit that I still keep, right, wrong, or otherwise.