Rear main seal replacement

Mattbo

Registered User
Joined
Apr 11, 2024
Posts
50
Reaction score
6
Location
Central Florida
So about this paper seal?? Is it necessary? I did not have one when I removed my plate and am seeing mixed reviews of yes and no to just use high quality sealant/RTV?
 

WrenchWhore

Full Access Member
Joined
Jun 2, 2022
Posts
176
Reaction score
163
Location
Lake Havasu City
Did you read through the link in post#5?

I must have done something right even though I was unsure if I was doing things right stumbling along getting the dang rear seal installed.
Put a few thousand miles on her and no leaks.

I put a link of the Rotunda Ford tool to press the seal into the plate using your Hyd Press. Sets the seal at the proper depth.
I see one is listed for $35 if you click on the link.


Goat
I was able to get my SKF seal installed from the back of the plate and get it flush with a block of wood. I'd definitely want the install tool but if you get creative it can be done without...at least with that thickness seal
 
Last edited:

Mattbo

Registered User
Joined
Apr 11, 2024
Posts
50
Reaction score
6
Location
Central Florida
I just dropped off the plate at a hydraulic shop miraculously they have the old rotunda kit so it will be done right. I’m prepping all the surfaces now for the crank sleeve. It should arrive today. I do have a question for anybody that’s willing to give insight, how imperative is it to get every bit of that old paper sealed off of the mountain it is like concrete alignment. Everything is spotless. I just cannot get off. I’ve tried everything knife even soaking it. It is damn near petrified to that bottom area.
 

Old Goat

Full Access Member
Joined
Jan 14, 2021
Posts
1,659
Reaction score
1,645
Location
Northern Nevada
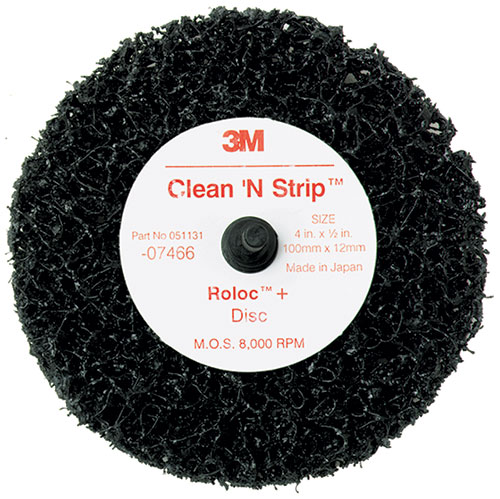
How about something like this?
I assume you are talking about the rear of the Engine.


Walmart has one I buy, pretty agressive and should clean up the back of the engine.
They around 8 - $12, look in the automotive section.
First time I bought one was $8, stopped at Auto Zone and same one was $16.

Be sure to stuff a rag in the Oil Pan where it protrudes, don`t want junk dropping in there.


Goat
 

Mattbo

Registered User
Joined
Apr 11, 2024
Posts
50
Reaction score
6
Location
Central Florida
I have a rag taped, the best I can to prevent any garbage falling in the pan. I don’t think that wheel would get in there. I almost need like an extremely small wire wheel for a Dremel. It’s tiny.
 

Mattbo

Registered User
Joined
Apr 11, 2024
Posts
50
Reaction score
6
Location
Central Florida
I was able to use a small screwdriver and hand pressure chisel the rest out she’s all cleaned up and the seal is pressed in from the hydraulic shop. I spent the day cleaning up the t-case and ZF-5 degreasing and cleaning mating surfaces, also making more lists of **** that needs to be replaced prior to the install and stuff that can be handled after.
 

IDIBRONCO

IDIBRONCO
Joined
Feb 5, 2010
Posts
12,343
Reaction score
11,075
Location
edmond, ks
old paper sealed off of the mountain it is like concrete alignment.

It is damn near petrified to that bottom area.
This is why I like to use a thin coat of RTV on both sides of most gaskets. It makes clean up SOOO easy the next time. The old gasket doesn't stick like this with the RTV in place.
 

Mattbo

Registered User
Joined
Apr 11, 2024
Posts
50
Reaction score
6
Location
Central Florida
I apologize I won’t use talk to text anymore while driving! I’m not even sure what I meant to say after re-reading that. I ended up getting it all off and gave it a carb cleaner bath to dry thoroughly overnight. The. Speedi sleeve came this afternoon so I will start reassembling everything let’s hope the failing DMF was the culprit to my ZF5 reverse grinding and I can start on timing, CDR and just plain tinkering. I still have a few bolts to track down and random parts here and there though.
 

Old Goat

Full Access Member
Joined
Jan 14, 2021
Posts
1,659
Reaction score
1,645
Location
Northern Nevada
Hacked89 did have a good YT Video of installing the Real Main. Guess he took it down.
I watched it several times before I installed the Plate.

Be sure you clean off the top of the Oil pam and corners, then apply your RTV (Right Stuff) especially in the corners.

Tip the Plate at an angle like you want to push it down into the Oil Pan.
Start working the lip of the seal over the Crank, and slowly tip the plate up as you work both sides with your fingers getting the seal lip on w/o getting it folded under.
As you get to the top it will just pop on. WOW~~~ That was easy.

Don`t use any oil on the crank. Usually will say on the seal you use.


Goat
 

Mattbo

Registered User
Joined
Apr 11, 2024
Posts
50
Reaction score
6
Location
Central Florida
Should I be using some sort of loctite on the crank itself? And the speedi seal that came with my kit has a flange on the back obviously for installing it does that need to be pealed off after it’s in place I’ve seen it removed and left on?
 

Mattbo

Registered User
Joined
Apr 11, 2024
Posts
50
Reaction score
6
Location
Central Florida
Well the crank sleeve I received is for an F-350 of the same year it was in the F-250 section on Rockauto. I had no clue they were larger I thought the only differences were drivetrain 3/4 to 1 ton. I had to return that and get the right one so I won't be getting back on this until Monday or Tuesday now.
 

Old Goat

Full Access Member
Joined
Jan 14, 2021
Posts
1,659
Reaction score
1,645
Location
Northern Nevada
Should I be using some sort of loctite on the crank itself? And the speedi seal that came with my kit has a flange on the back obviously for installing it does that need to be pealed off after it’s in place I’ve seen it removed and left on?
In the kit it has a metal cup to drive it on?
I bought that same one, and thought what is this goofy thing? None of the pictures of an IDI Crank did I see a speedy Sleeve with this Flange.

So then bought a different one or type OEM From Ford (but through E-bay) Has 4 pins and a tool to drive it on.
That one is for if you leave the plate on the Engine, and drive it on with the Sleeve, as I remember.
I got the Sleeve on part way but didn`t want to go on all the way.
Finally used a Brass Drift and gently tapped around to get it set.


I ended up finally using a Felpro kit that has the paper gasket.
Then bought the Rotunda tool to press the Seal into the Plate.

I did see a thread a while back where the guy used the Speedy Sleeve and then cut off the Flange.
It was mentioned you do not need to cut it off.

Goat
 

Old Goat

Full Access Member
Joined
Jan 14, 2021
Posts
1,659
Reaction score
1,645
Location
Northern Nevada
Well the crank sleeve I received is for an F-350 of the same year it was in the F-250 section on Rockauto. I had no clue they were larger I thought the only differences were drivetrain 3/4 to 1 ton. I had to return that and get the right one so I won't be getting back on this until Monday or Tuesday now.
I was under the impression all IDI`s (6.9/7.3) were all the same. (as far as the Crank) maybe the 94, last year some changes were made because of the factory Turbo.
I doubt Ford had 2 different cranks for 250 and 350.

I don`t remember reading anything on it.
Iam still stumbling along learning too, and accidently do something that works...LOL


Goat
 

Mattbo

Registered User
Joined
Apr 11, 2024
Posts
50
Reaction score
6
Location
Central Florida
I was under the impression all IDI`s (6.9/7.3) were all the same. (as far as the Crank) maybe the 94, last year some changes were made because of the factory Turbo.
I doubt Ford had 2 different cranks for 250 and 350.

I don`t remember reading anything on it.
Iam still stumbling along learning too, and accidently do something that works...LOL


Goat
Ya I looked again at my order and it was for an F-350 same year same motor. After double checking outer diameter sizes it was definitely a larger speedi sleeve.
 

Forum statistics

Threads
91,304
Posts
1,129,966
Members
24,110
Latest member
Lance

Members online

Top