IP Adjustment for timing purposes.

icanfixall

Official GMM hand model
Joined
Apr 10, 2005
Posts
25,858
Reaction score
673
Location
West coast
Ken...:hail:hail:love: 
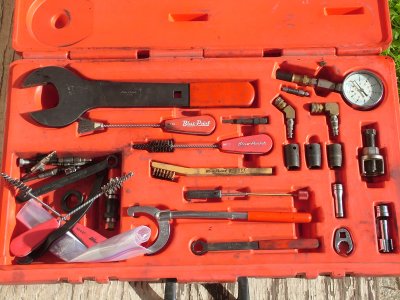
Thats a really nice tool kit you borrowed. Nice that it has the pump turning tool and the wire brushes to clean out the injecter bores with. Al, Thats agreat viedo too. We all like seeing better than reading. Pics rule and viedos are more better. This forum does go above and beyond to help. Seems Ford will only take our money and even thats something they think about. Bring in an older rig and they have no idea what it is. Shame on them.. But we do it for free here.
 

grey69

Registered User
Joined
Jul 7, 2013
Posts
1
Reaction score
0
Location
Sierra / California
Prior owner of my rig advanced the IP way to far (maybe 4 dimes)... What a mess. Clouds of smoke all around. I had a trail behind me like Tron. Just this afternoon, I turned it back to the factory notch, and presto... It's a whole new truck. Now I need to time it for real.

Very happy and appriciative for finding this thread. Thanks!
 

riotwarrior

Supporting Member
Supporting Member
Joined
Sep 19, 2006
Posts
14,778
Reaction score
483
Location
Cawston BC. Canada
Prior owner of my rig advanced the IP way to far (maybe 4 dimes)... What a mess. Clouds of smoke all around. I had a trail behind me like Tron. Just this afternoon, I turned it back to the factory notch, and presto... It's a whole new truck. Now I need to time it for real.

Very happy and appriciative for finding this thread. Thanks!
Welcome to the fold...this is the best place for help with these old trucks bar none.

Take a look in the FAQ and tech sections, and HALL of SHAME so you spend wisely and informed.

Pleas fill in your signature so we know what you have for a vehicle. Post pics and read lots.

Glad this was of help to you and you cleared up a mess from PO. Always nice to hear success like that when a new owner gets a rig, and is able to get it running better.

PM Gary aka Icanfixall he has timing meters for rent to time the engine properly.

Got questions we can usually answer and quick, usually someone on here 24/7 heck I've been here on Christmas even!

Well enjoy the site, and please pics we love pics

Al
 

icanfixall

Official GMM hand model
Joined
Apr 10, 2005
Posts
25,858
Reaction score
673
Location
West coast
Welcome to the forum gery69. As posted please read the Hall of Shame forum before you purchase anything off ebay. We have listed some sellers to stay away from for good reasons. Asking questions here will get you an answer baced on what works. And what usually wont work. The experiance here far surpass's any dealer or private shop anywhere. There is always some kind of "testing" going on somewhere in the world on these idi engines thru this site. Please feel good asking questions before you turn a wrench. Its always simpler to help you do the right thing than it is helping you fix a problem you created because you had no information to guide you. An example is the injection pump change out. Looks really simple to remove 4 bolts on the gear cover and lift it off. Well that the completely wrong way to do that. Lifting off the pump and the gear cover housing changes the gear timing and its nearly impossible to fix that issue. The gear timing marks are very low and hard to see well. It looks like the right way but its really not. Now if you were removing a pump from a wrecked engine then yes. Do it that way but never try to reinstal it that way. You just can't see the gear timing and get it off one tooth and your in something deep and smelly.....:angel::sly
 

siddfynch

Registered User
Joined
Oct 13, 2013
Posts
2
Reaction score
0
Location
sc alaska
Thank you for providing a great pic of the injector pump!

Elsewhere, I was told to try turning the guide stud on my IP to bump up the idle RPM. Is the guide stud the allen-headed screw seen between the top two injector lines in the view from the rear (it has an orange tint in your photo)?

Rationale for turning it was that perhaps I have a worn governor, which is the cause of my engine stall when decelerating.
 

riotwarrior

Supporting Member
Supporting Member
Joined
Sep 19, 2006
Posts
14,778
Reaction score
483
Location
Cawston BC. Canada
Thank you for providing a great pic of the injector pump!

Elsewhere, I was told to try turning the guide stud on my IP to bump up the idle RPM. Is the guide stud the allen-headed screw seen between the top two injector lines in the view from the rear (it has an orange tint in your photo)?

Rationale for turning it was that perhaps I have a worn governor, which is the cause of my engine stall when decelerating.

Hi and Welcome to OB, thanks for the PM too btw.

Let me see if I can decipher this or at least guide you to some correct information.

Now if you are referring to the small TORX screw with the ORANGE paint on it not the plastic caps then I really cannot answer that question about it. Idle is set on the side of pump where throttle cable attaches IIRC.

I'm sure someone will chime in MEL or Russ and help me out with this...

Please take the time and go through our FAQ, TECH and HALL of SHAME sections, this will really help you learn some basic information about these trucks and engines.

Also please fill in your signature so we don't have to guess what you have.

Again welcome to OB

Al
 

jas88

Full Access Member
Joined
Mar 14, 2008
Posts
120
Reaction score
0
Location
Greater Austin, Texas
Hey just wanted to say thanks to all you guys for all the great info. I timed the Bronco today using a Snap On MT257 inductive adaptor I got on eBay for $125. I used my trusty Sears timing light I have had since the 70s and timing tape I got at Summit for like $5. Modified an old Challenger 9/16" wrench for loosening the injector pump bolts and used a turnbuckle like I saw on the youtube video for holding the RPMs. She's now set to 8* BTDC. It still amazes me how easy it is to get your hands on this info nowadays. Thank you all!!
 

icanfixall

Official GMM hand model
Joined
Apr 10, 2005
Posts
25,858
Reaction score
673
Location
West coast
We try to help anyone that comes here asking for help. Very seldom do we miss something. many times the most difficult issue is getting the posters to tell us what they did to cause the questions. Most times someone has made a mistake they had no idea of but we sort thru the posts. I don't think any question has come thru this forum that could not be answered yet. Most problems have been seen by many of us first hand so to speak..
 

Pinky

Registered User
Joined
Jan 12, 2014
Posts
1
Reaction score
0
Location
South Florida
Thanks for the video. I got a lot of questions about IP on our trucks answered. Great video.
 

ironworker40

NYC Ironworker
Joined
Dec 16, 2013
Posts
939
Reaction score
19
Location
nj
Tool Kit

The brushes for cleaning injector bore can be substituted with copper tubing cleaning brushes you use when sweating pipes. Since this is a informational thread can someone explain what the rest of the tools in the kit are for? Also what is the snap on kit number?
I will start with the gauge and the 3 pieces under it= diesel compression tester.You screw the adapter piece in the glow plug hole and use the quick connects either 90 or 45 degree to attach gage.
Large wrench on top left is 1 7/8 cooling fan removal tool. The 1/2 in square hole is for using a torque wretch to torque fan
Bronze brush with wood handle is for cleaning carbon off of injector tips.
Puller on right is for removing vacuum pump pulley.
 

ToughOldFord

The Cold Glow-Plug
Joined
Sep 30, 2007
Posts
663
Reaction score
1
Location
City of Shasta Lake, Ca.
Another thing that I picked up off a youtube video is not only the 3/4" wrench but a turn buckle attached between the wrench and filter bracket will adjust the pump under control and very smoothly with a few turns, works for advancing it atleast. This also works with the throttle, a small turn buckle will hold it and a couple of turns will get you to the correct RPM.

Nick,

In order to delete the timing adapter from your #1 cylinder fuel line, you need to find a #1 cylinder line from a van, because just removing it will change the timing of that cylinder as Josh stated. The van uses the #4 cylinder line for timing, so the #1 cylinder line is correct length without the adapter. I have one that I got from another member, that I have yet to put on. It makes timing with the feret a little easier because it gives you a better location to put the piezo (SP?) clamp on within the required 4 inches from the injector. Timing with the feret is pretty simple. Here is a video of the process, along with a video of how to adjust the timing.

Diesel pump timing - YouTube

Pump timing adjustment - YouTube

Good luck,

Mac.

Soooo, now that it's time right how much HP does that trash can put out? :sly

Oh crud, that didn't work out, here's the videos:

Diesel pump timing - YouTube

Pump timing adjustment - YouTube
 

gandalf

Senior Member
Joined
Jan 21, 2005
Posts
3,884
Reaction score
1,075
Location
CA &/or Maine
... can someone explain what the rest of the tools in the kit are for? Also what is the snap on kit number?
I will start with the gauge and the 3 pieces under it= diesel compression tester.You screw the adapter piece in the glow plug hole and use the quick connects either 90 or 45 degree to attach gage.
Large wrench on top left is 1 7/8 cooling fan removal tool. The 1/2 in square hole is for using a torque wretch to torque fan
Bronze brush with wood handle is for cleaning carbon off of injector tips.
Puller on right is for removing vacuum pump pulley.


I'll get a couple more of the things in the tool kit.

On the lower right is a line wrench type attachment for a ratchet. It's used to loosen those hard to reach lower injection lines on the IP. Nestled inside it, for lack of anywhere better to put it, is a 3/8th deep socket, for your glow plugs.

Bottom center is a wrench used to loosen those three nuts holding the IP tight. Use this when you're adjusting the timing and have to move the IP. It's the one with the dirty red handle. Just above it, with the clean red handle, is the tool to actually rotate the IP when you're timing it. It's the one with the crescent shaped end.

The lower left is a misc area, a catch-all. On the right side of this area is a reamer, used to scrape the seat area of the injector hole, in preparation for a new copper ring. Use this only if the seat area is rough.

I don't know that the kit number is.
 

ironworker40

NYC Ironworker
Joined
Dec 16, 2013
Posts
939
Reaction score
19
Location
nj
No other takers hummm. I thought more of you would chime in.
In the extra parts tray on the left there are two wrenches. I assume for ip pump. I have always made these.
Just below fan wrench is a soft brush for general cleaning i guess, next to that is something that i would like to know what it is.
I am most curious about the tool between the ip turning wrench and the bronze brush. I have one of these and have know idea what it is for.
 

Attachments

  • snap on 7.3 tool kit.jpg
    snap on 7.3 tool kit.jpg
    800.9 KB · Views: 67

riotwarrior

Supporting Member
Supporting Member
Joined
Sep 19, 2006
Posts
14,778
Reaction score
483
Location
Cawston BC. Canada
make yer own tool thread ...lol this is an IP THREAD LOL

good question and ya these kits are worth picking up whwn available for those of us zuch as myself that are tool horders lol...ill just get a few I dont have or cannot make.
 
Top