Tire dismounting and mounting by hand, IDIBRONCO style

IDIBRONCO

IDIBRONCO
Joined
Feb 5, 2010
Posts
12,312
Reaction score
11,021
Location
edmond, ks
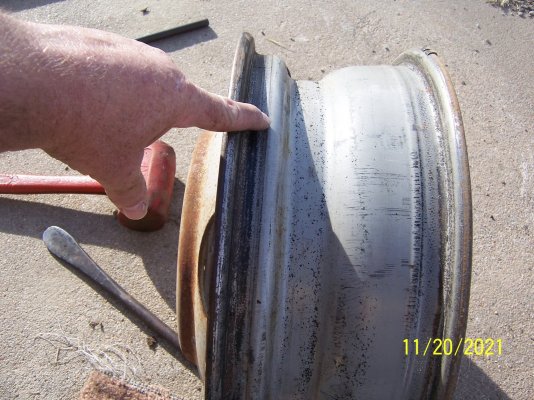
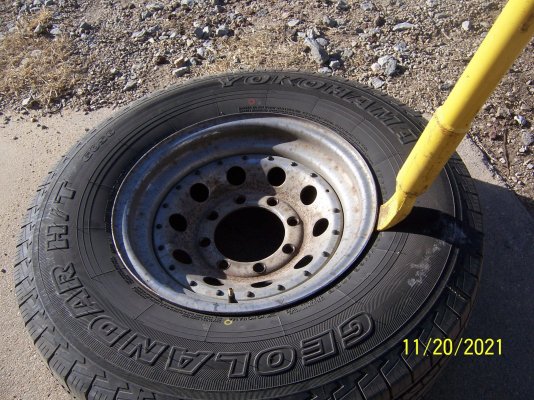
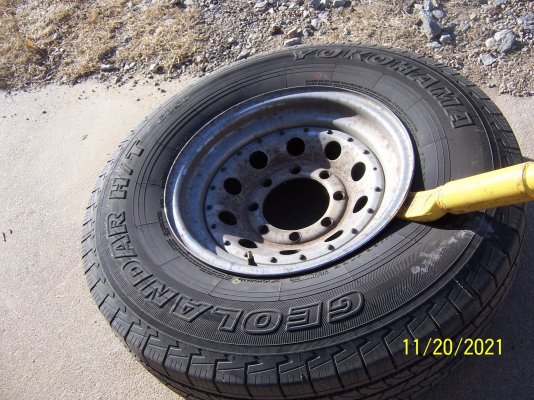
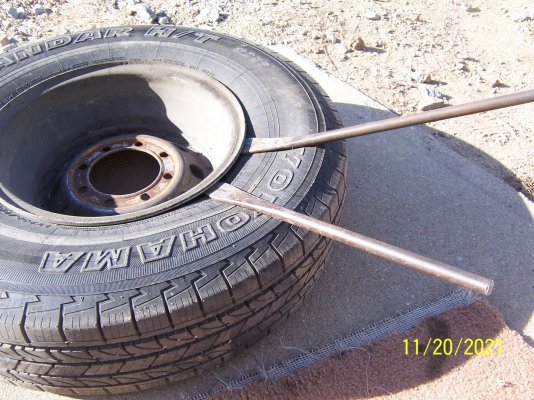
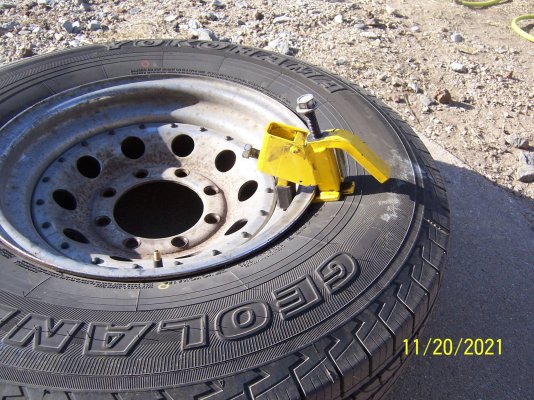
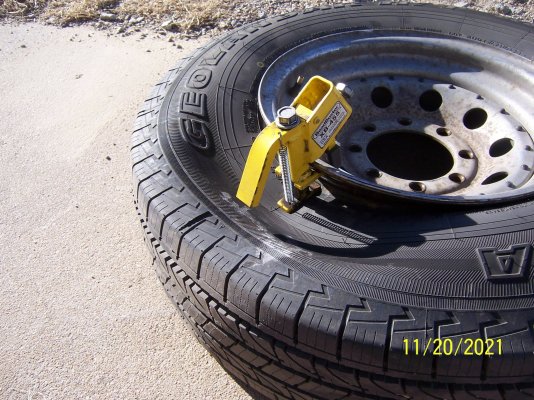
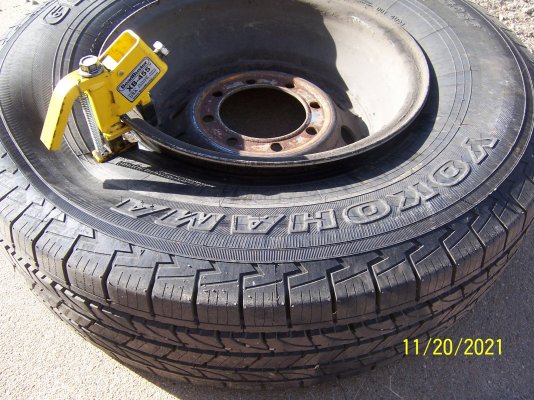
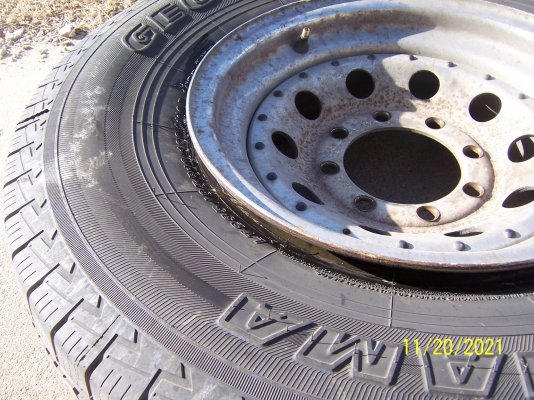
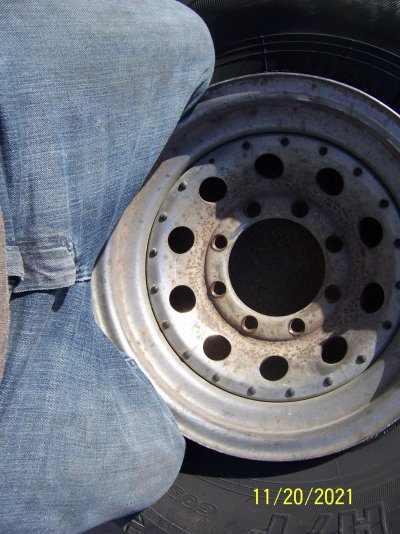
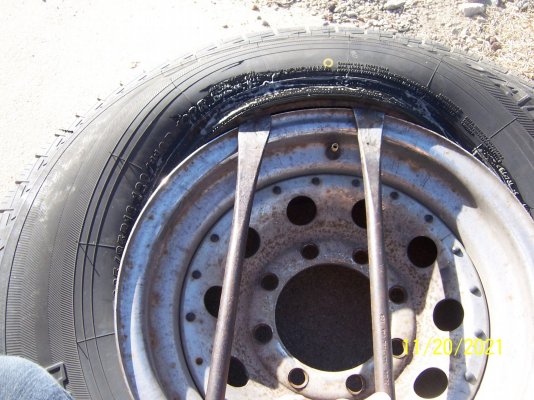
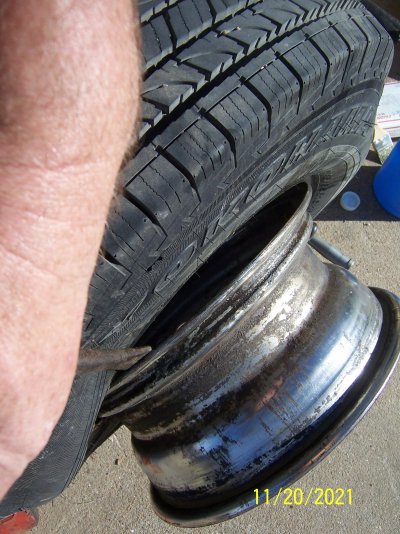
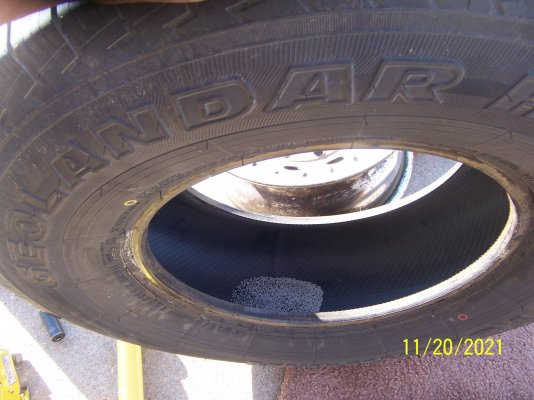
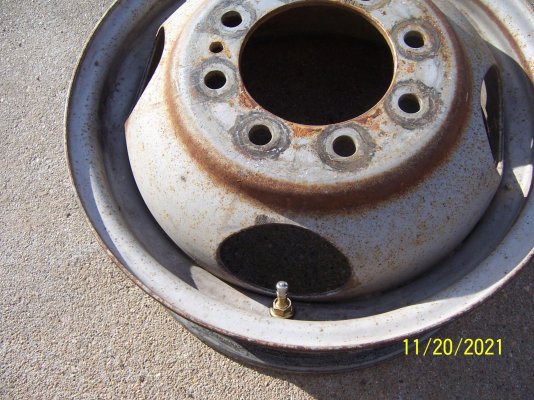
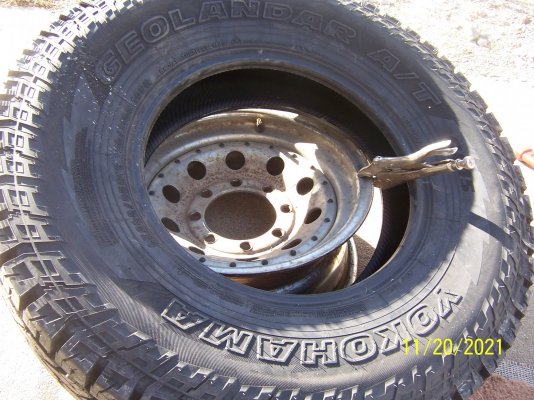
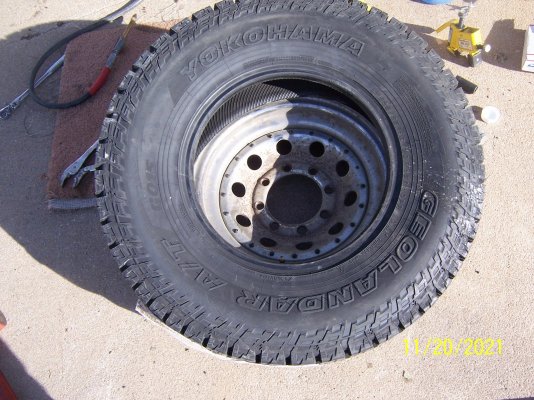
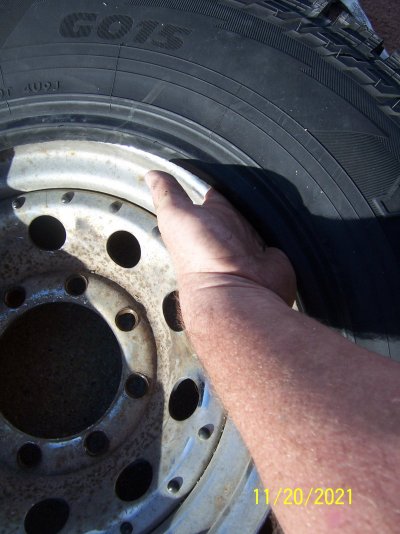
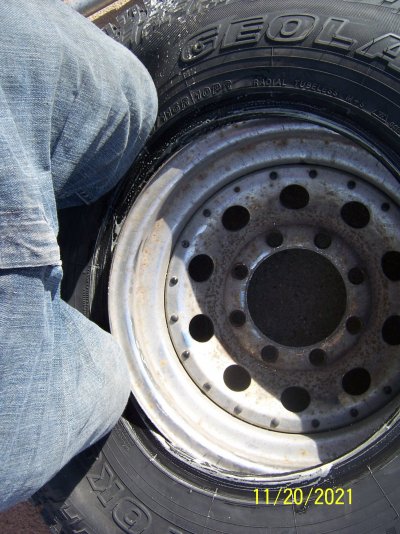
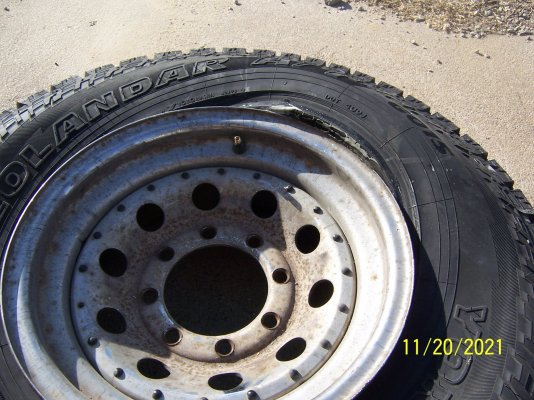
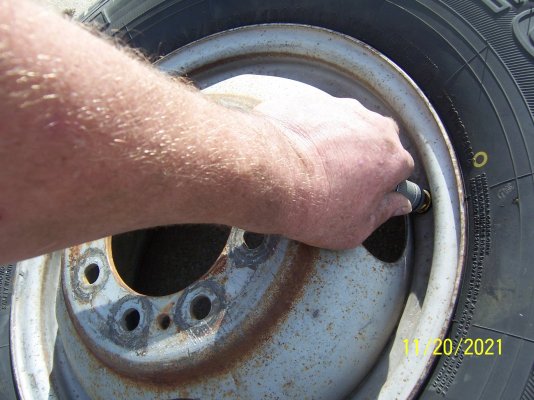
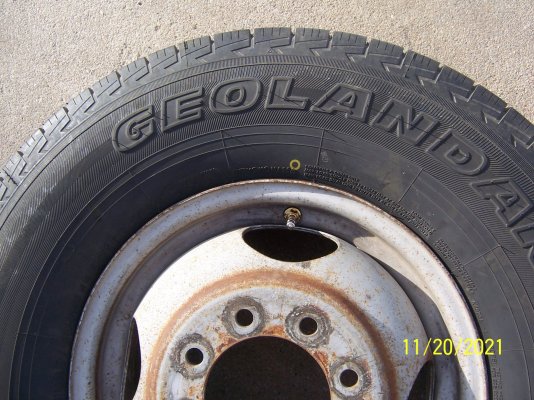
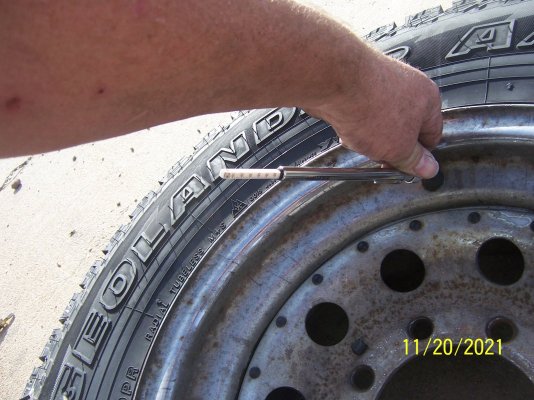
First off, here is the disclaimer: THIS MAY OR NOT BE THE RIGHT OR PROPER WAY TO DO THIS, but it is my way, with my tools, and my knowledge. Another warning: this can damage aluminum rims, so if you have fancy rims, I don't recommend trying this method.First off, let's go over some information that is important here. Modern wheels are what is referred to as "dropped rims" which means that the center isn't straight across. The reason for making them this way is to allow tires to be mounted onto a one piece rim. There are two drops to each rim, a deep drop and a shallow drop. In the picture below, I'm pointing to the shallow drop on one of my dually rims. Using my 16" rims as the examples here, the center is probably only 14" in diameter. Maybe less. This is to allow the bead of a 16" tire to be slid onto the rim. The tires are mounted and dismounted from the shallow drop side. The tire bead is slipped over the outer part of the rim and held in place in the dropped center. While the bead is slid onto the rim, it will fairly easily slide over the 16"+ part of the rim and, since it's sliding into a part of the rim that's a smaller diameter, this can be accomplished without the use of a locking ring (split rims use these). The split rims do not (from what I can remember) have a dropped center. They are almost flat across the rim between the tire bead mounting points. Since the modern styled rims are one piece, this allows them to run without inner tubes. Is this stuff boring? Most likely (it is to me), but I'm trying to be very detailed on this write up so that everybody can understand what I'm saying.
 

Attachments

  • 035.JPG
    035.JPG
    432.2 KB · Views: 10

IDIBRONCO

IDIBRONCO
Joined
Feb 5, 2010
Posts
12,312
Reaction score
11,021
Location
edmond, ks
Here is the equipment that I use.
First picture: from right to left, my dead blow hammer, a 3/8" drive ratchet with a 3/4" socket on it, the style of valve core removing tool that I prefer to use, my Bead Buster XB-455, my two tire spoons (one came from Orscheln Farm and Home, the other came with a garage that I bought years ago), and my tire blaster. Above is my "slide hammer" style bead breaker.
Second picture: the bead lube that I use (bought on Amazon for about $20 six months ago), and a cheap paint brush that I use to apply the bead lube.
Third picture: a clip on style air chuck which is used when the blaster is used. You use the clip on style of air chuck so that sir is still going into the valve stem while the blast comes into the tire. I don't remember where I bought the air chuck.
The slide hammer bead breaker and the blaster both are Stark brand and came from Amazon. The Bead Buster is relatively expensive. It was right about $100 when I bought it. I mostly bought it to use on ATV tires, but it comes in VERY handy for automotive tire use too. I've been told that you can use an impact wrench on it, but I prefer to use hand tools in the hope that the threads will last longer. I also lube the threads every other time that I use it trying to extend the thread life.
 

Attachments

  • 002.JPG
    002.JPG
    540.6 KB · Views: 13
  • 010.JPG
    010.JPG
    655.9 KB · Views: 12
  • 033.JPG
    033.JPG
    359.4 KB · Views: 13

IDIBRONCO

IDIBRONCO
Joined
Feb 5, 2010
Posts
12,312
Reaction score
11,021
Location
edmond, ks
Now on to the dirty work. I will not mention taking tires off and putting them back onto a truck. I feel that if someone doesn't know how to do that, then this thread will be all Greek to them anyway. The first step is to let the air out of the tire (naturally, but still needed). Then it's onto breaking down the beads. First, I'll show the slide hammer method. Hold the wedge on the bottom right at the place where the outer part of the rim and the tire meet. Holding it more upright, give it a couple of hits in order to slightly slide the tire away from the rim. Then, hold the tool more level and drive the wedge in until it contacts the rim. Finally, hold the tool back upright and keep working the slide until the tire starts to separate from the outer part of the rim. Keep working around the rim a little bit at a time until the whole side of the tire breaks loose from the rim. Then repeat the steps on the other side of the tire until both sides are free from the rim. The reason to drive the tool against the rim before trying to separate the tire is that this can tear the rubber that covers the bead on the tire. If that happens, then it may not seal up when you air the tire back up. If you're removing a tire and installing another tire, them it doesn't matter if you tear the bead rubber. If you're removing the tire in order to patch a hole, then you will definitely want to beads to seal again.
 

Attachments

  • 005.JPG
    005.JPG
    552.8 KB · Views: 5
  • 006.JPG
    006.JPG
    539.5 KB · Views: 5

IDIBRONCO

IDIBRONCO
Joined
Feb 5, 2010
Posts
12,312
Reaction score
11,021
Location
edmond, ks
Now, using the Bead Buster method. I like to drive the tire spoons in between the tire and rim to make it easier to slide the Bead Buster in there. I sit it as far as I can get it and then tighten up the clamp. Next, I drive it all the way in with my dead blow until it's sitting upright. This will cause the foot to push down on the tire bead in the same spot an the slide hammer is used, for the same reason. The Bead Buster doesn't push the bead down very far, maybe only 1 1/2" at the most. Honestly, most of the time, I use a combination of the Bead Buster and the slide hammer tool. On a shallow drop, you may only have to use the Bead Buster one time before you can get the tire bead broken free (this is where I use the slide hammer tool for the combination). Finally, the bead will be completely broken free from the rim. Turn the tire over and repeat the steps on the other side until the bead is completely broken free. On a deeper drop, I usually have to use the Bead Buster 3 or 4 times before the slide hammer tool will work easily. Yes this is physical work, but I still try to make it as easy as I can. that's why I use the combination of the bead breaker tools.
 

Attachments

  • 011.JPG
    011.JPG
    486.4 KB · Views: 8
  • 007.JPG
    007.JPG
    517.8 KB · Views: 9
  • 008.JPG
    008.JPG
    496.9 KB · Views: 9
  • 009.JPG
    009.JPG
    506.7 KB · Views: 9
  • 012.JPG
    012.JPG
    496.4 KB · Views: 9

IDIBRONCO

IDIBRONCO
Joined
Feb 5, 2010
Posts
12,312
Reaction score
11,021
Location
edmond, ks
After both beads are broken free, then it's time to remove the tire. Starting on the shallow drop side, lube the tire and rim to help the tire slide off easier. Sorry for the quality and content of some of the pictures from here on out, but my picture taking helper left before I could ask him to help so I had to do the work and take the pictures by myself. Kneel on one side of the tire in order to push that side down into the dropped center of the rim and slide the tire spoons underneath the other side of the rim and grab the tire with them. using both spoons, pull the tire bead out over the rim. Use two spoons for this so that you can kneel on one to hold the tire in place while you work the rest of the tire over the bead. Use small bites on the tire for this. Don't get in a hurry. By the time the you get half way around the tire, it will not try to slip back over the rim so you only need to use one spoon at this point. Keep going until the entire tire bead is on the outside of the rim.
 

Attachments

  • 013.JPG
    013.JPG
    477.1 KB · Views: 5
  • 014.JPG
    014.JPG
    432.4 KB · Views: 5
  • 015.JPG
    015.JPG
    354.6 KB · Views: 5
  • 016.JPG
    016.JPG
    471.9 KB · Views: 5
  • 017.JPG
    017.JPG
    474.6 KB · Views: 5

IDIBRONCO

IDIBRONCO
Joined
Feb 5, 2010
Posts
12,312
Reaction score
11,021
Location
edmond, ks
On to the other bead. I do this side while standing up. Lube the entire bead on this side of the tire. Then stick both spoons under the bead and pull it over the rim like the other side. I hold one spoon under the tire bead to keep it in place and push one foot on the rim to keep pressure on it while working the other spoon to slide more of the tire over the rim. After a few times of working the tire over the rim, I grab the dead blow and use that to smack the tire on the bead area. This will remove the tire faster and easier than by just using the spoons. I had to be careful here. The tires that I removed were on the back of the Blue Truck for maybe 2000 miles and they already had Dyna Beads inside them. I didn't want to lose the Dyna Beads so I could still use them when I put the tires onto the Ex Wife where they belong. The Yokohama A/Y tires that I run on the Blue Truck were unavailable for a while (at least where I buy them) so I put the HT tires on it just to get the crappy Ironman tires off while they still some tread on them. That way, they will last for a while when I put them on my pickup bed trailer.
 

Attachments

  • 018.JPG
    018.JPG
    411.6 KB · Views: 6
  • 019.JPG
    019.JPG
    406.2 KB · Views: 6
  • 020.JPG
    020.JPG
    301.4 KB · Views: 6

IDIBRONCO

IDIBRONCO
Joined
Feb 5, 2010
Posts
12,312
Reaction score
11,021
Location
edmond, ks
Now that the tire is off of the rim, it's time to replace the valve stem, or at least the rubber seal on the full metal type. I was told that the reason for installing a new stem when you put on a new tire is because the rubber in the stem is subjected to the same heat cycles that the tire is and the rubber in the stem degrades and will eventually leak. I did not replace the stems on the rims for the Blue Truck since the tires had been on there for less than two months. I did replace the stems on the rims for the Ex Wife. Who knows how long they were on there? The last picture shows the difference between the standard valve cores and the ones that Innovative Balancing (the company that sells Dyna Beads) sells. I thought they were filtered, but I couldn't see where a filter was at. Somehow they are special and need to be use with balance beads. Maybe the filtered ones were the ones that are used with Equal Flexx?
 

Attachments

  • 036.JPG
    036.JPG
    568.7 KB · Views: 9
  • 037.JPG
    037.JPG
    468 KB · Views: 9
  • 004.JPG
    004.JPG
    736.3 KB · Views: 9

IDIBRONCO

IDIBRONCO
Joined
Feb 5, 2010
Posts
12,312
Reaction score
11,021
Location
edmond, ks
Time to mount the new tires. These tires all have balance dots on them. Balance dots are used by some tire manufacturers to help balance the tires. There are two colors of balance dots. Red and yellow. Not all of the tires have the red dots and I'm not sure exactly why they are used at all. All of the tires that use balance dots have yellow dots. You line the yellow dot up with the valve stem and it takes less weight to balance the tire. At least that's the theory. I can say that if you forget which color of dot to line up with the stems and use the red ones, balance beads don't help very much so there must be something to the theory anyway. Before anyone mentions the fact that you can't see the balance dots in these pictures, it's because they are on the side with the outlined white letters. I wanted the black side out so I had to mount the tires with the balance dots to the inside. The dots still work the same way like this, it's just much more difficult to get them lined up with the valve stems. First, lube the bead of the side that you are going to put on the rim first. I try to push the tires as far onto the rims as I can here. I then kneel on the tire to hold it down into the dropped center of the rim. If the tire's fighting you here, you can hold one side of the tire with a pair of Vise Grips to keep it from sliding while you work the tire over the rim going in the other direction. Just one more reason to not try this with aluminum rims. I use one tire spoon for this part. Again, by the time that you get the bead about half way over the rim, it will no try to slip back off of the rim. When you have almost the entire tire bead slid over the rim, it gets hard to slide a tire spoon between the tire and rim. It also gets hard to slip this last part of the bead over the rim. I like to put my foot on the opposite side of the rim to keep the rim from sliding while I pull the last, stubborn part of the tire over the rim. One last piece of advice here, I find that it's easier to have the yellow dot lined up with the valve stem before you start this step. This will make it so you don't have to try to spin the rim inside the tire (spin it as far) to get them lined up after the tire is completely mounted.
 

Attachments

  • 022.JPG
    022.JPG
    361 KB · Views: 9
  • 023.JPG
    023.JPG
    418 KB · Views: 9
  • 024.JPG
    024.JPG
    492.1 KB · Views: 9
  • 025.JPG
    025.JPG
    473.2 KB · Views: 9
  • 026.JPG
    026.JPG
    456.5 KB · Views: 9

IDIBRONCO

IDIBRONCO
Joined
Feb 5, 2010
Posts
12,312
Reaction score
11,021
Location
edmond, ks
This is when I like to install the balance beads. Yes, they can be installed through the valve stem after you remove the core, but I think that it's MUCH easier to just dump them in the tire before it's completely mounted. Also, Equal Flexx comes in some type of bag that breaks apart so you just throw everything, bag and all, into the tire. That can't be done through the valve stem. Yes this is my thinking "Oh no! Don't drop the bag or you'll have to fish it back out".
 

Attachments

  • 027.JPG
    027.JPG
    527.4 KB · Views: 8
  • 028.JPG
    028.JPG
    290 KB · Views: 8

IDIBRONCO

IDIBRONCO
Joined
Feb 5, 2010
Posts
12,312
Reaction score
11,021
Location
edmond, ks
Once the balance beads are installed, lube up the second tire bead and start sliding it over the rim. Once it's almost completely over the rim, I grab the dead blow and give it a good thump. The reason the I use a dead blow when doing tire work is so that it doesn't damage the bead rubber on the tires.
Here's some more advice on the actual removal and installation of the tires. Watch out for the valve stems. If you rub the tire across them, you may cause a leak or even break a valve stem off. If you have a newer vehicle with a Tire Pressure Monitoring System (TPMS), you can damage a sensor and it will need to be replaced. When you remove the tire, start on the valve stem side so that you will pull it over the valve stem without contacting it. When you install the new tire, install the first bead on the valve stem side first to push it down past the stem. When you install the second bead, install it from the opposite side as the valve stem. The last part if the tire that goes over the rim doesn't drop very far past the outer edge of the rim and it won't come in contact with the valve stem this way.
 

Attachments

  • 029.JPG
    029.JPG
    478.3 KB · Views: 4
  • 030.JPG
    030.JPG
    423.9 KB · Views: 4
  • 031.JPG
    031.JPG
    420.2 KB · Views: 4

IDIBRONCO

IDIBRONCO
Joined
Feb 5, 2010
Posts
12,312
Reaction score
11,021
Location
edmond, ks
Assuming that the balance dot and the valve stem are lined up (they don't have to be perfect, but the closer, the better) it's time to air up the tire. I prefer to stick some inner tubes in the tires, air them up, and let them sit for a few days. This will spread out the beads on the tire and will make it easier to get air back into the tire after it's mounted on the rim. I only had these tires for a couple of days before this, but they weren't too bad looking. If the tire beads are spread out wide enough, all it usually takes for me to get the beads seated on the new tires, is to leave the valve core out of the stems and stick the coupler on the end of my air hose onto the stem. That lets air flow into the tire as fast as it possibly can which will usually be enough to seat the beads.
 

Attachments

  • 038.JPG
    038.JPG
    321.5 KB · Views: 3
  • 039.JPG
    039.JPG
    470.8 KB · Views: 3

IDIBRONCO

IDIBRONCO
Joined
Feb 5, 2010
Posts
12,312
Reaction score
11,021
Location
edmond, ks
Now if I can't get the tire to take air by using just the hose, then it's time for me to bring out the blaster. I honestly rarely need the blaster since I've started using the inner tube trick, but I still need it once in a while like I did today. I can only talk about my blaster, but I like the fact that it has a little hook that you rest on the rim before you open the big valve to blast the air. This is where the clip on air chuck comes in handy. It usually only take one time with the blaster unless it's cold outside. I didn't put tubes in these tires, so I wanted to make sure that they would go on as easy as possible, so I sat them on the hood of the Ex Wife to warm in the sun before I put them on. If you use an old piece of carpet to kneel on like I do (keeps the knees off of the concrete), make sure that you're not a dumb-donkey like I was and get the carpet between the tire and the rime when you're trying ti air up the tire. The blaster almost worked, but I saw that there was still a lot of air coming out of the bottom side of the tire so I realized that some thing was wrong. I did have a bear of a time pulling that carpet back out! Once I got the carpet back out, the tire aired up pretty easily with just the air hose. Not my most brilliant moment, but I hope that little story gives someone a chuckle.
 

Attachments

  • 032.JPG
    032.JPG
    296.6 KB · Views: 6
  • 033.JPG
    033.JPG
    359.4 KB · Views: 6
  • 034.JPG
    034.JPG
    364.4 KB · Views: 7
  • 003.JPG
    003.JPG
    383.5 KB · Views: 5

IDIBRONCO

IDIBRONCO
Joined
Feb 5, 2010
Posts
12,312
Reaction score
11,021
Location
edmond, ks
After the tire is aired up, it's just time to put it back on the truck. If you use balance beads, be sure to remove the old lead weights from the rim before mounting the tire. They won't be fighting with the balance beads when removed and it's easier to remove them without a tire on the rim. If you take your tires to a shop to be balanced, then you may still want to remove the weights from the side of the rim that you use to mount the tire. It's possible for a weight to damage the bead rubber on your tire.
I'm sure that I forgot something here, but I've literally been writing this for almost three hours. It's getting hard to type. I'm tired and I'm also sick of looking at this screen in front of me. Hopefully, this will help anyone who wants to try mounting their own tires by hand. Once the tools have been bought, it really does save you quite a bit of money.
 

Old Goat

Full Access Member
Joined
Jan 14, 2021
Posts
1,646
Reaction score
1,633
Location
Northern Nevada
Have you seen the modifications to the HF Manual Tire changer on YT. Pretty slick add on.

xc_hide_links_from_guests_guests_error_hide_media

xc_hide_links_from_guests_guests_error_hide_media

Here is the mod to the bar he mentioned
xc_hide_links_from_guests_guests_error_hide_media

Here he is doing a comparison of 3 types of Duck Bills.
Also with the permanent bar Mod.

xc_hide_links_from_guests_guests_error_hide_media

I know out in the field, doing a tire change you have to manhandle them.
But at home in the shop this HF Mod is pretty slick.


Goat
 

Forum statistics

Threads
91,263
Posts
1,129,511
Members
24,094
Latest member
madmustang1965

Members online

Top