Got my headlight harness in today from rjm :D :D

gdhillon

Full Access Member
Joined
Jun 26, 2010
Posts
1,193
Reaction score
0
Location
PG...Canada
You must be registered for see images attach
heres a pic of the relay

So the passenger sidebulb doesnt work for low beam but it does for hi beam?

Edit cant get the picture to work but the contacts are _
_ l l
_ like that

I put the parking brake on today, then fired up the truck the lights seem to have been working good. I then released the break and tried the lights again and they were working like they should....so im thinking it is my drls that are screwing it up. Anyone know how to disable them?
 

Attachments

  • 2013-04-14 14.22.56 (2).jpg
    2013-04-14 14.22.56 (2).jpg
    458.2 KB · Views: 64
Last edited:

KyleQ

Full Access Member
Joined
Aug 8, 2010
Posts
470
Reaction score
0
Location
Minnesota
I put the LMC kit and clear housing lights on my truck when I first got it - STUPID bright, love it. The LMC kit works - no issues whatsoever.
 

gdhillon

Full Access Member
Joined
Jun 26, 2010
Posts
1,193
Reaction score
0
Location
PG...Canada
Haha ya, it is a nice thing to have hibeams that are actually bright

.....anyone know how to diable drls?
 

riotwarrior

Full Access Member
Joined
Sep 19, 2006
Posts
14,782
Reaction score
492
Location
Cawston BC. Canada
Unplug the DRL harness...from the DRL module...I know your gonna ask where it is...so I won't tell ya where to look but on the rad support is all I'll say! one side or the other!
 

gdhillon

Full Access Member
Joined
Jun 26, 2010
Posts
1,193
Reaction score
0
Location
PG...Canada
I just unplugged the drl fuse, will that be ok?

The lights work good now without the drls, thanks for all the help guys...and again i recommend this mod to everyone !
 

LCAM-01XA

Full Access Member
Joined
Mar 17, 2008
Posts
5,932
Reaction score
12
Location
my very own hell
I found out why your DRLs don't work with relays - apparently I was correct in my suspicion that the DRL module runs the highs on reduced power, it achieves that by pulsing the voltage on and off real quick thus not allowing the bulbs to heat up to full brightness. Unlike the GM setup where the DRL module simply reconnects the high beams in series instead of parallel and so each lamp sees only half the normal voltage.

If you want DRLs to satisfy local regulations let me know and I should be able to come up with a simple circuit that does that for you. It won't be half-power BS like the factory tho, it will be low beams at full power.
 

LCAM-01XA

Full Access Member
Joined
Mar 17, 2008
Posts
5,932
Reaction score
12
Location
my very own hell
OK, we gonna do this the simplest way possible:

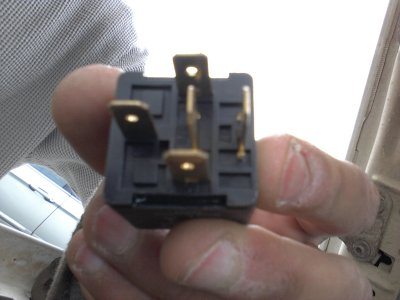
1) Get yourself another one of those 5-pole "ice cube" relays, install it somewhere under the dash, and ground its terminal #86.

2) Locate a switched key-on wire somewhere under the dash. You can tap into the fuse panel for this, use an Add-A-Fuse thing in place of the 10-amp fuse for the tank selector valve. If you're not sure how to get the Add-A-Fuse in there the right way lemme know, you shouldn't just stab it in there any way it looks good cause you can end up on the wrong side of the primary circuit. Extend the Add-A-Fuse thing's pigtail till it reaches the relay, and connect it to relay terminal #87a (it's the one in the middle).

3) Open your steering column, locate harness for combination switch, in the harness locate red/black and red/yellow wires. Verify the red/black only has power when headlights are on low beams. Verify the red/yellow has power on both low and high beams, but drops power the moment you push the headlights switch halfway in (to running lights position) and then remains dead when you turn all lights off.

4) Tap into the red/yellow wire in any way you prefer (I suggest avoiding scotchlock "suitcase" connectors). Do NOT cut the wire, just splice into it and then extend new wire to relay. Connect it to relay terminal #85. This completes your relay trigger/master circuit.

5) Cut the red/black wire in the column harness, extend both ends to relay. Connect red/black wire coming from the combination switch to relay terminal #87. Connect red/black wire going into the big harness to relay terminal #30. This completes your relay load/slave circuit.


How it works:

a) when headlights are off there will be no power on the red/yellow wire you tapped into. The relay trigger will therefore remain inactive, defaulting the relay to bridge terminals #87a and #30 together. With ignition on the Add-A-Fuse will power up terminal #87, and that voltage will be sent to terminal #30, then thru the red/black wire into the main harness and all the way down to your RJM relayed harness, where it will trigger your low beams relay and you will have low beams on full power.

b) when headlights switch is pulled out all the way the red/yellow wire will become live, thus triggering the relay to switch from its default #87a-#30 bridge to #87-#30. The Add-A-Fuse power thus gets disconnected from the main harness and DRL feature is disabled. If the dimmer part of the combination switch is set to low beams it will feed power to terminal #87, from where terminal #30 will pick it up and send it down the main harness to the RJM harness and its low beams relay, exactly how it was happening in DRL mode. However if the dimmer part on the combination switch is set to high beams there will be no power supplied to the #87->#30->mainharness->RJMharness chain, and thus the low beams will go off - which is what you need to happen when high beams are on anyways.

In other words the relay is used to switch between key-on (headlights off) and dimmer (headlights on) signal for the RJM low beams relay trigger. Note that if you only pull the headlights switch halfway out for your running lights, the DRLs will still be active, and thus you end up with both markers and headlights on. Except you won't be able to use your high beams because in DRL mode the relay does not accept signal from the dimmer. So if you wanna run the highs, make sure the headlights switch is pulled all the way out.
 

gdhillon

Full Access Member
Joined
Jun 26, 2010
Posts
1,193
Reaction score
0
Location
PG...Canada
Thanks for laying that out for me step by step :) I shall print this out and git r done. Couple questions ive never used 'add a fuse' so i dont know the right way to install. second I assume I should leave the drl fuse out then?
 

LCAM-01XA

Full Access Member
Joined
Mar 17, 2008
Posts
5,932
Reaction score
12
Location
my very own hell
Aye this bypasses the DRL module and its tampering with the high beams entirely, so if the headlights work properly now just leave the factory DRL disabled.

The Add-A-Fuse thing, actually it's called Add-A-Circuit, here's what it looks like:
You must be registered for see images

You'll notice it stacks two fuses together, the lower one (red in color in the small pic in the right) is for your original circuit, while the upper one (yellow in color in the small pic) is for the circuit you're adding. Lower fuse runs between the two bladed contacts of the thing, upper fuse connects one of the blades to the wire pigtail. In other words both fuses are connected to the same blade on one side, while the other side gets either the pigtail (for the upper fuse) or the remaining blade (for the lower fuse). Easiest way to install it correctly is to initially keep the lower fuse (the one closer to the fuse panel) out of it and pop it in the fuse panel with only the upper fuse in place - if you see voltage at the pigtail (in this case you must first turn the ignition on) then you got it right, if pigtail is dead pull the thing from the fuse panel and flip it around and reinsert it and you should see the voltage. Remember the correct position, do your wiring work, pop both fuses in, plug the thing back in the panel, and you're good.

If you're wondering what will happen if you plug it in the wring way, well current will flow thru the bottom fuse first, and then thru the upper fuse - your new circuit is still protected, but since the lower fuse now carries double duty if it blows both circuits will drop. Whereas in correct installation both circuits are 100% in parallel so each has its own fuse and is independent of the other. That's why I said to initially test fit it with lower fuse removed, this eliminates the possibility of double-taxing the lower fuse by accident.
 

Forum statistics

Threads
92,933
Posts
1,155,168
Members
26,434
Latest member
quicklaptoprepair

Staff online

Members online

Top