Adding a Running Lights Relay to a
1991 Ford Truck
by Jon (JPR)
Having burnt the running
lights part of the headlight switch in my 1991 F-250 diesel twice, I decided it
was time to correct the problem and take the electrical load off the switch.
This is a separate modification from the "brighter headlight mod"
that uses relays to power the head lights, and accomplishes the same thing for
the headlight part of the headlight switch. If you have not performed that modification,
it would be highly recommended.
Before beginning, disconnect
both negative battery cables. The wiring colors and fuse number may differ
between model years, so please be sure
to verify the correct color power wire for your truck.
To gain access to the headlight
switch and wiring, remove the wiper and head light switch knobs. To remove the
knobs, look for a small notch in the back of the knob. Place a small flat screw
driver in this notch, press the clip toward yourself while gently pulling on
the knob. The 1991 trim panel is removed next by gently lifting along the
edges. Other model years may have screws
fastening it. Be careful on pulling too
hard, as the fuel tank selector switch is mounted to this panel and the switch
mounts can be broken. Remove the switch from the panel and set aside. The steel
switch panel is removed by pulling the four mounting screws. You can leave the
switches attached to the panel.
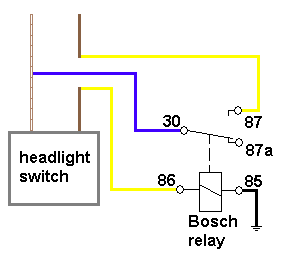
Looking at the head light
switch, the tan /white stripe wire is the power from fuse # 4. Tap into this
wire for power to to terminal #30 on the relay. I used a premade relay plug,
however you can use standard female spade connectors and 12" long 14 gage
wire.
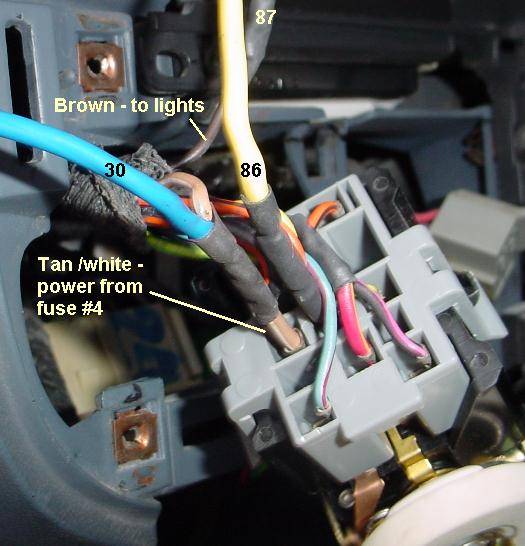
The dark brown wire next to
the tan /white goes to the running lights, cut this wire. The switch side will
go to #86 on the relay, to activate the relay when the head
light switch is turned on.
The brown wire going to the lights will connect to #87 on the relay.
Connect a ground wire to #85
on the relay.
To protect the wiring, wrap
the wires with two layers of electrical tape. Make the first wrap with the
adhesive side outward, followed by the second layer adhesive
side inward. Wrapping the
harness this way will keep the wires clean if you need to remove the tape later
and will hold just as well.
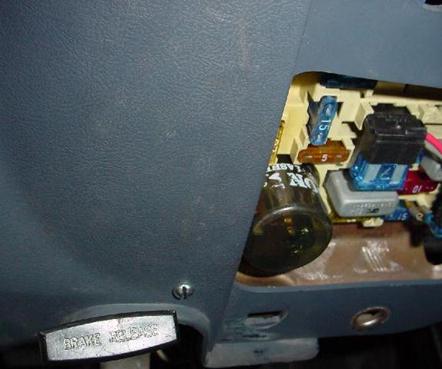
I slid the relay down next
to the fuse box. This picture shows a #8 bolt that is holding the relay next to
the fuse box. Once painted the screw should not be
noticeable.
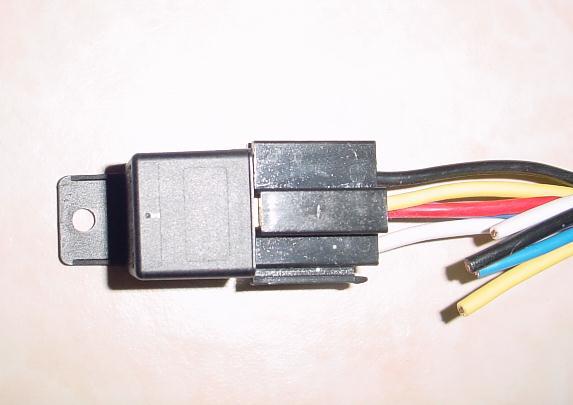
I purchased the Bosh
relay with the
plug from Parts Express. $2 for
the relay and $1.50 for the plug.
If you use this plug, insulate
the end or remove the red lead to #87a. This wire will have power when
the light switch is turned off.
This modification, in combination with the
traditional headlight relay modification, will make your headlight switch last
far longer, then it would with factory electrical circuits. This mod will benefit you especially if you
have added additional running lights, or if you pull a trailer.
Parts List:
Bosh 30 Amp 12 volt Relay
(or equivelent) available at http://www.partsexpress.com/pe/pshowdetl.cfm?&DID=7&Partnumber=330-070
Relay Plug (optional, if
substituting spade connectors) available at http://www.partsexpress.com/pe/showdetl.cfm?&DID=7&Partnumber=330-075
Electrical Tape